Creating and editing visit plans on the site
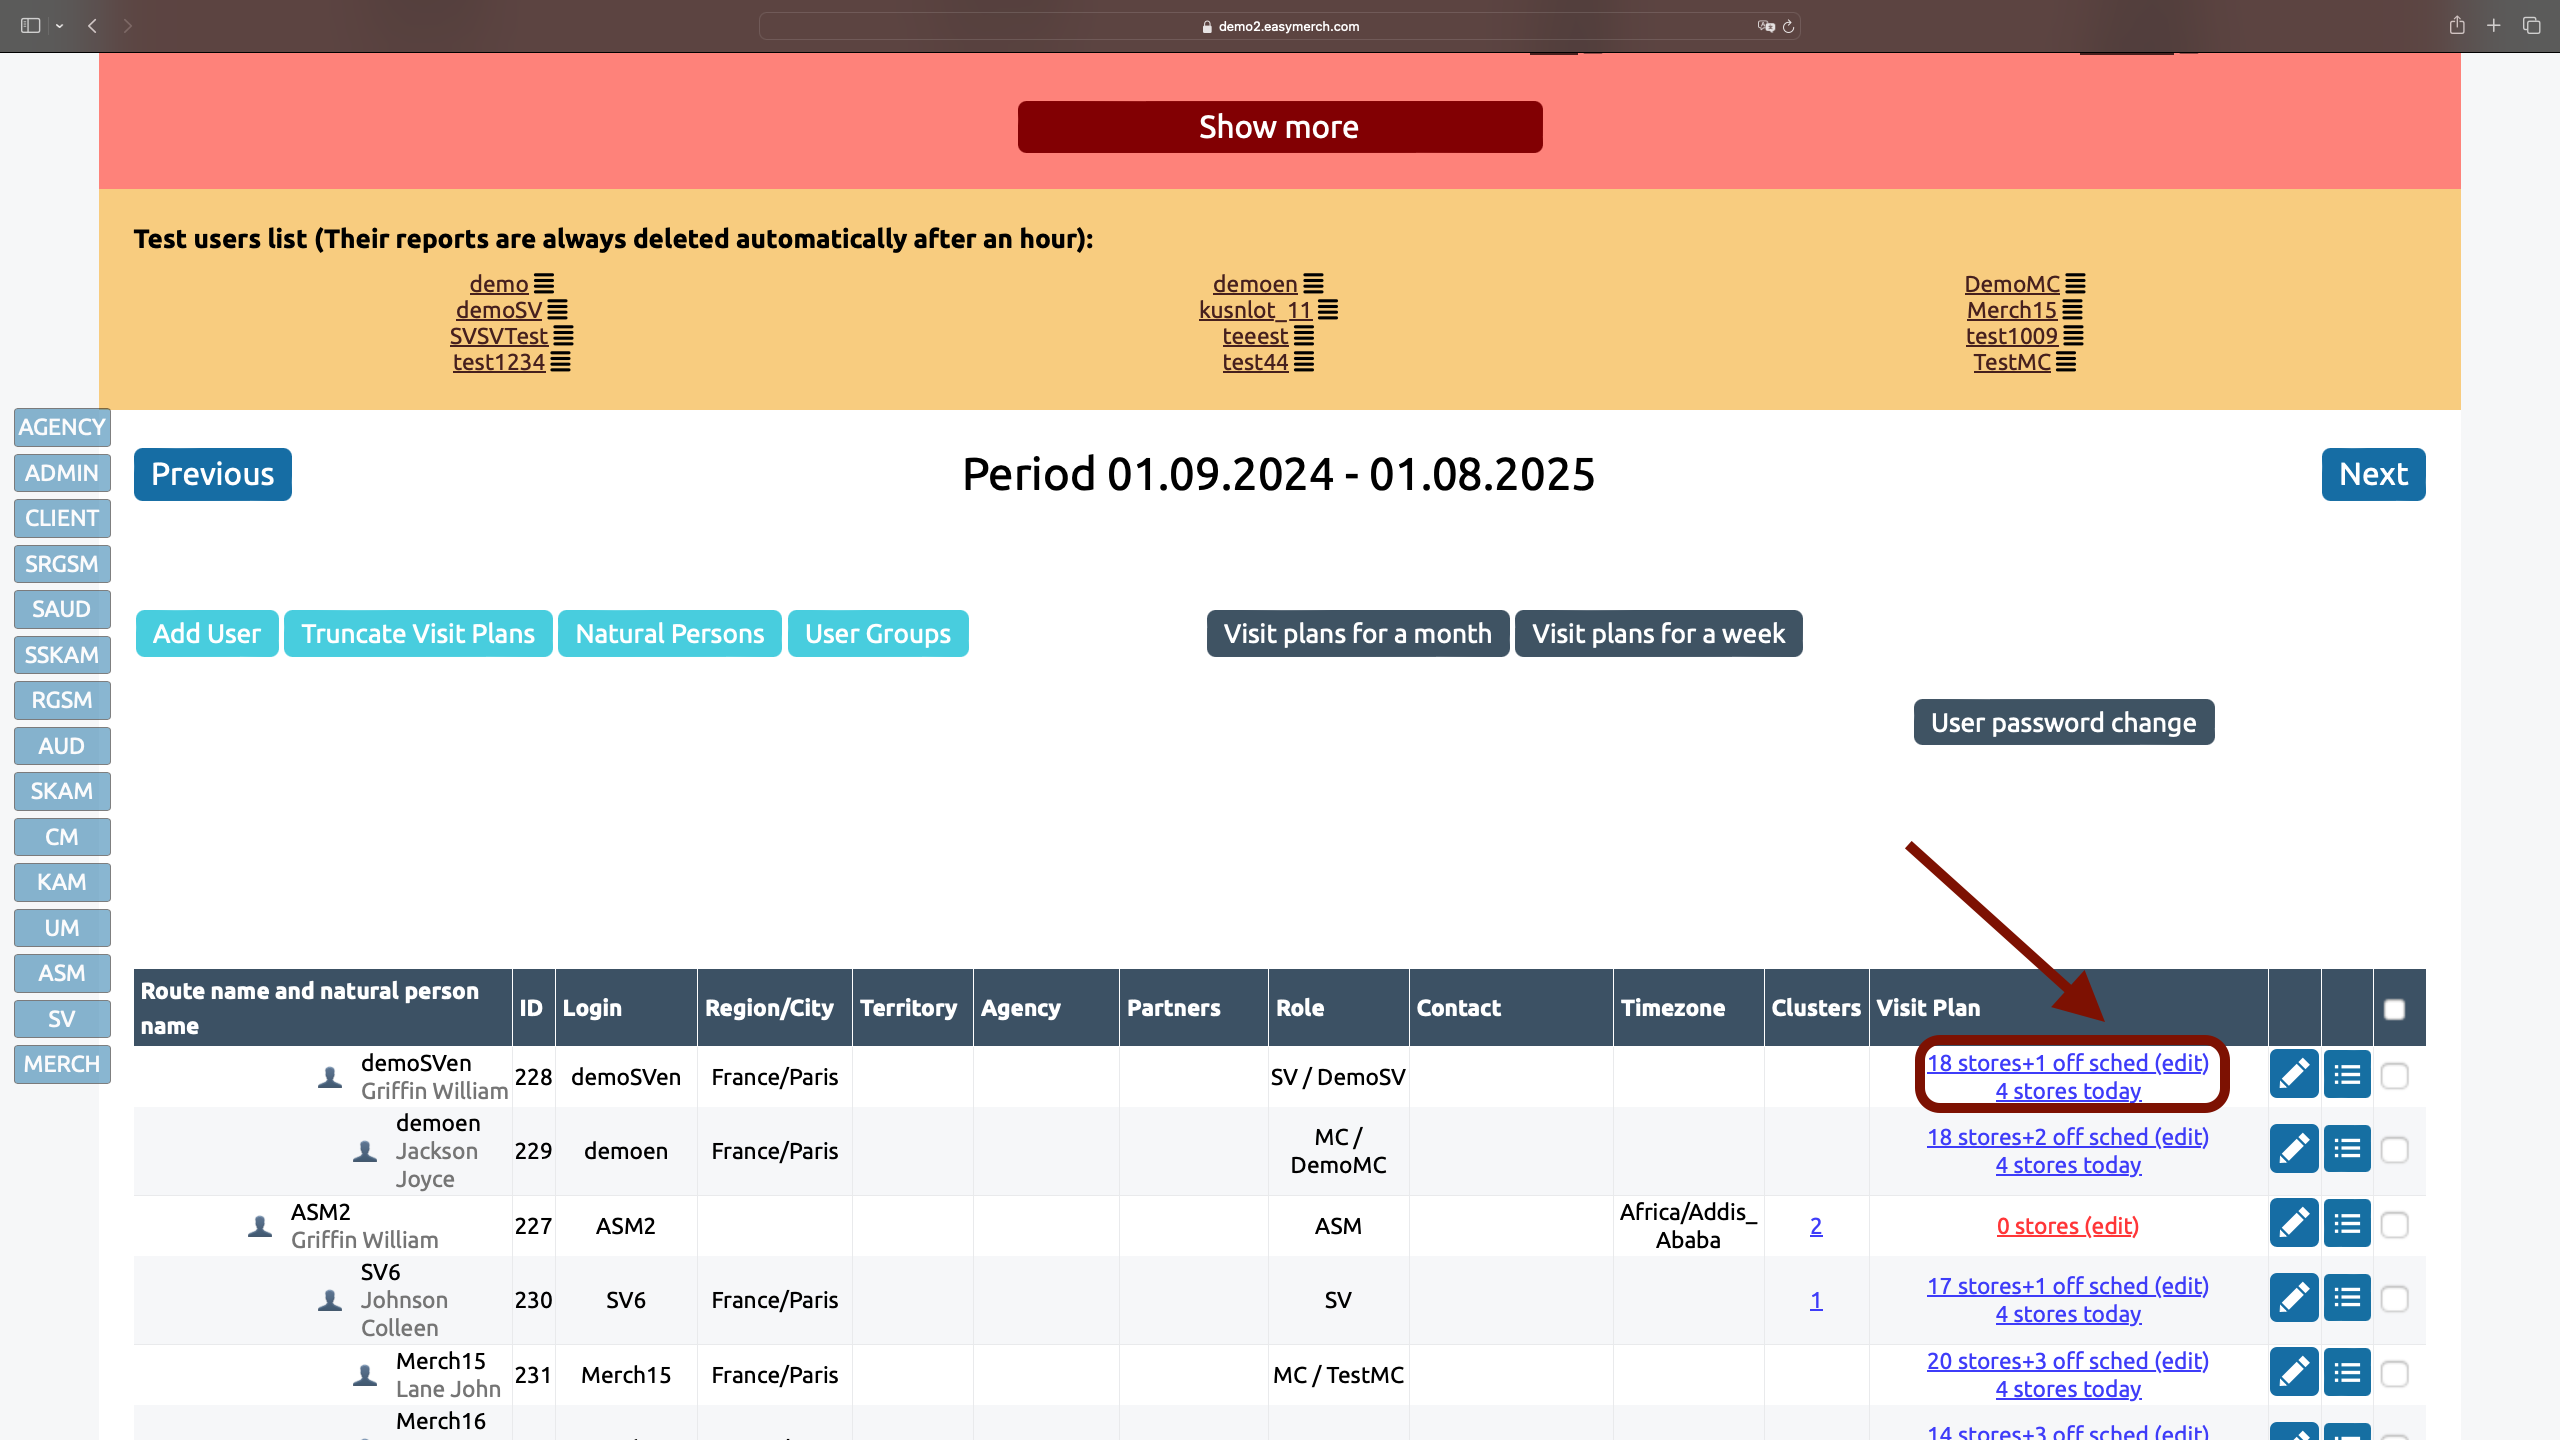
How to get on the visit plan. Method 1
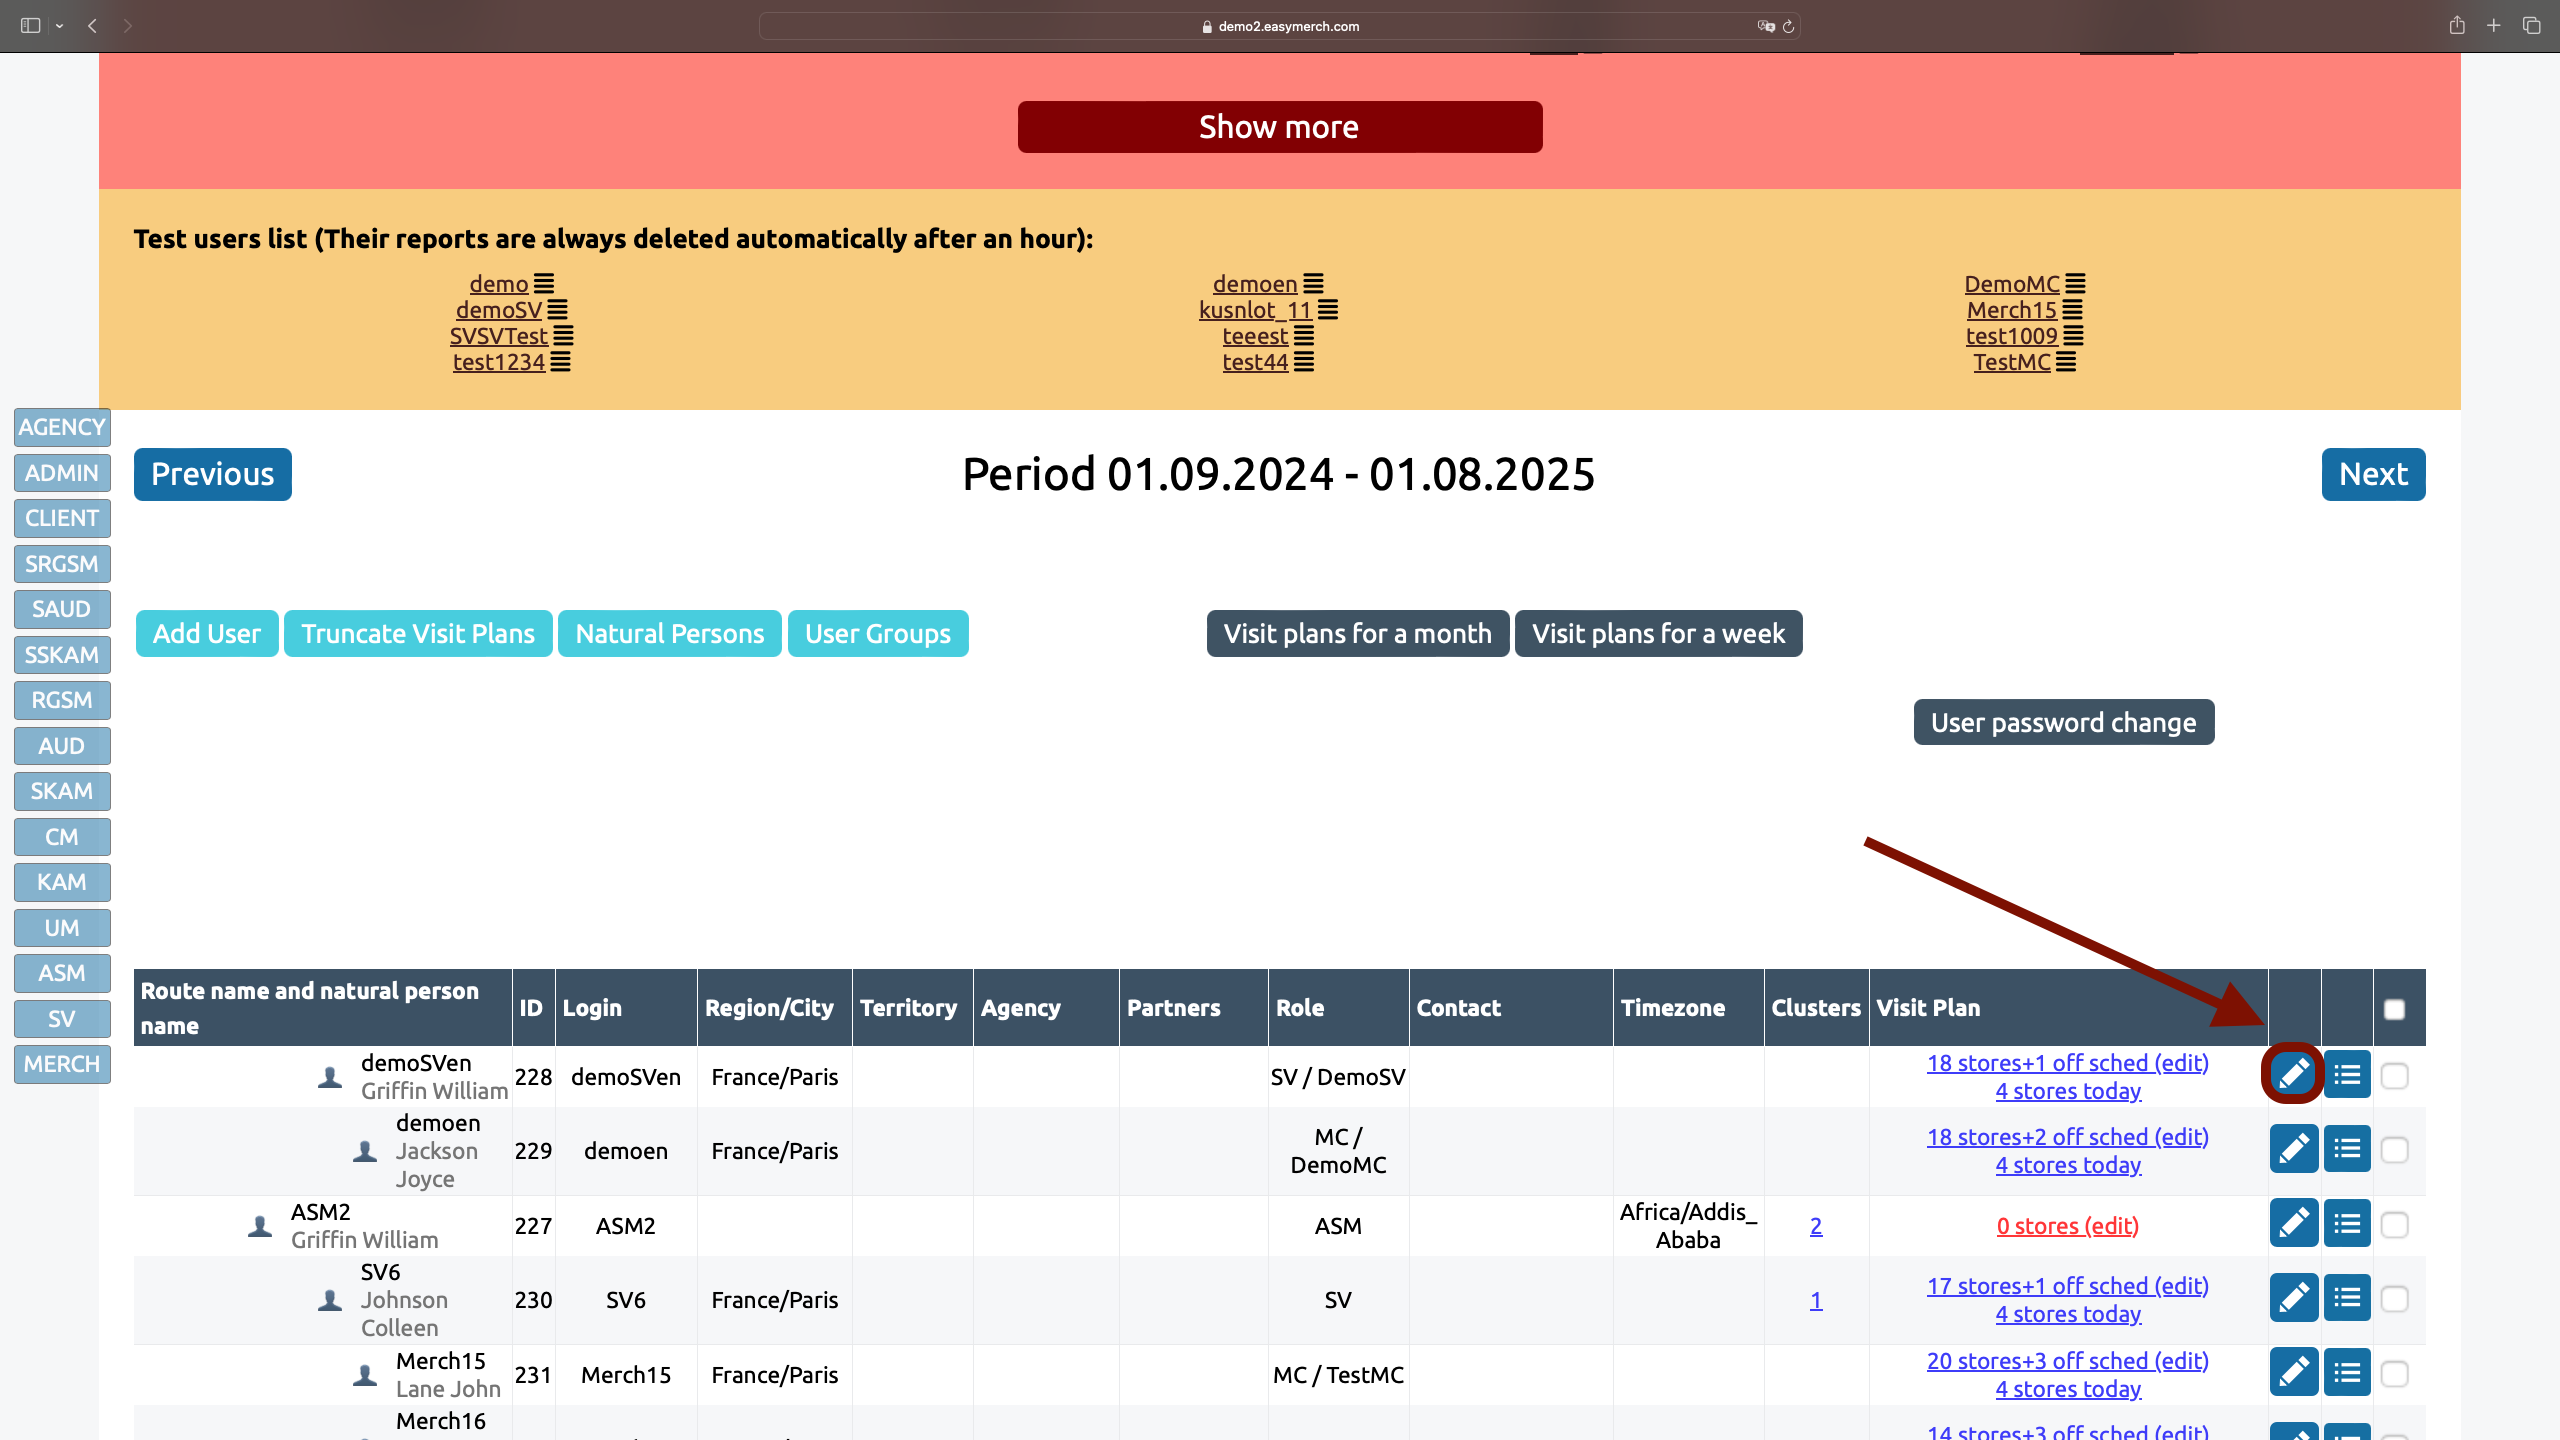
In the Employees tab find the column «Visit Plan» and click on the line with the number of stores
How to get on the visit plan. Method 2
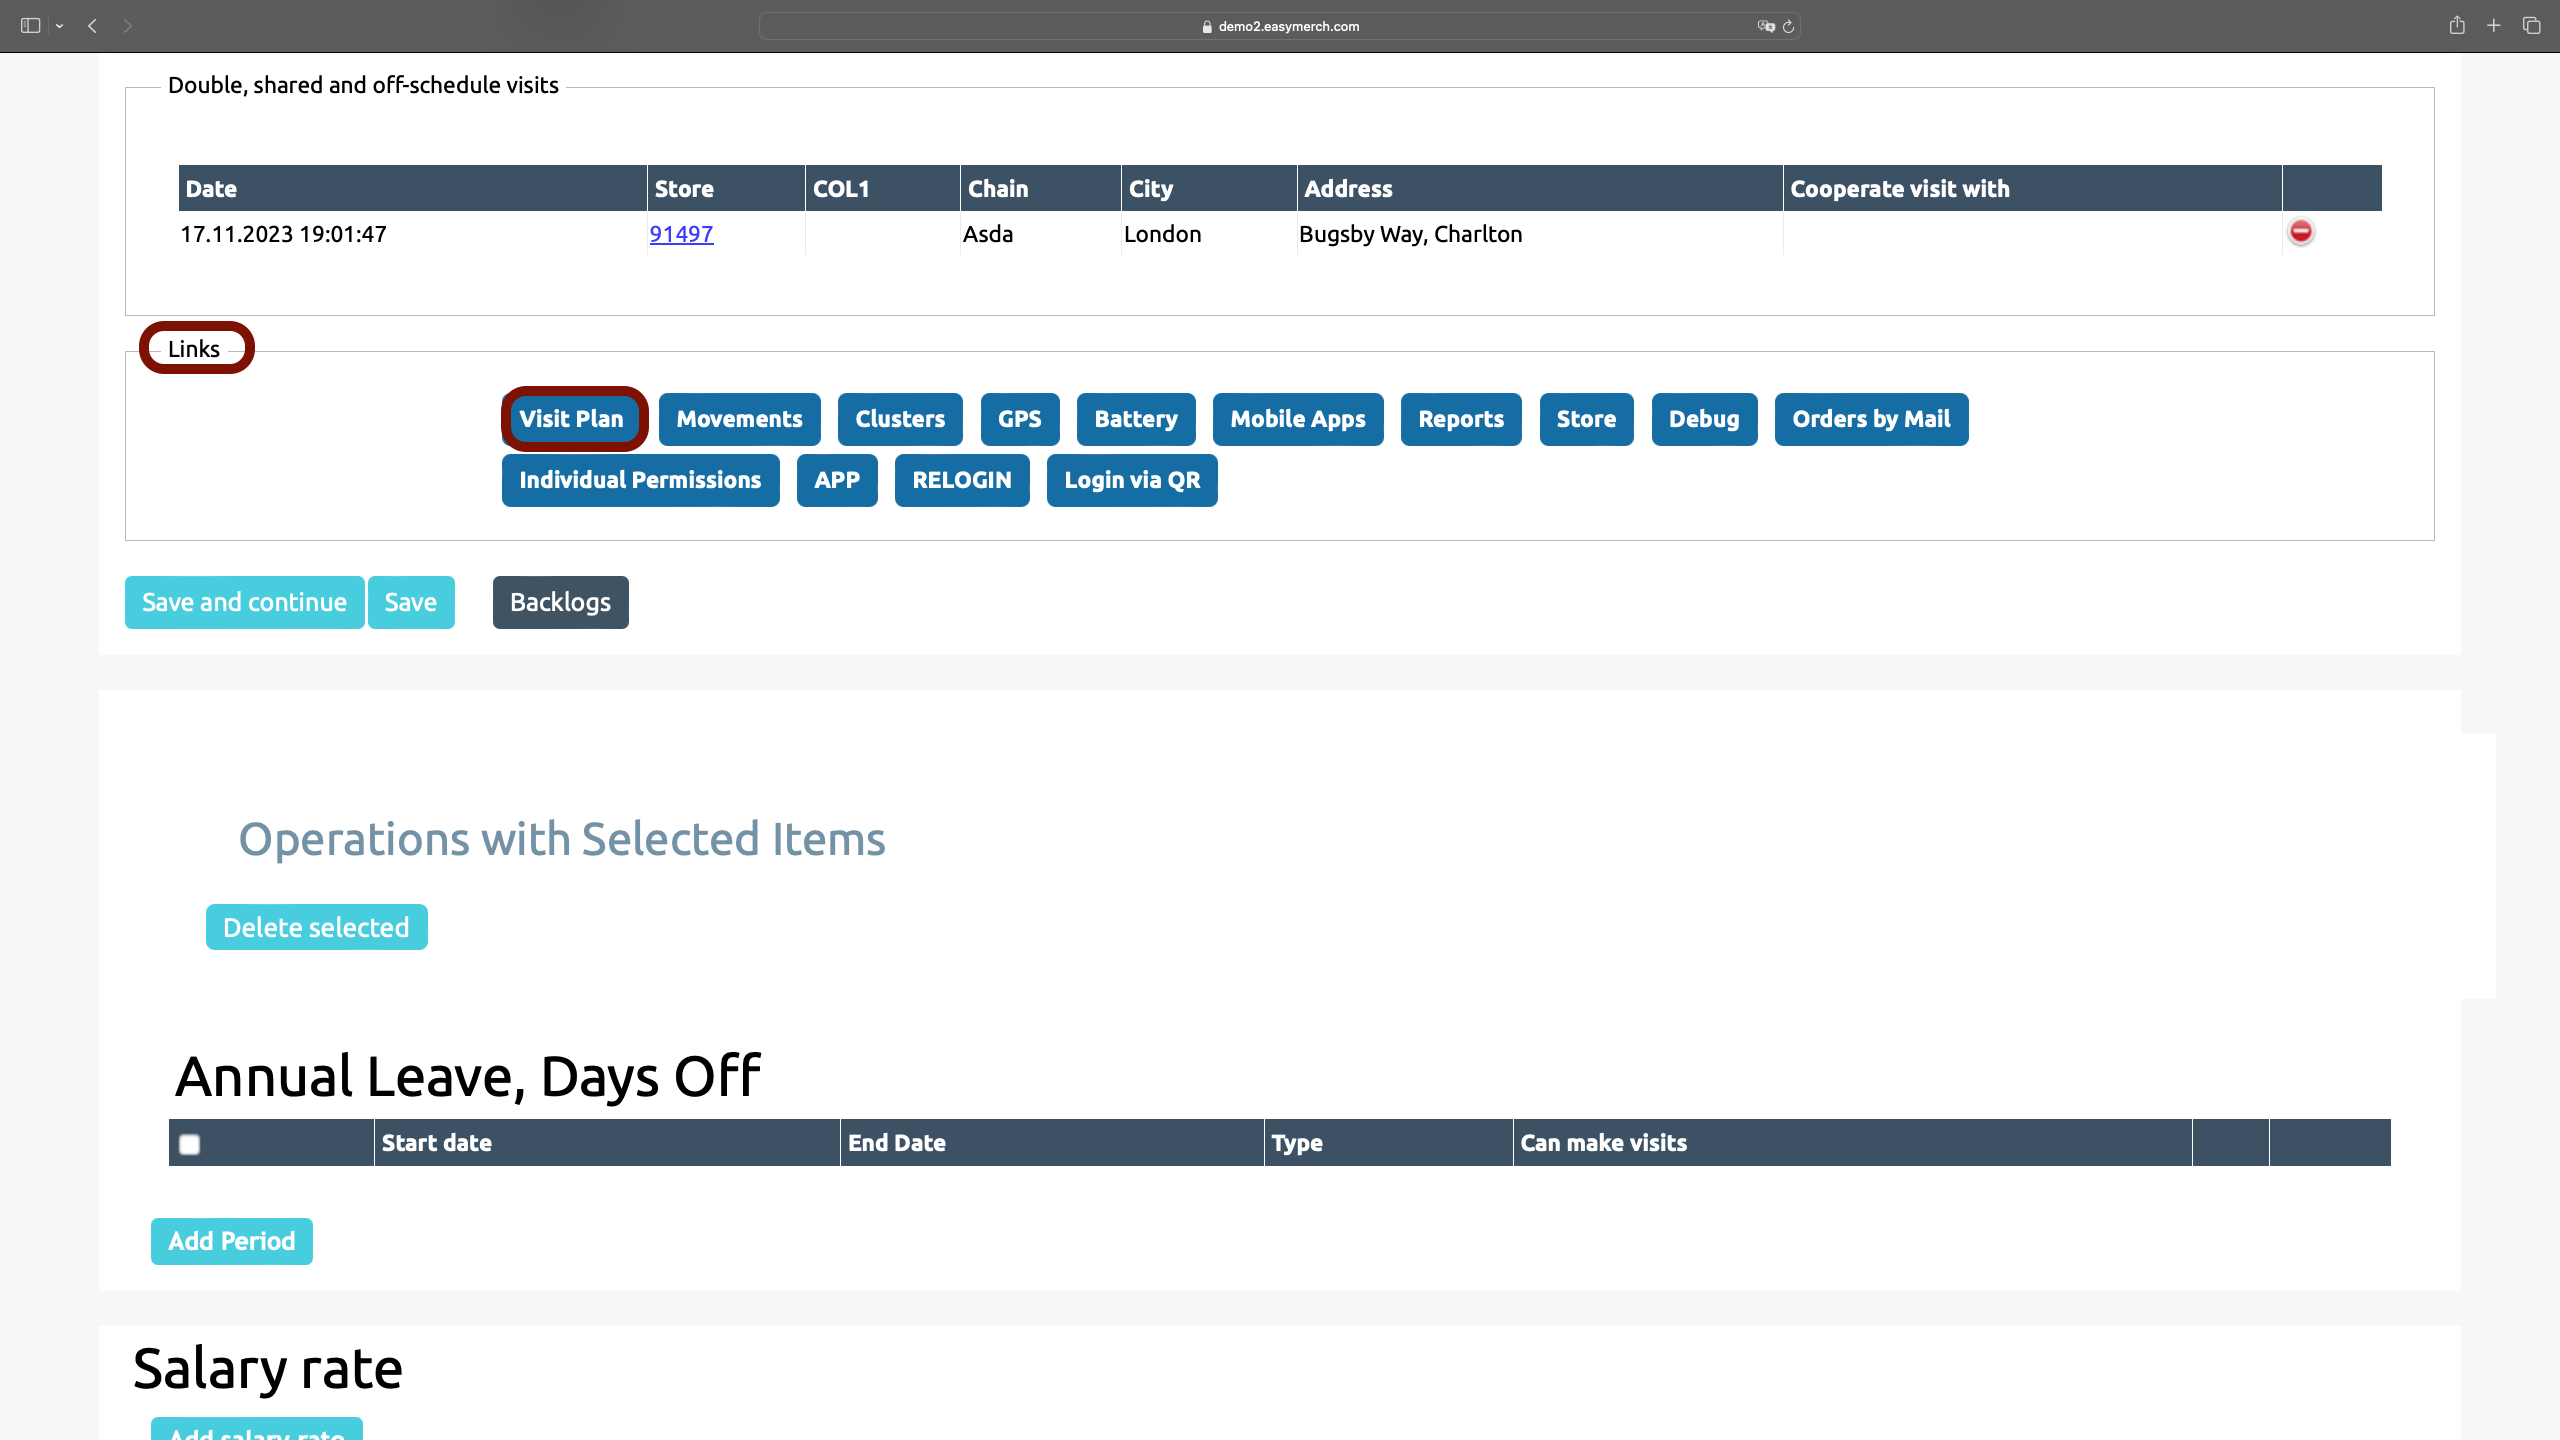
In the Employees find the required employee, click on next to the employee’s login to proceed to editing information about him
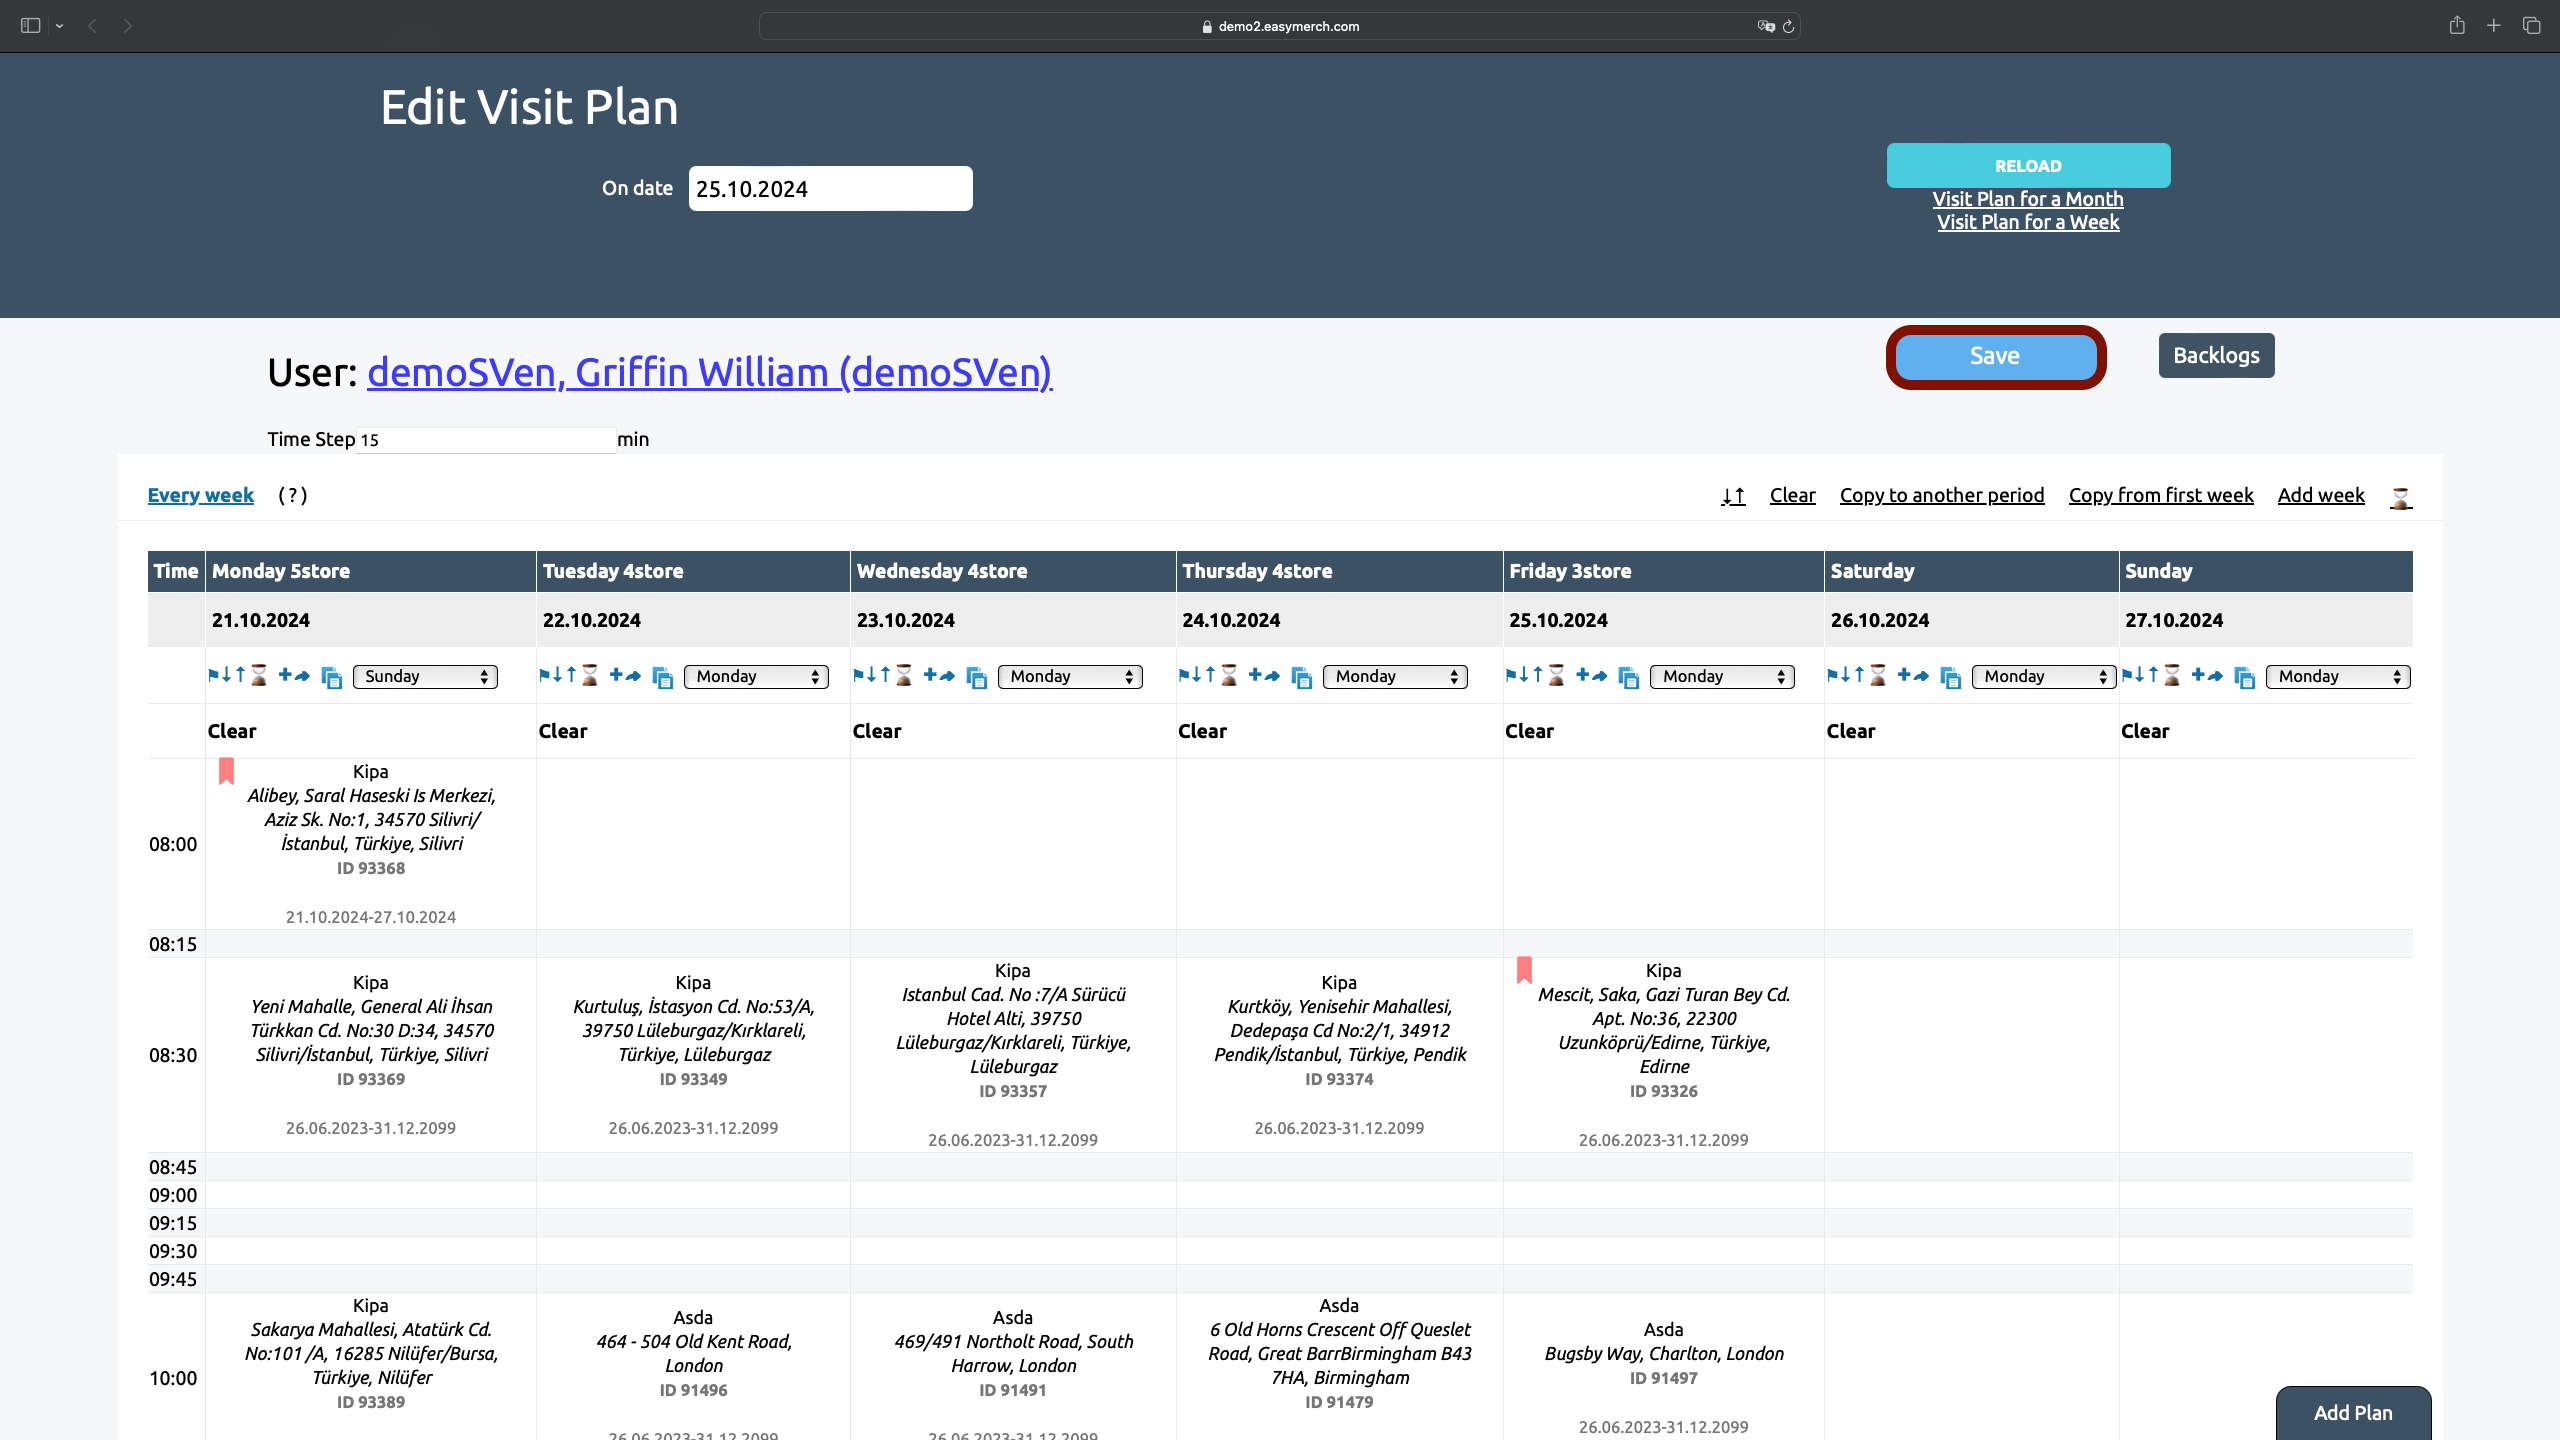
Visit plan for every week
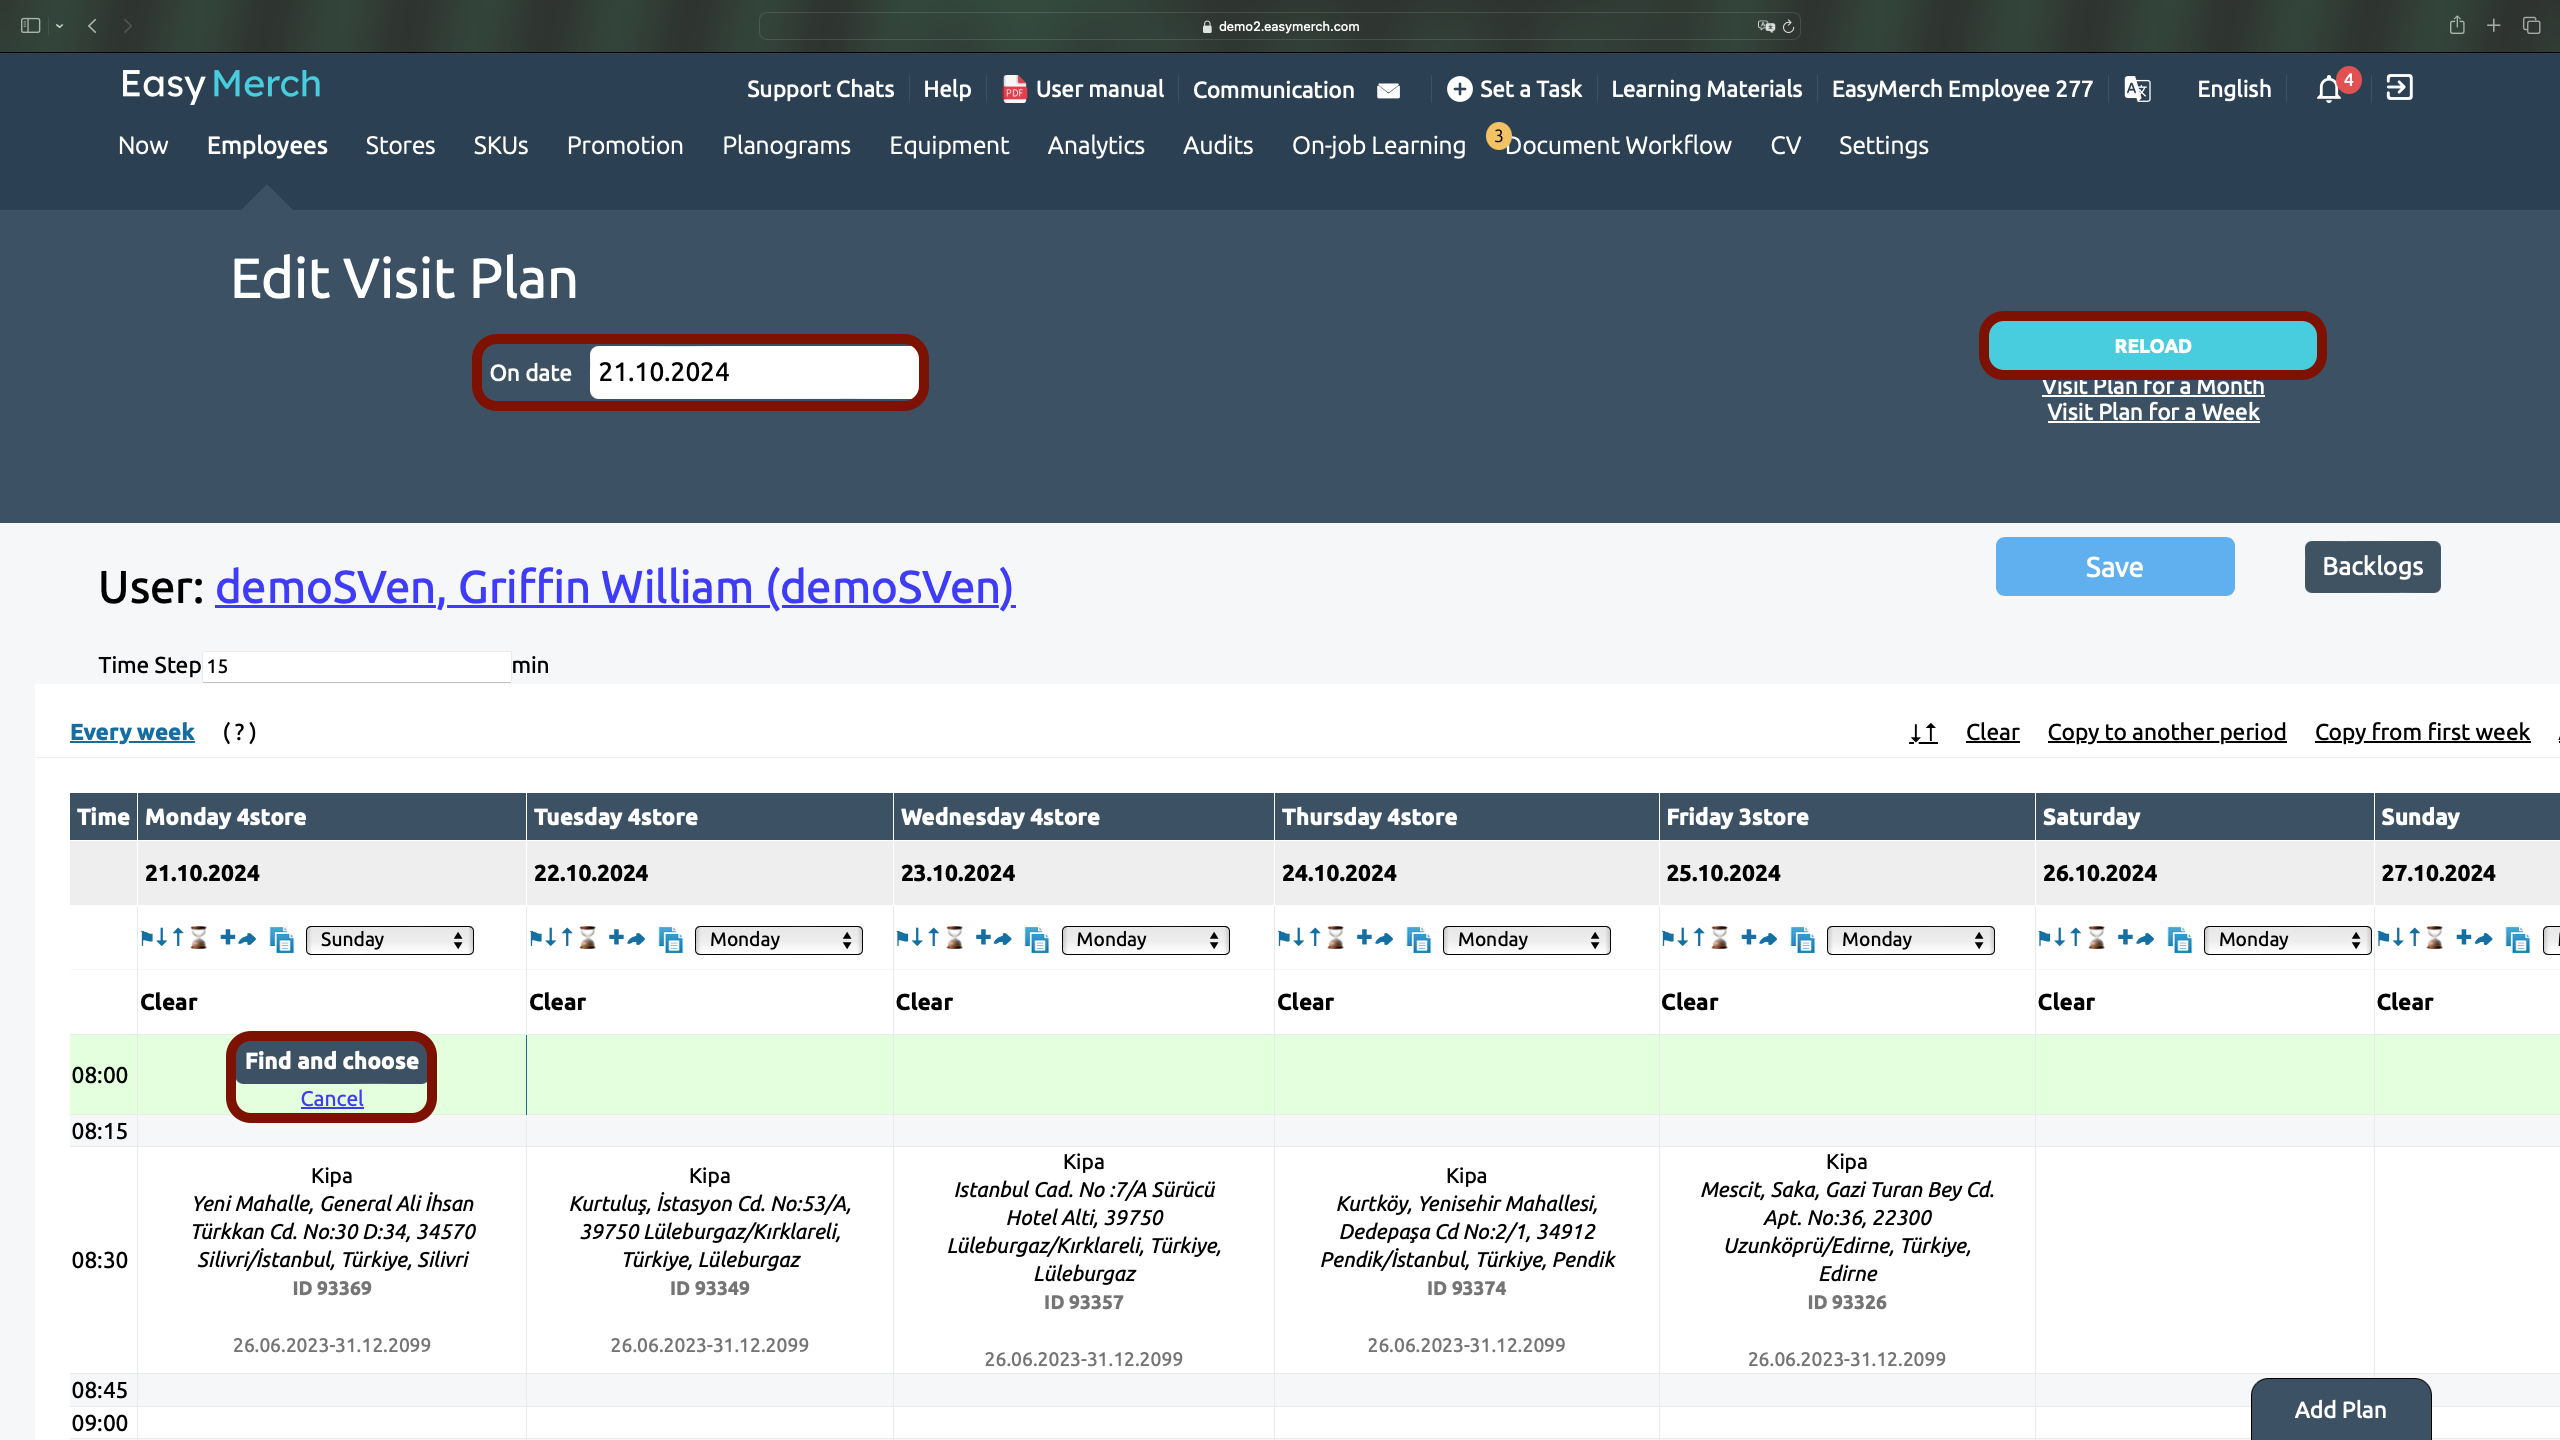
1. Select on what date you need to open Visit Plan. You can select any date during the week (for example, September 17th - Tuesday), and the entire week (from September 16th to 22nd) will open to you.
2. Click the «Refresh» button
3. Select the day of the week, the required time and click on this window. The «Find and choose» button will appear
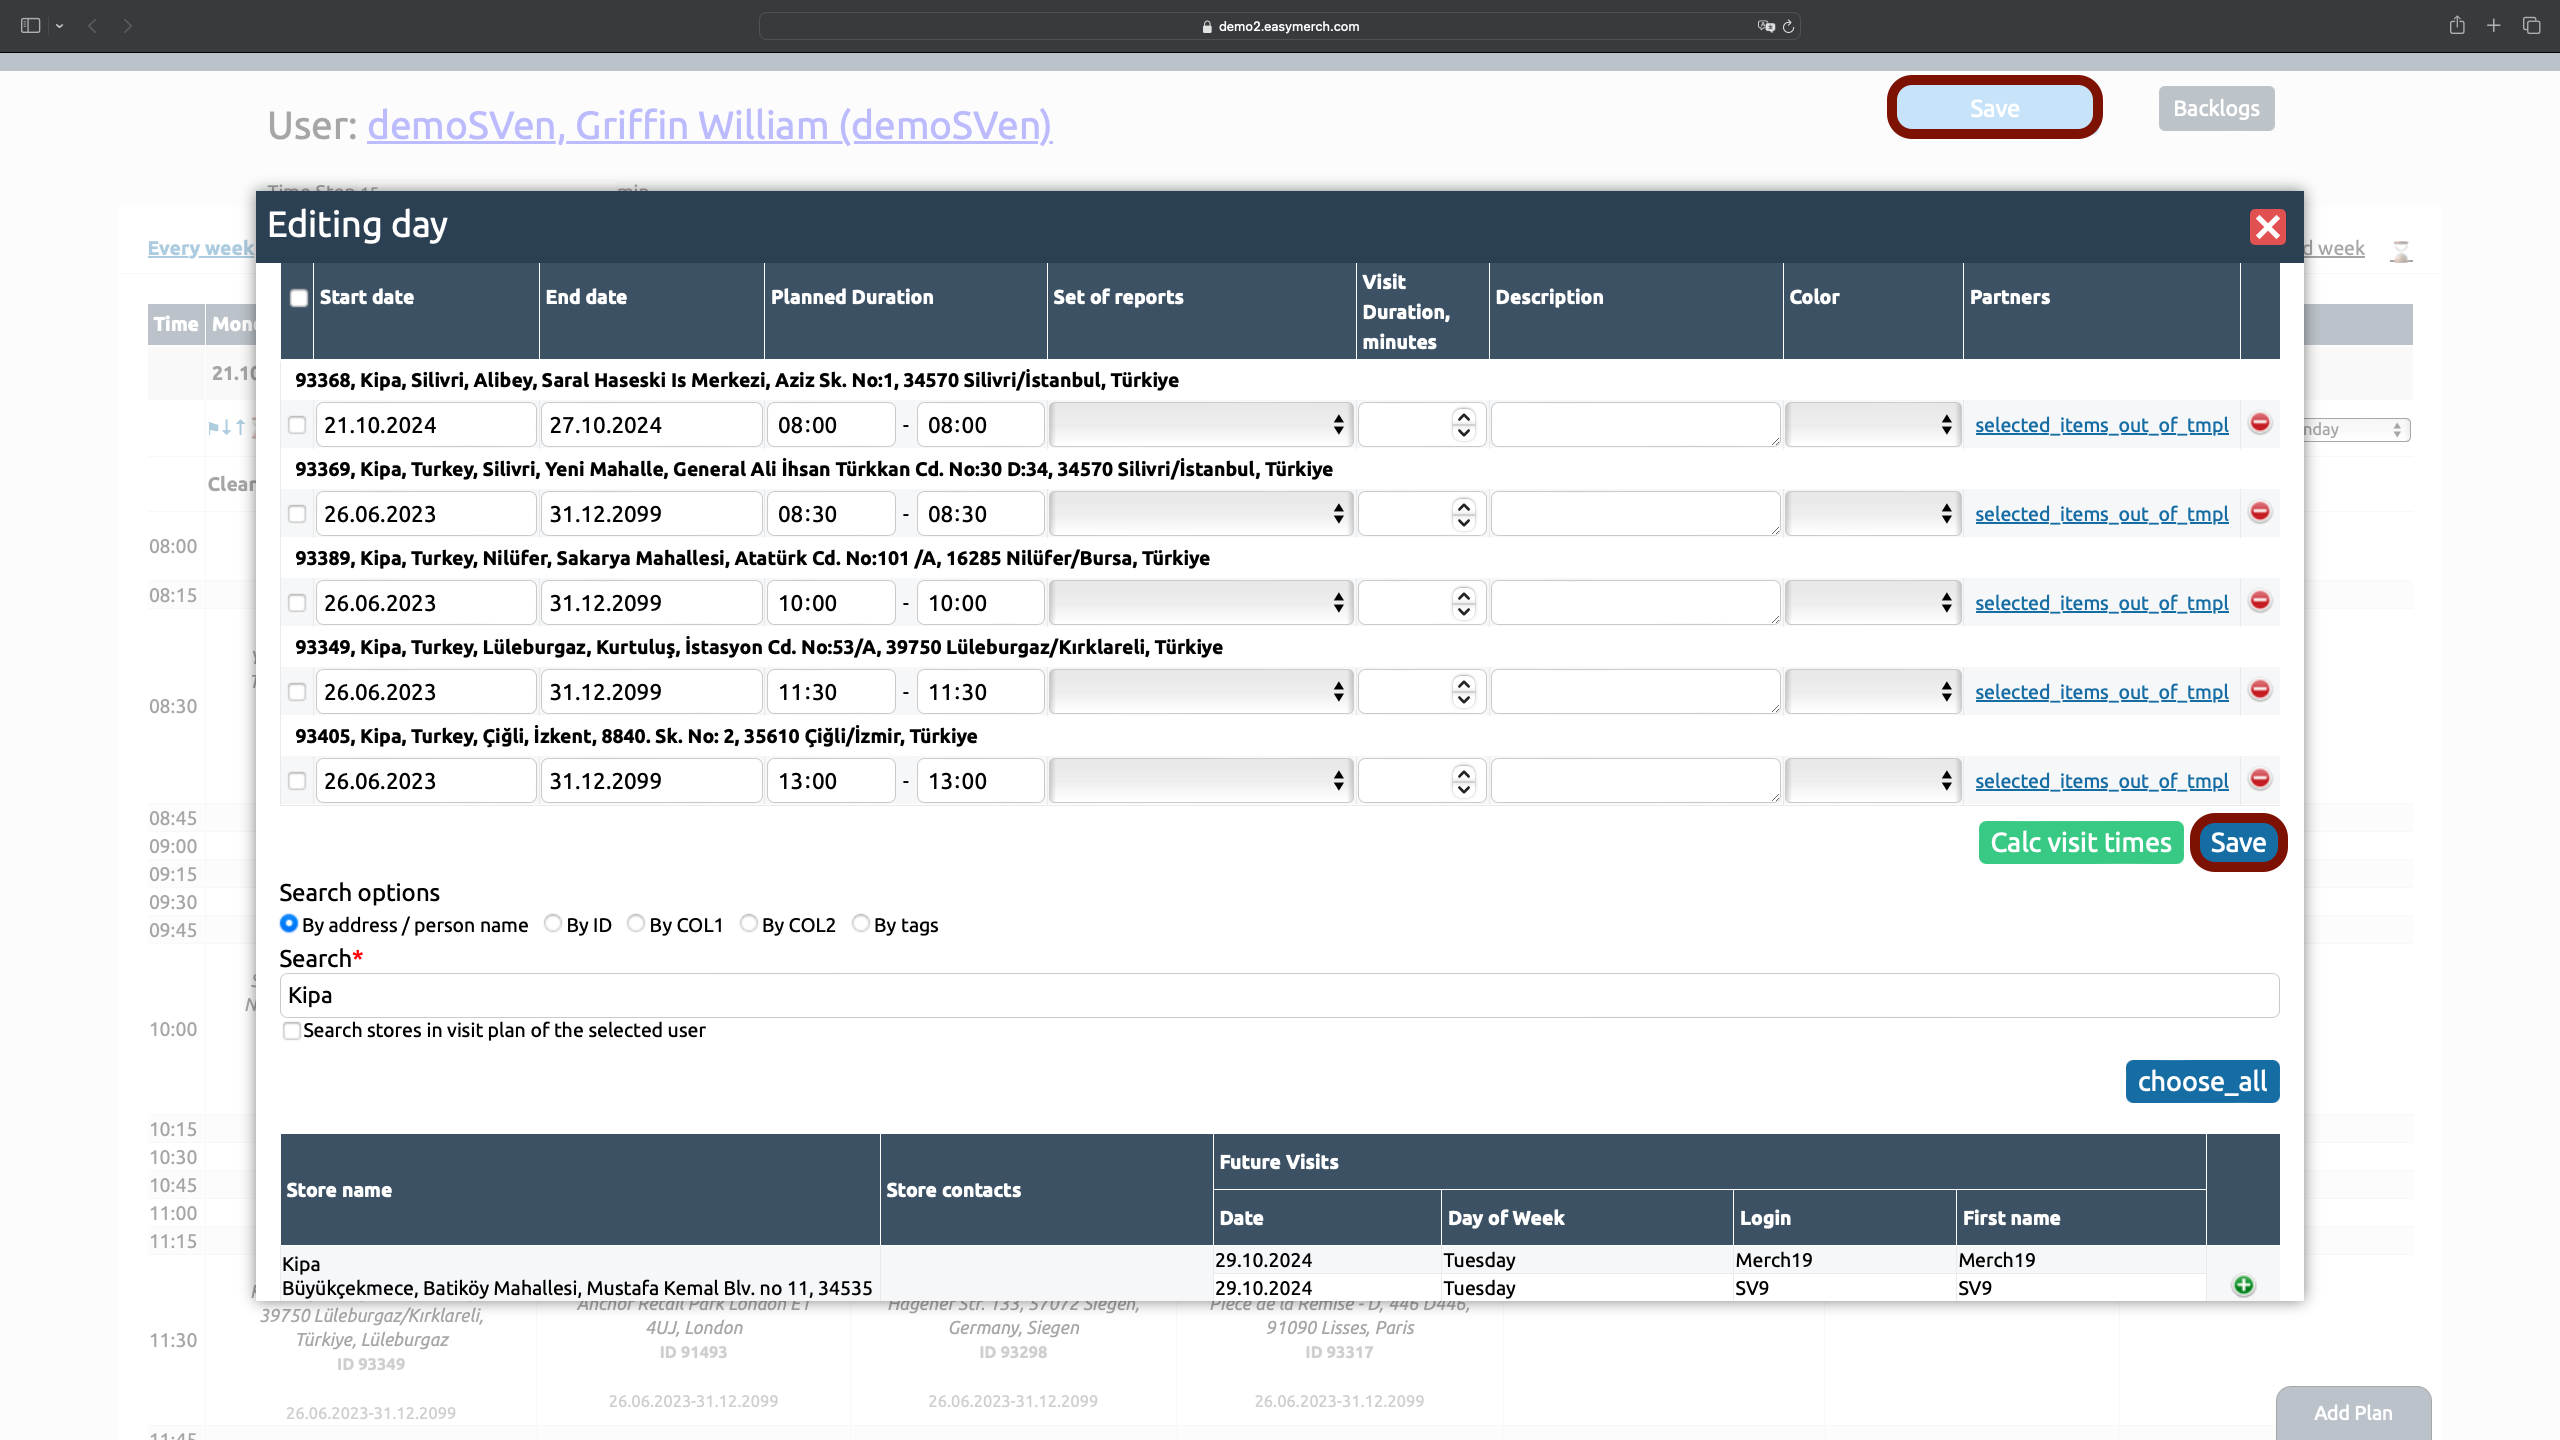
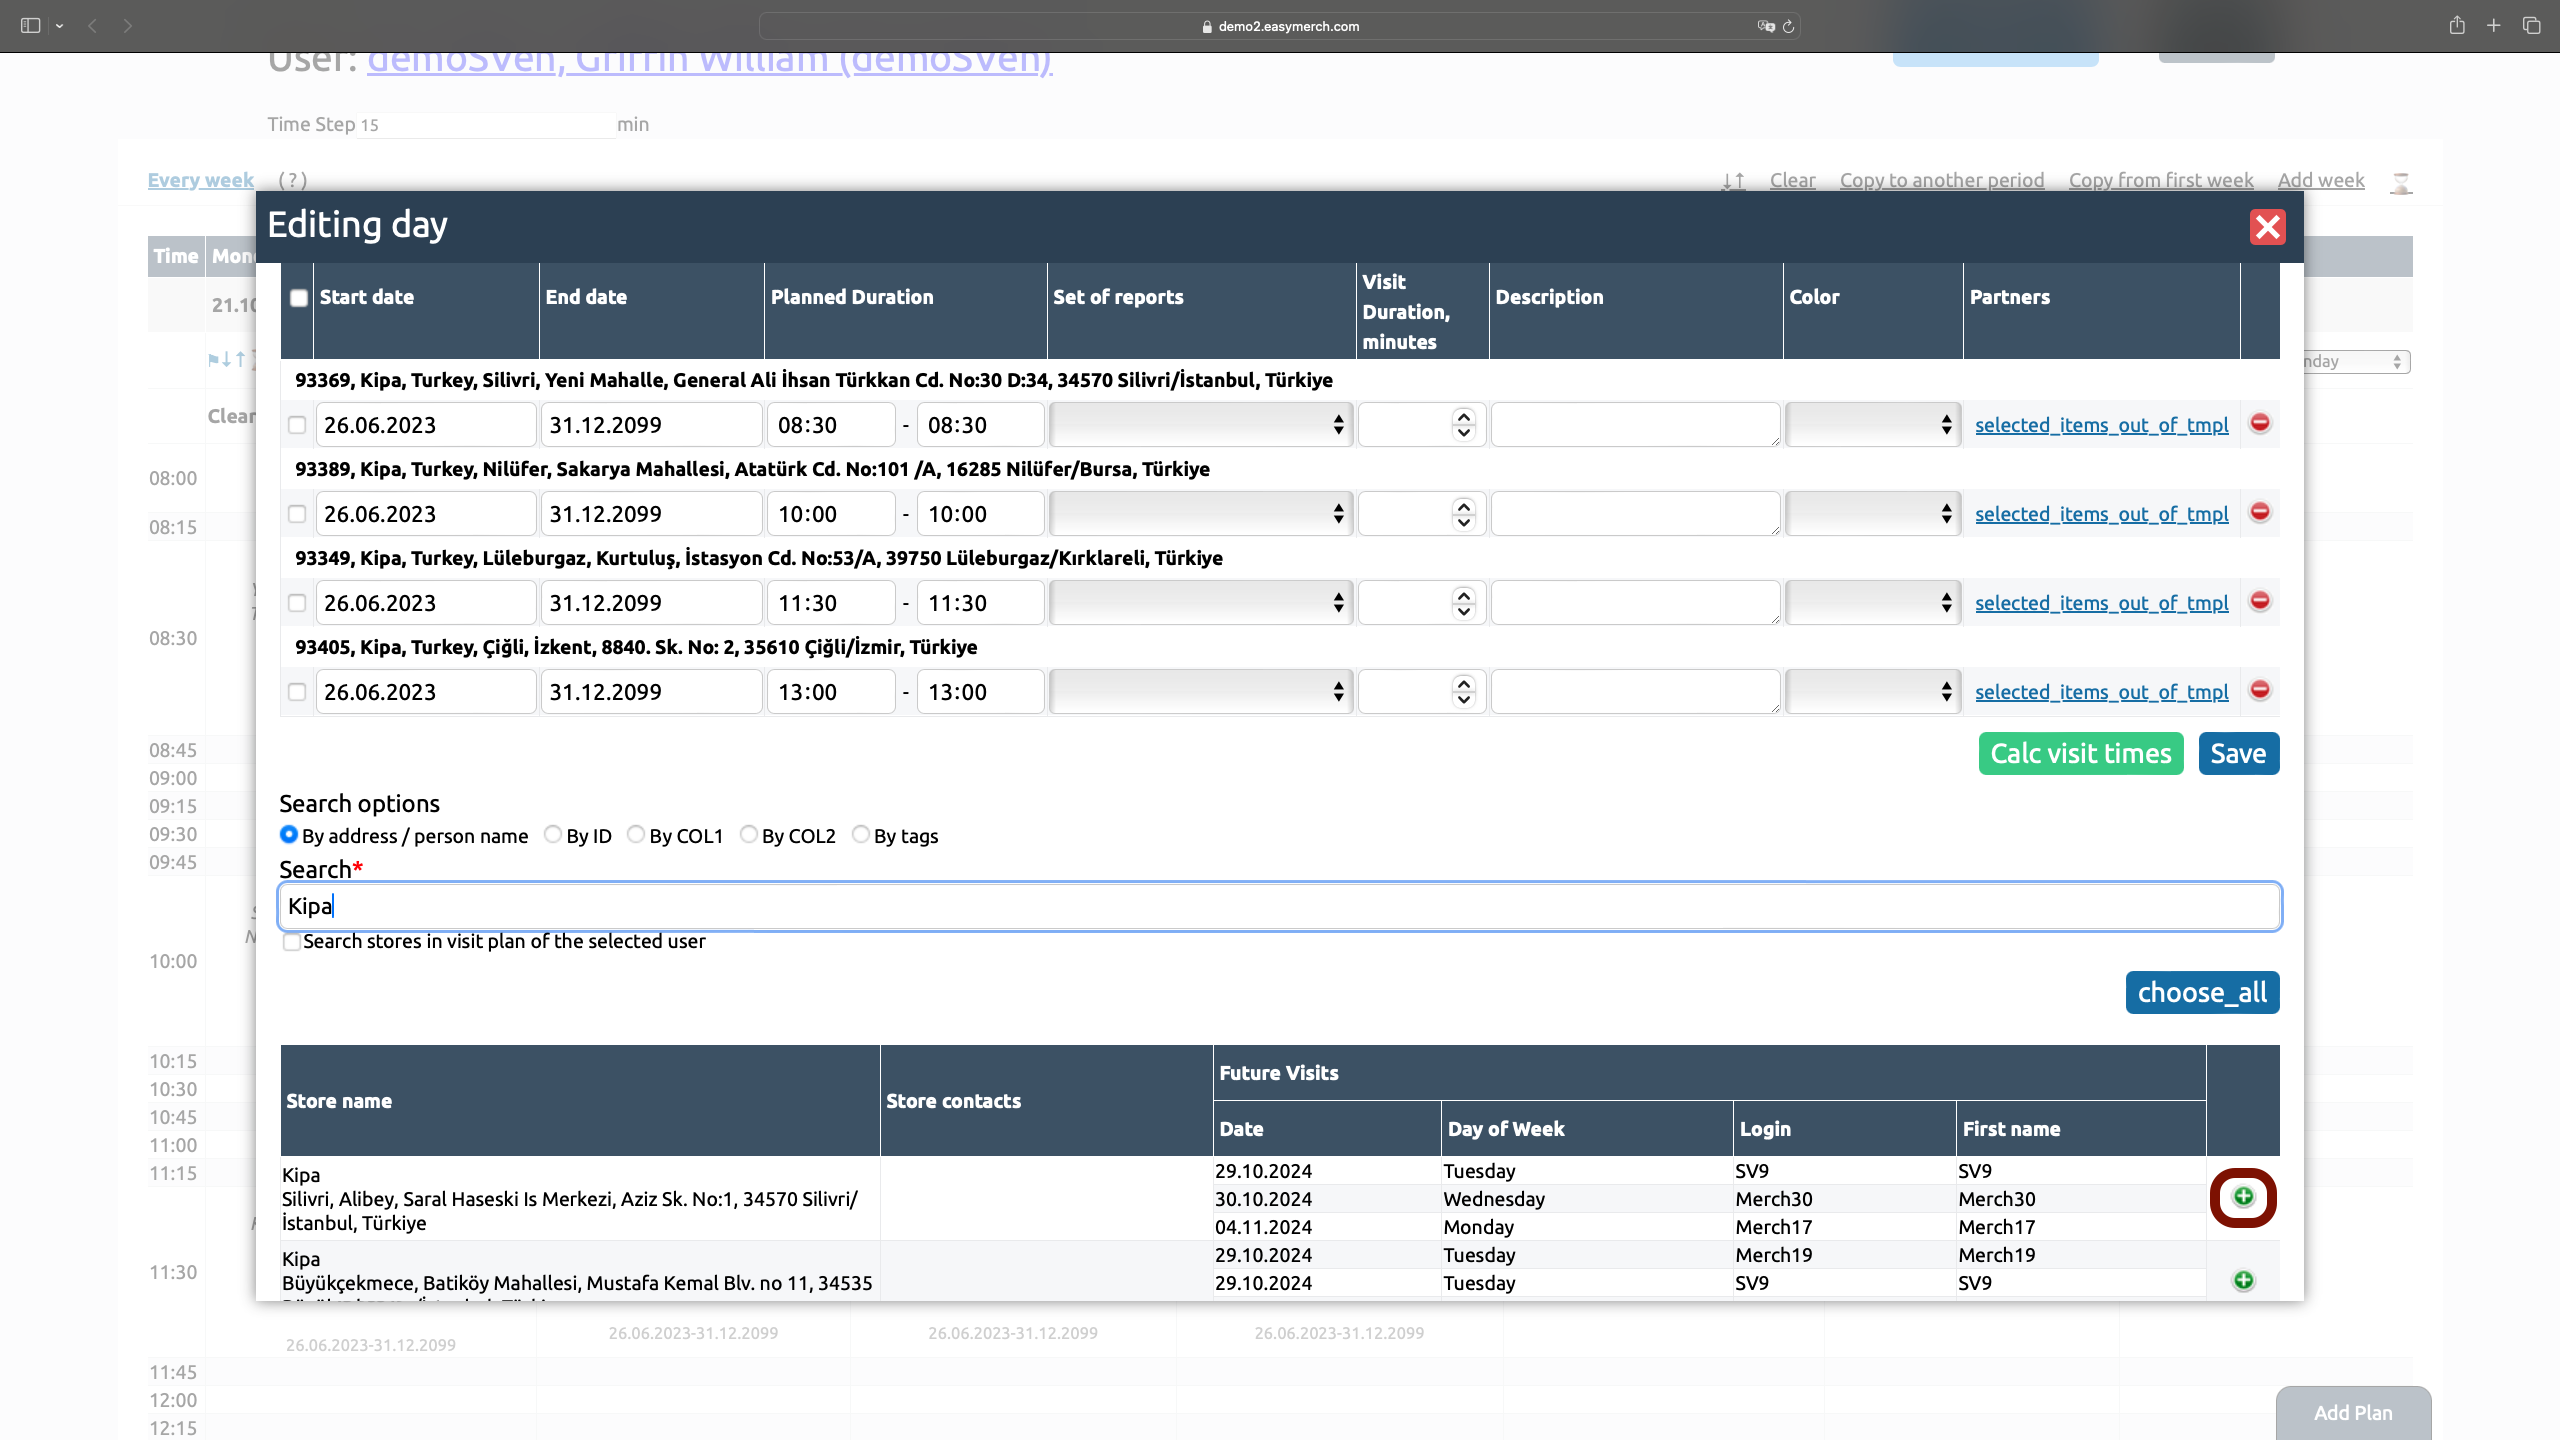
4. Specify the start date and end date of the period for which this point will be available for visiting
5. The visit time is automatically taken depending on which field in the visit plan you clicked on
6. Start entering a fragment of the store’s address or its col1. When you see the desired outlet, click on ![]() to add the store to «Visit Plan». You must enter the address, otherwise the visit will not be saved. You can select several outlets at once
to add the store to «Visit Plan». You must enter the address, otherwise the visit will not be saved. You can select several outlets at once
7. Enter «Planned Visit Duration, minutes» and a description if necessary. On some servers, it is mandatory to fill out a visit time plan.
8. If necessary, add Set of reports, which will be available to the employee during the visit
9. On some servers you can select employees (relevant for medical representatives) and partners
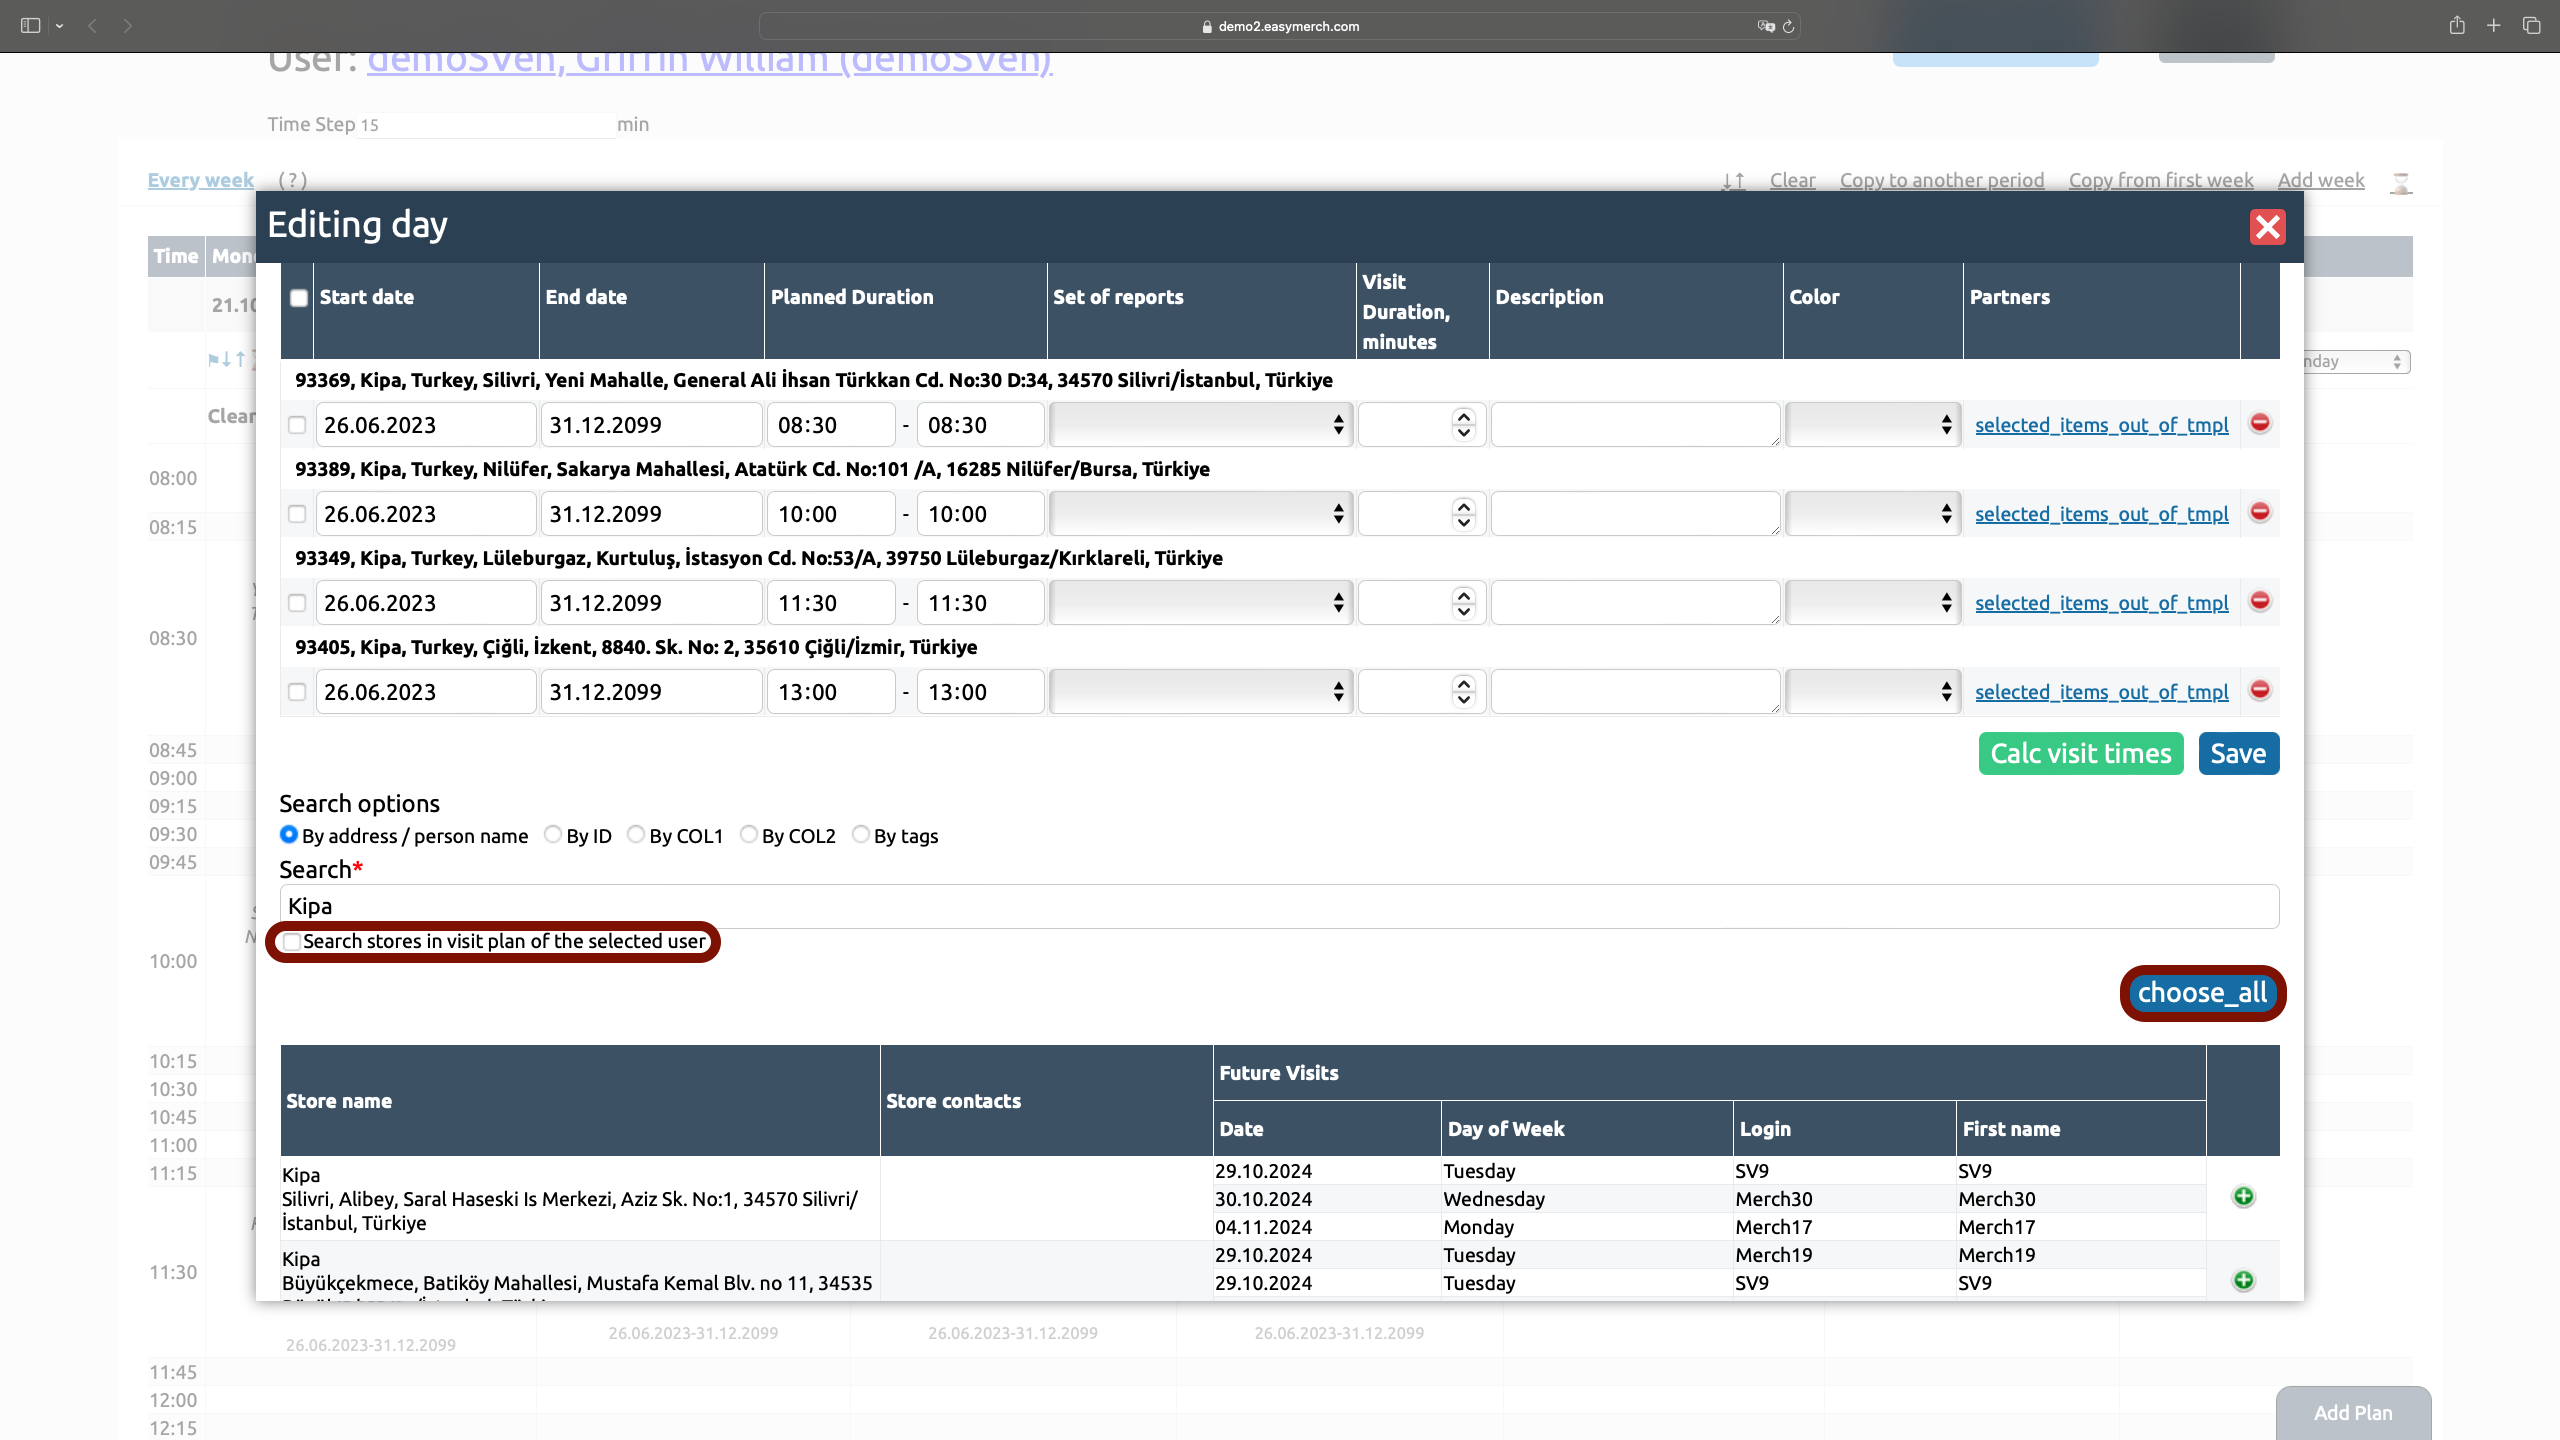
10. You can select all the stores that are displayed according to the specified parameters at once. To do this, click “Select all”
11. Check the box «Search stores in visit plan of the selected user» so that the search displays only those stores that were previously added to this employee
If you selected a color when adding a store to Visit Plan, then after saving the changes you will see a colored flag next to the store. The need to use color codes is discussed within each company
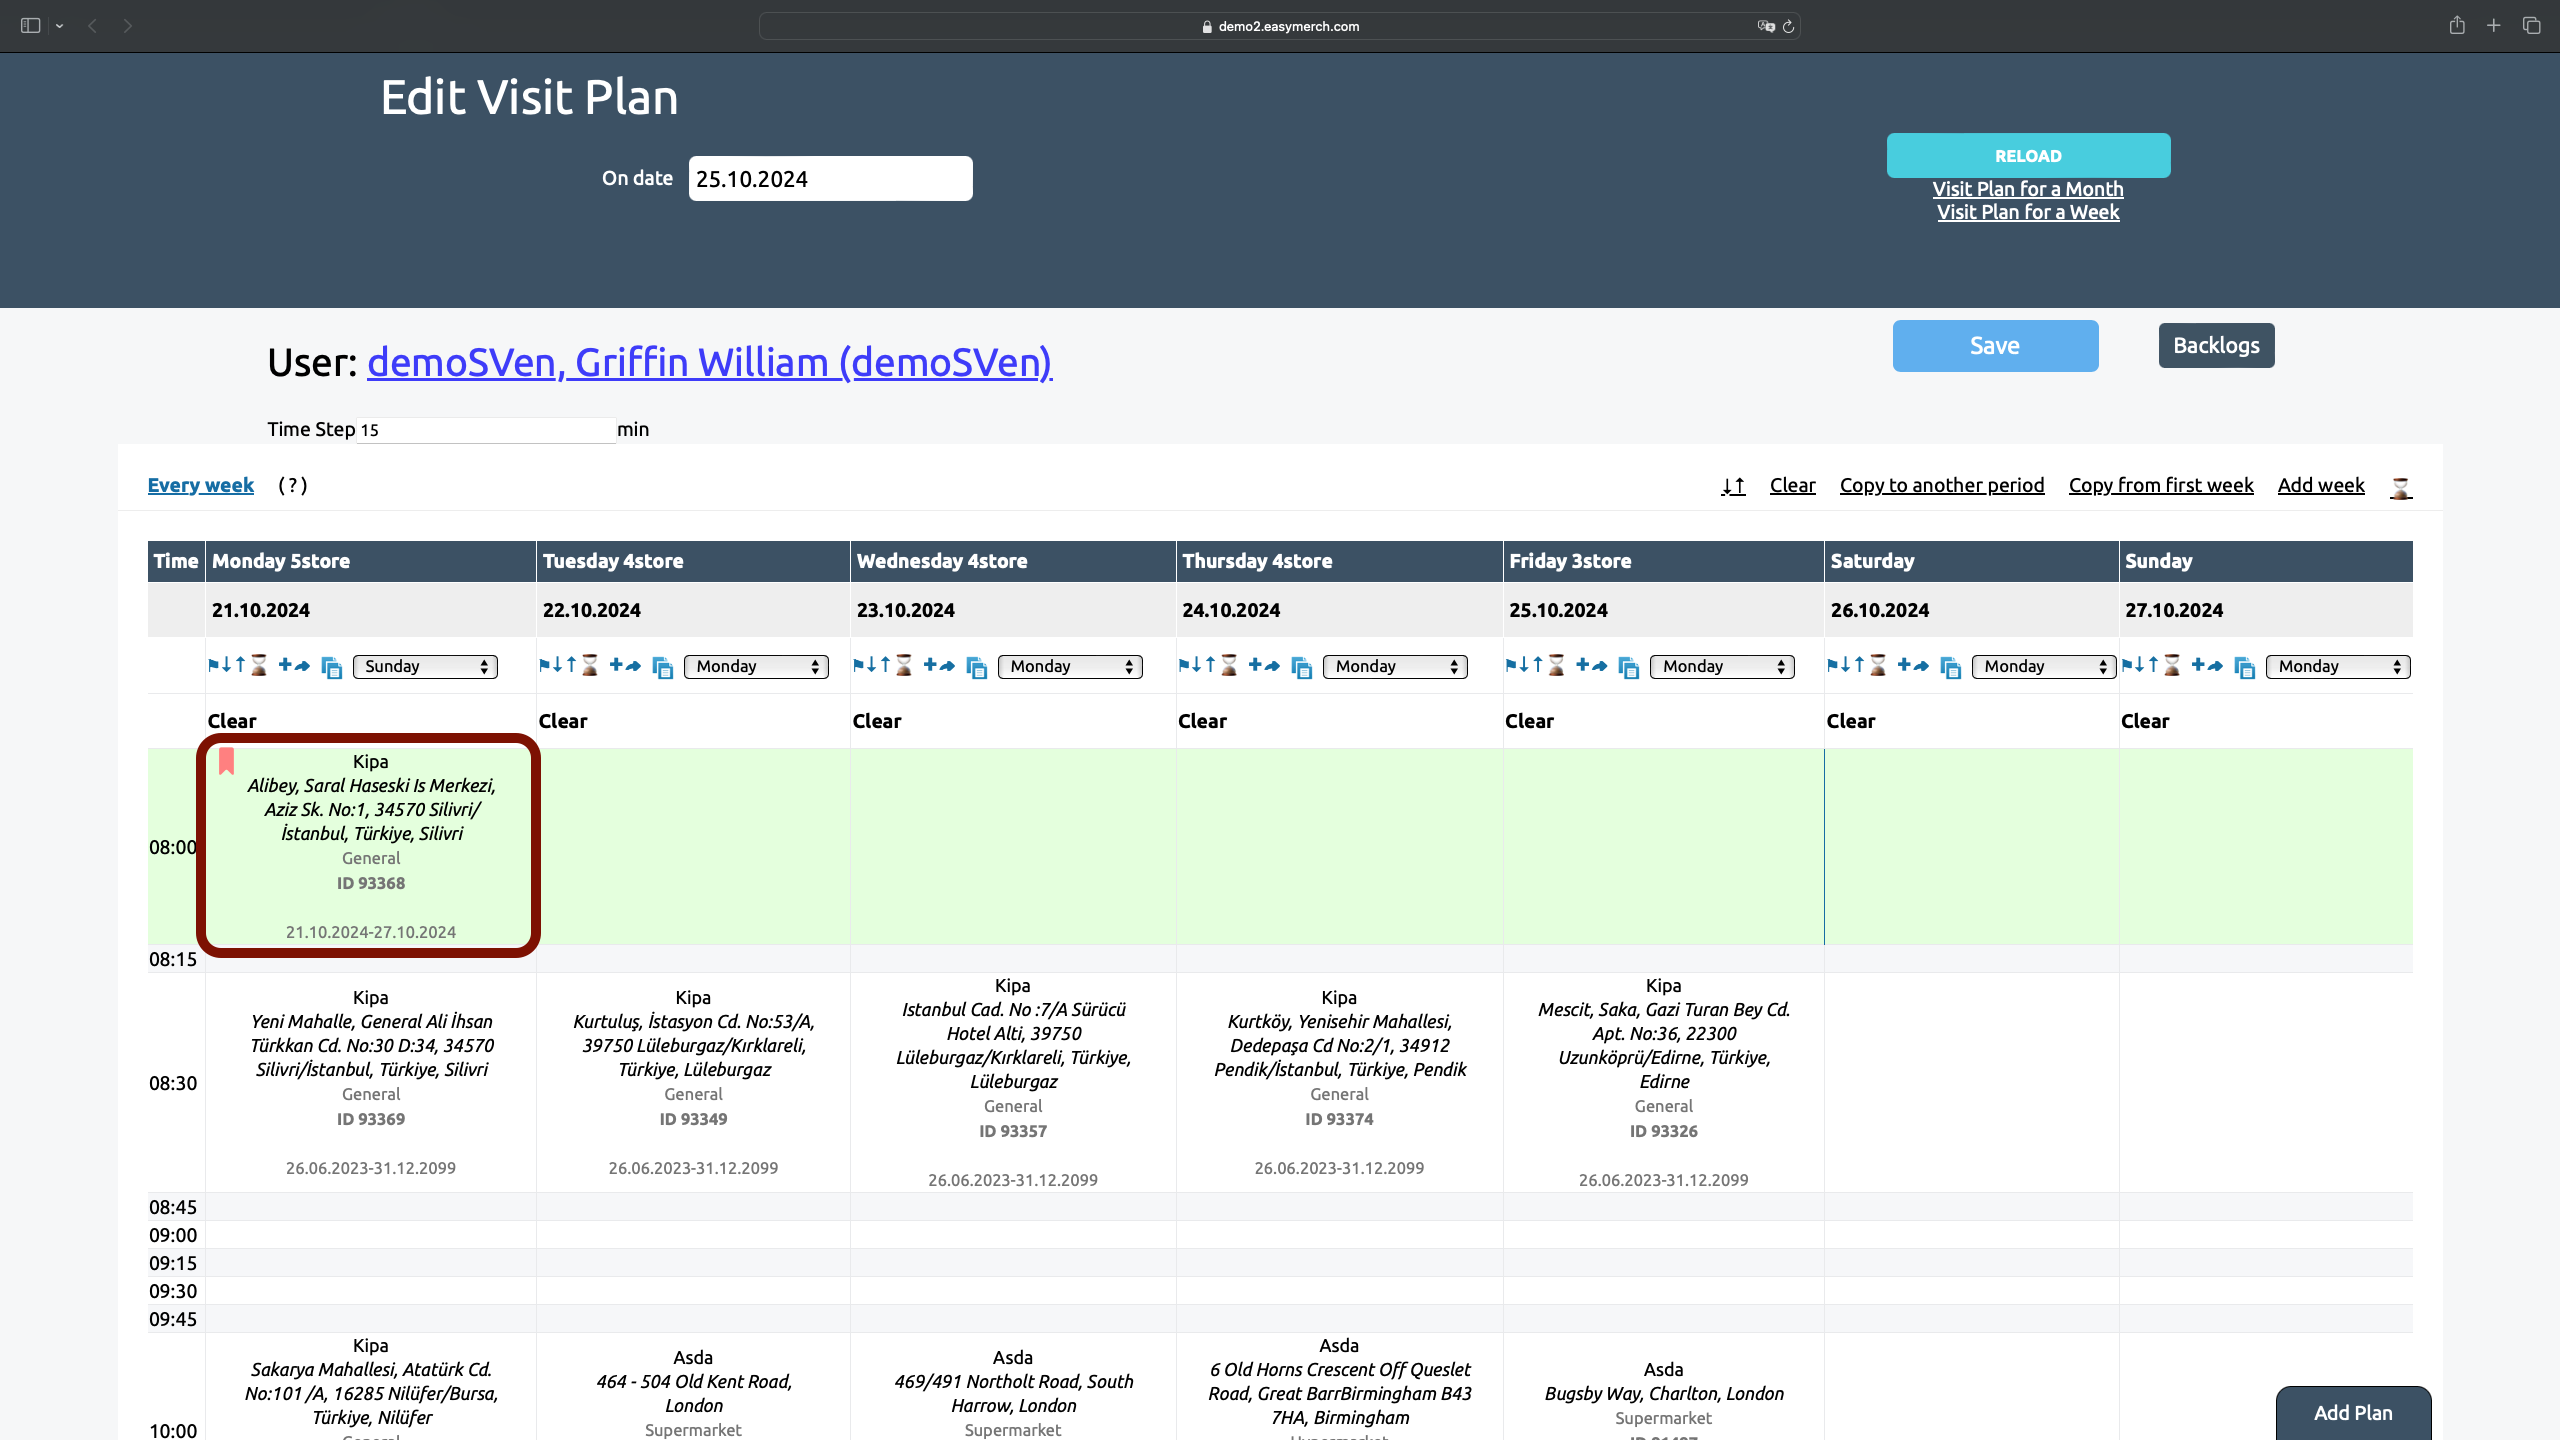
Editing the visit plan
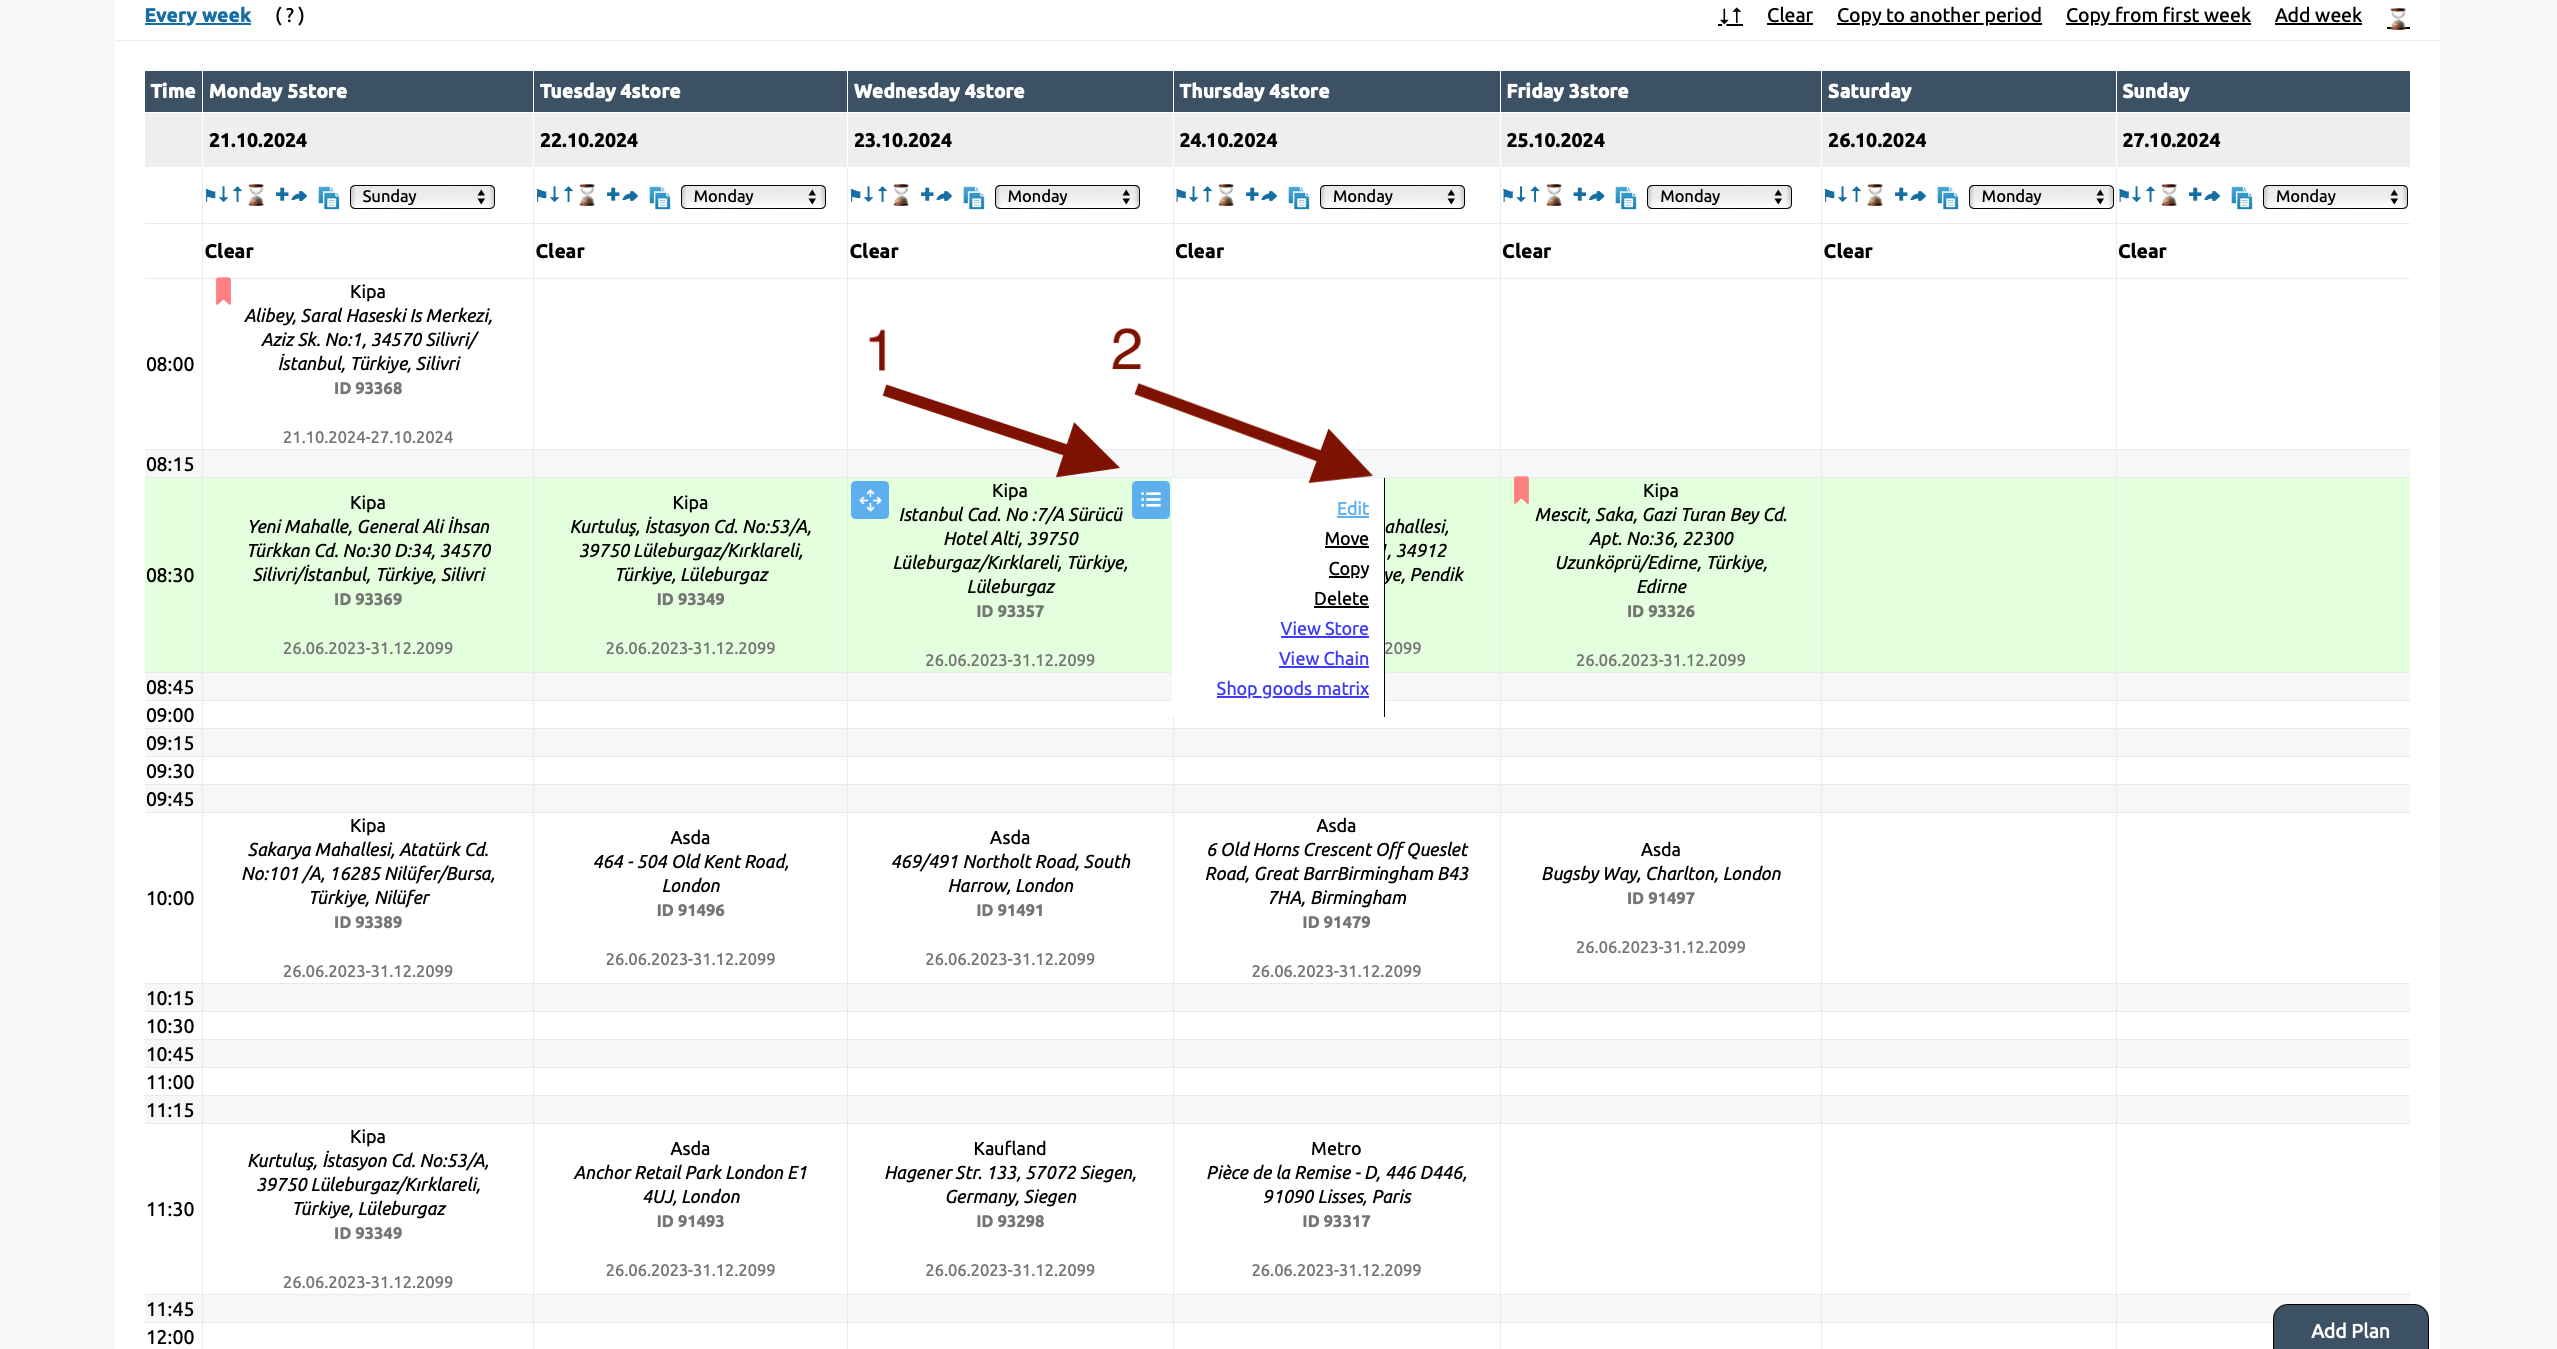
Hover your cursor over the field with the store. When ![]() appears, aim at it. After this, a menu will appear with a choice of actions:
appears, aim at it. After this, a menu will appear with a choice of actions:
1. Click «Edit» to open a menu similar to adding a point to «Visit Plan»
2. Click «Move» to reschedule your appointment to another day of the week or time. After clicking, the entire table will be highlighted in green. Select the day of the week and time where you want to move the store and click on this field
3. Click «Copy» to copy the store to another day of the week. After clicking, the entire table will be highlighted in green. Select the day of the week and time where you want to copy the point and click on this field
4. Click «Delete» to delete the store from your visit plan
5. Click «View Store»to go to the store information editing page
6. Click «View Chain» to go to the page for editing information about the retail chain to which the outlet belongs
7. Click «Shop goods matrix»” to proceed to editing matrixes by store
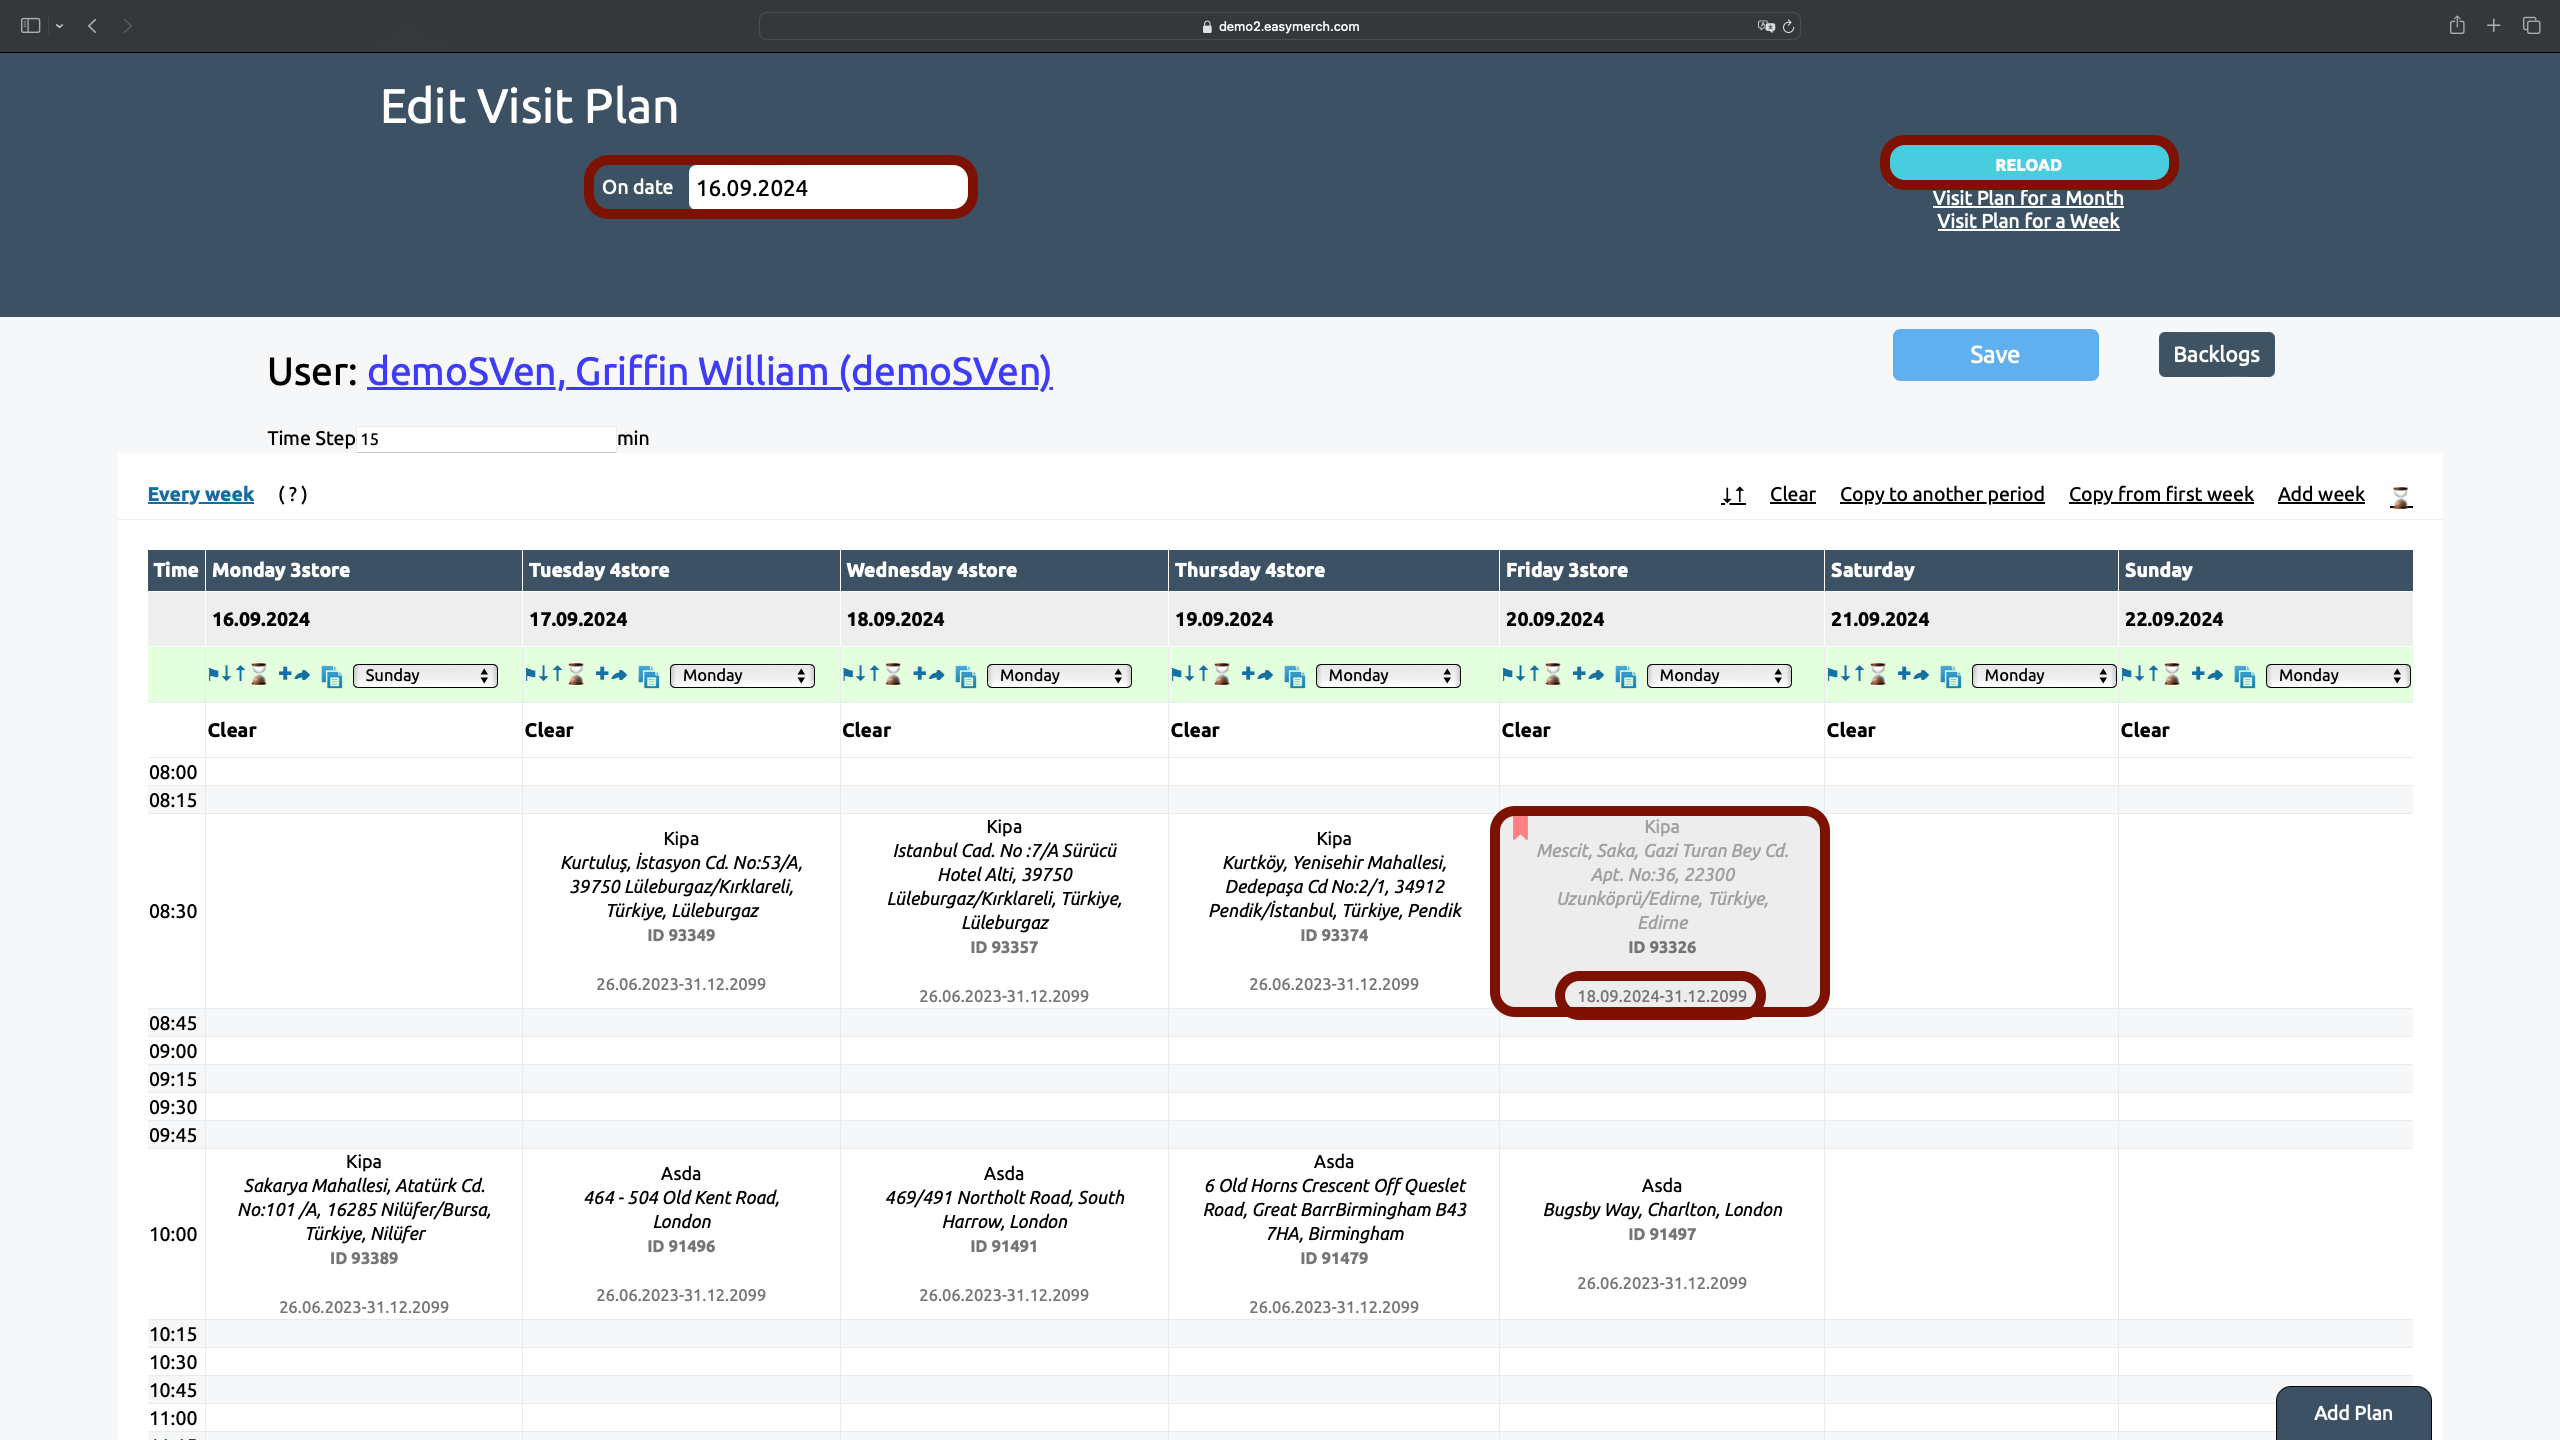
Error while editing: store is inactive
If the store is greyed out, you won't be able to
edit it. This is due to the fact that its start date and end date do not match the date on which Visit Plan is open
For example, the dates selected for the outlet are 09/18/2024-12/31/2099. Visit Plan open on 09/16/2024. Since 09/16/2024 does not fall within the range selected for the store, we will not be able to edit it
To edit such a store, in the «On date» field you need to select the day that falls within the range of the point. For example, 09/18/2024 or a later date, and click «Refresh»
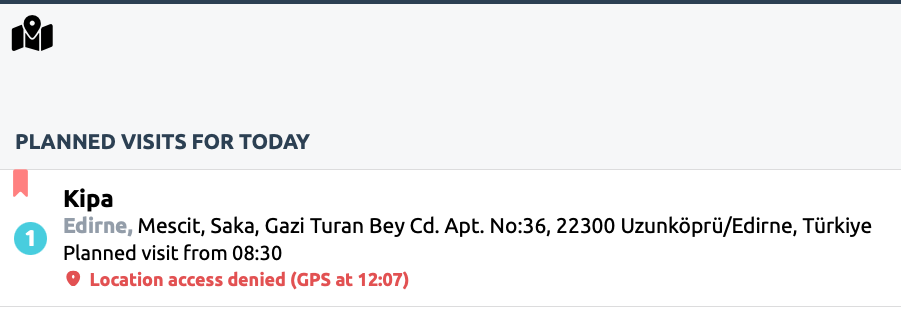
An employee will not see a store when it is inactive in his visit plan
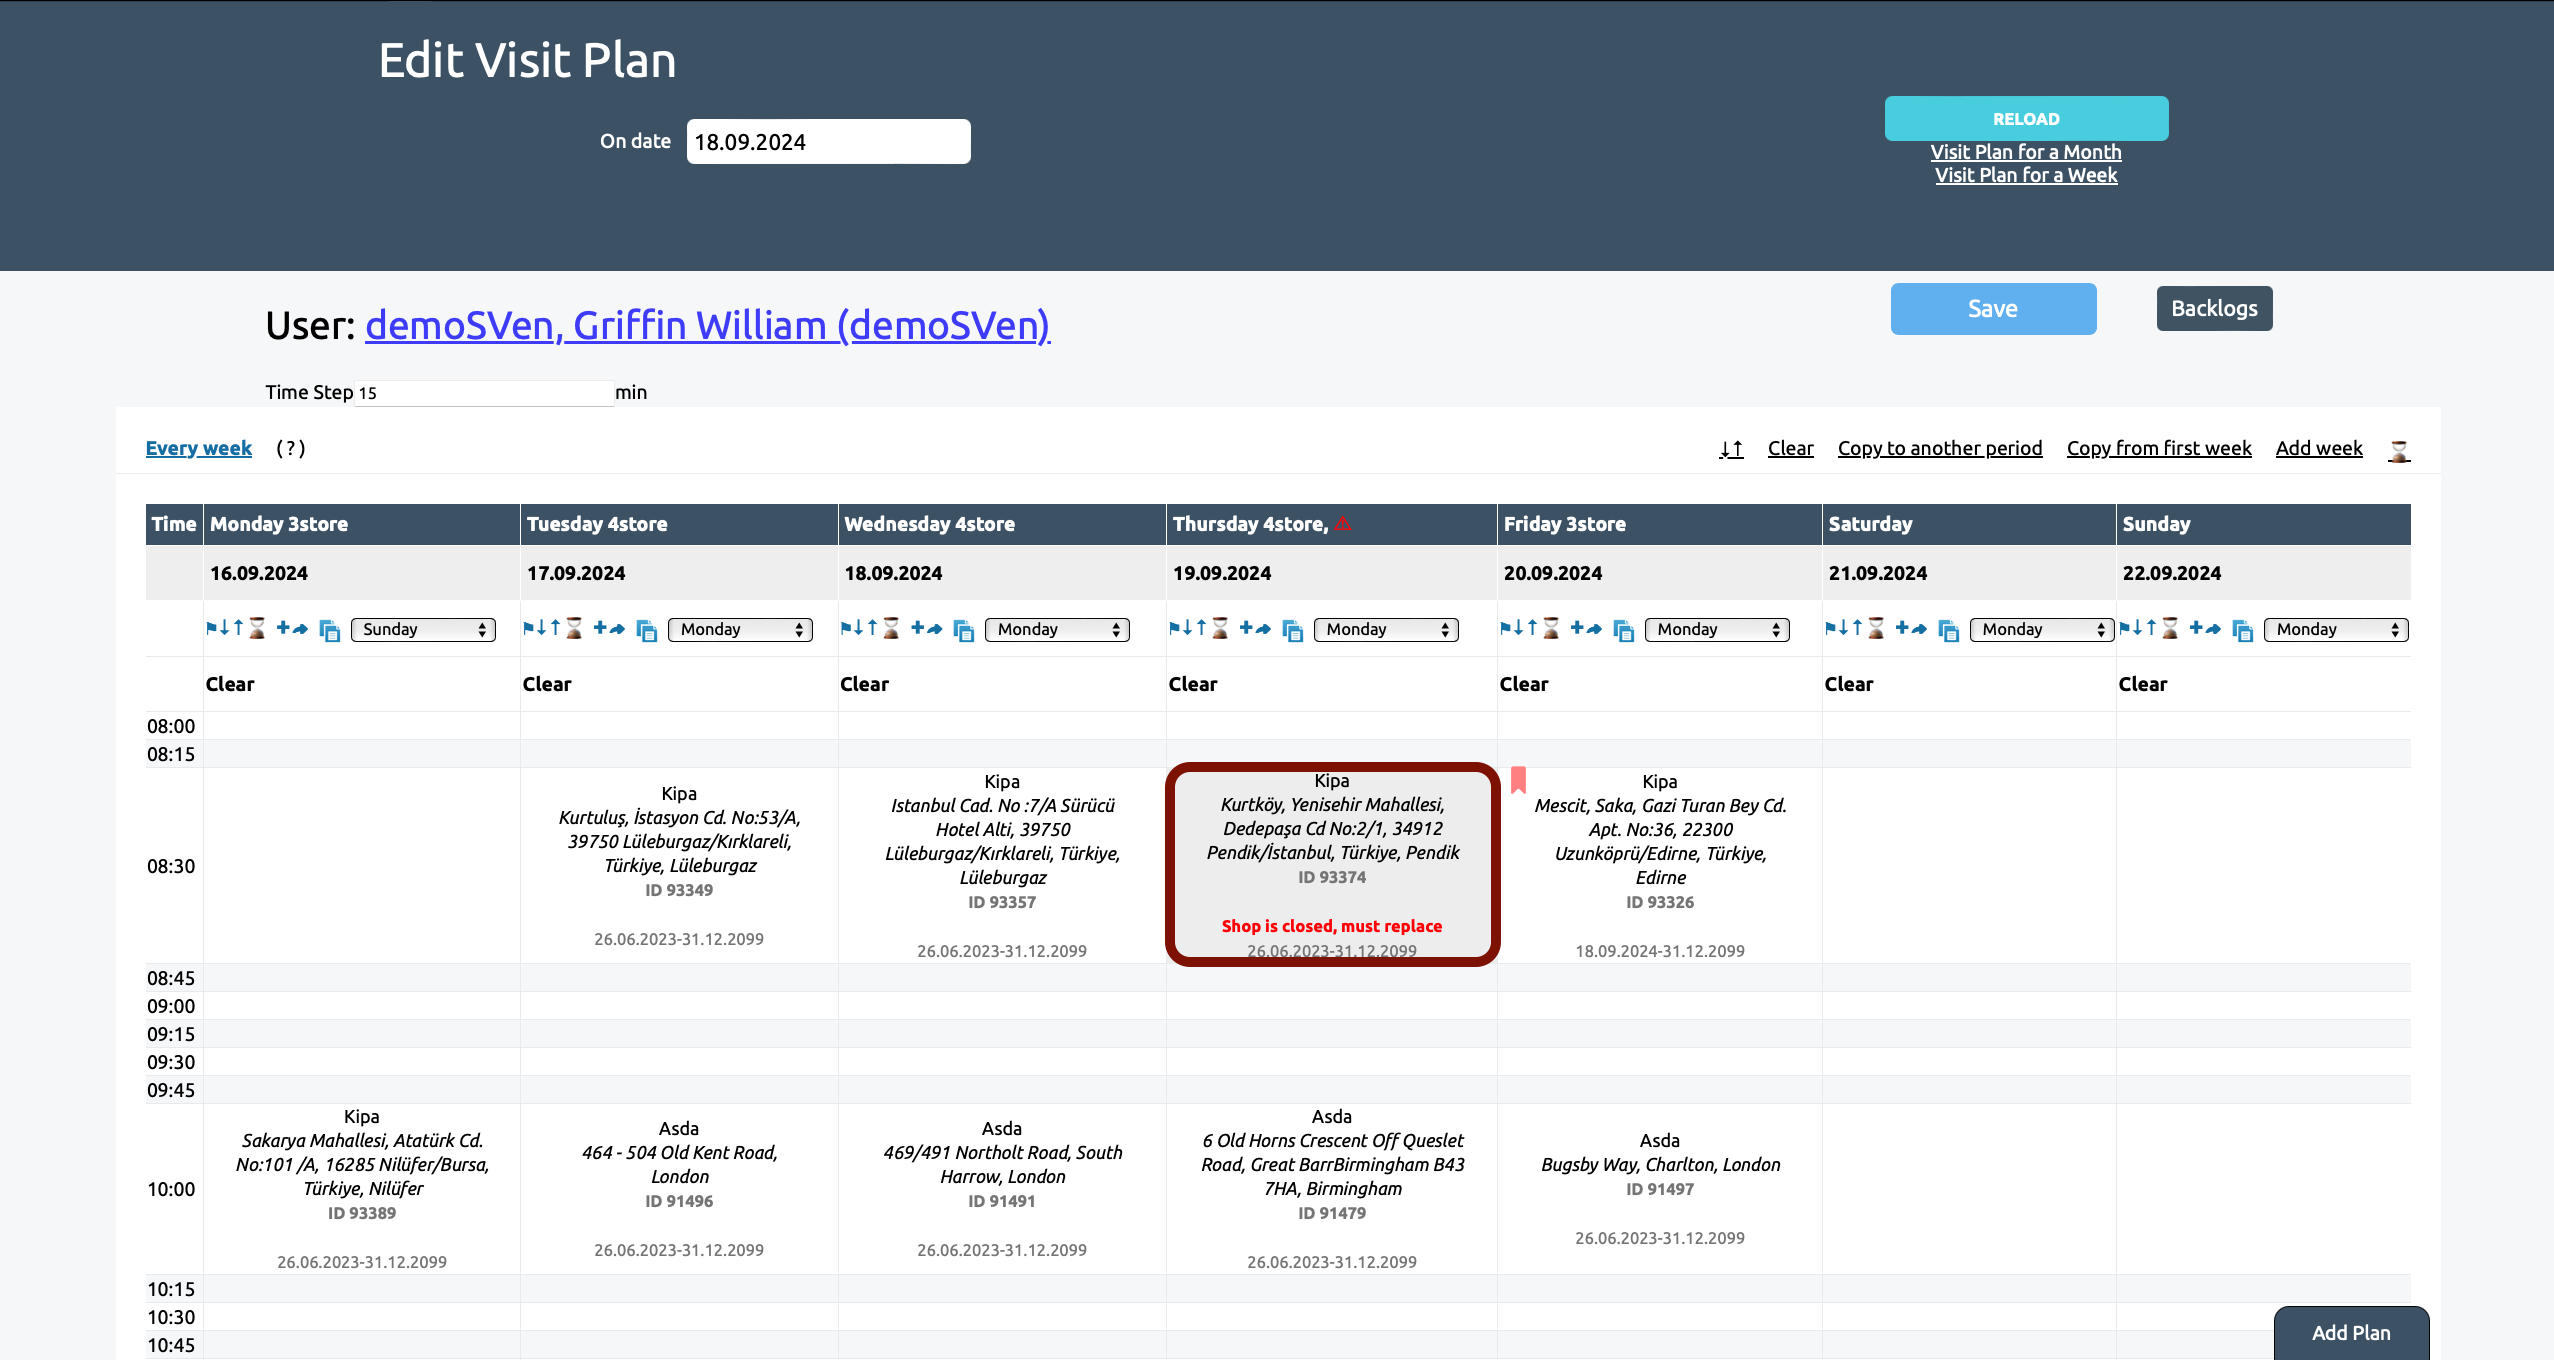
Error while editing: store is closed
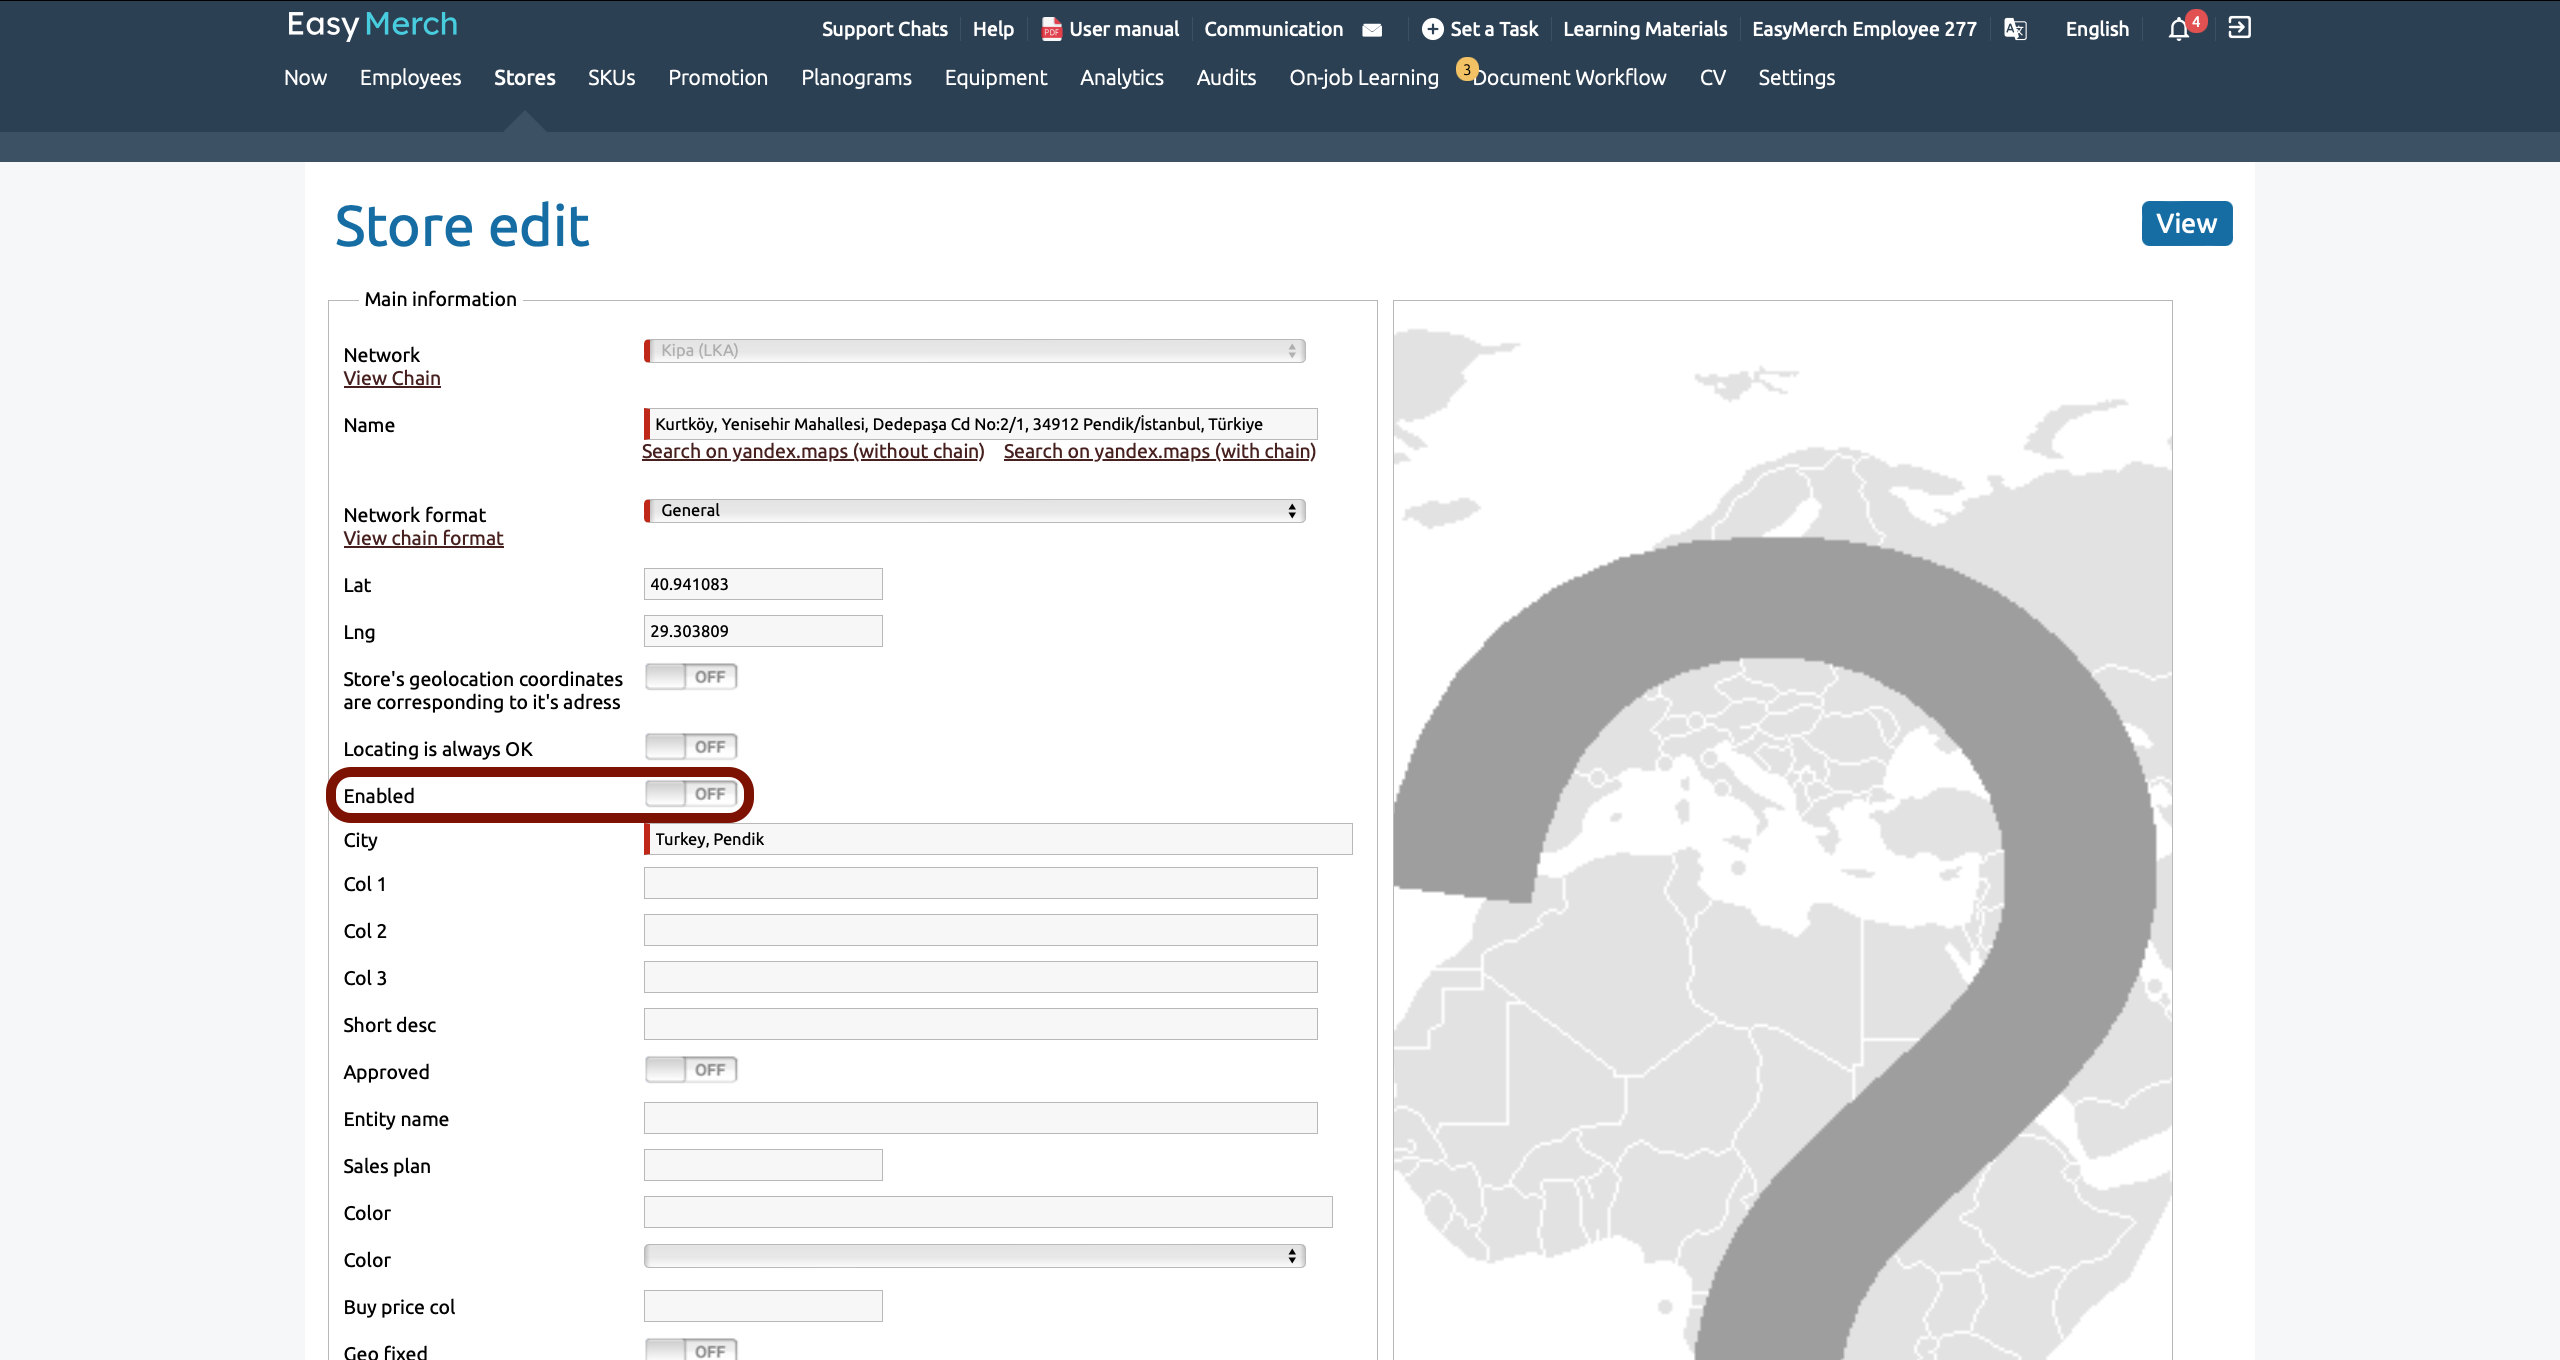
A store that has «Shop is closed, must replace» marked will not be displayed to the employee
To make a store active, you need to open its page (for example, through the «View Store» button, which appears when editing a visit plan when you click on ![]() )
)
On the store page in the line «Enabled» you need to move the switch to the “ON” position and click «Save»
After this, just refresh the page in your browser where you have Visit Plan open
Actions in the visit plat
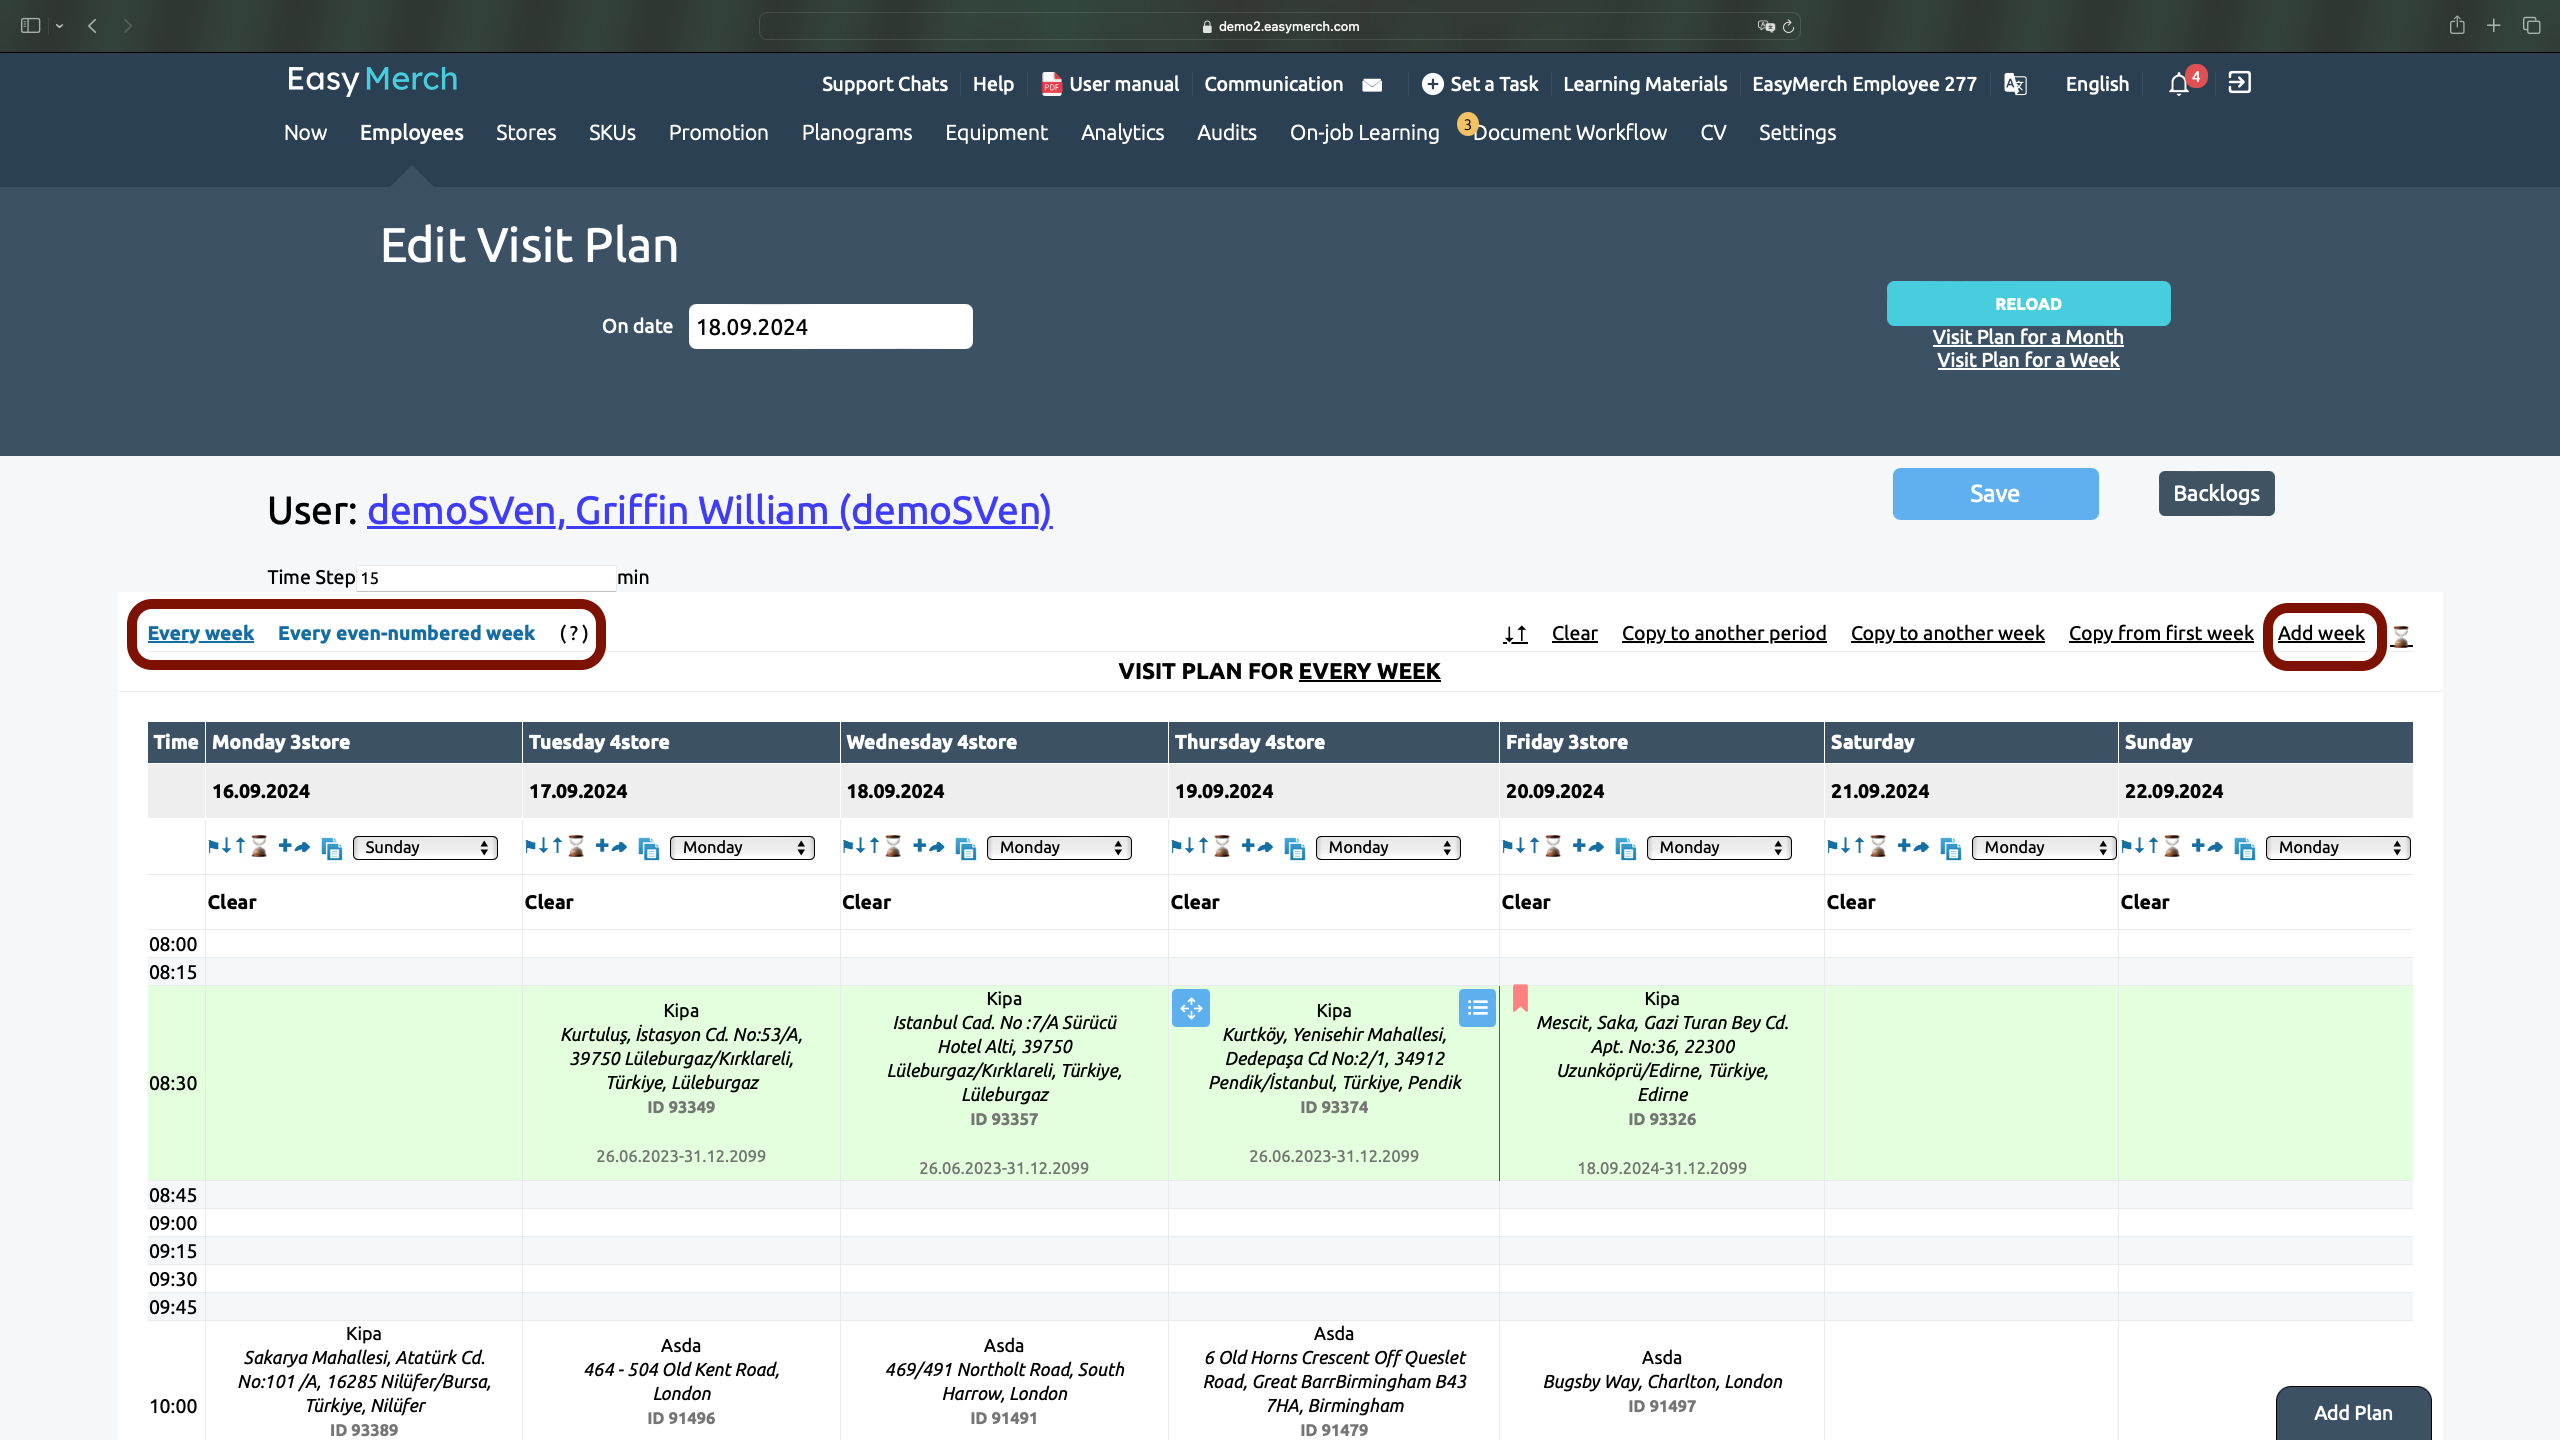
1. In the visit plan, you can see weekly planning. You can open an existing weekly chart (for example, by clicking on «Every even-numbered week»). The selected week is marked with an underscore
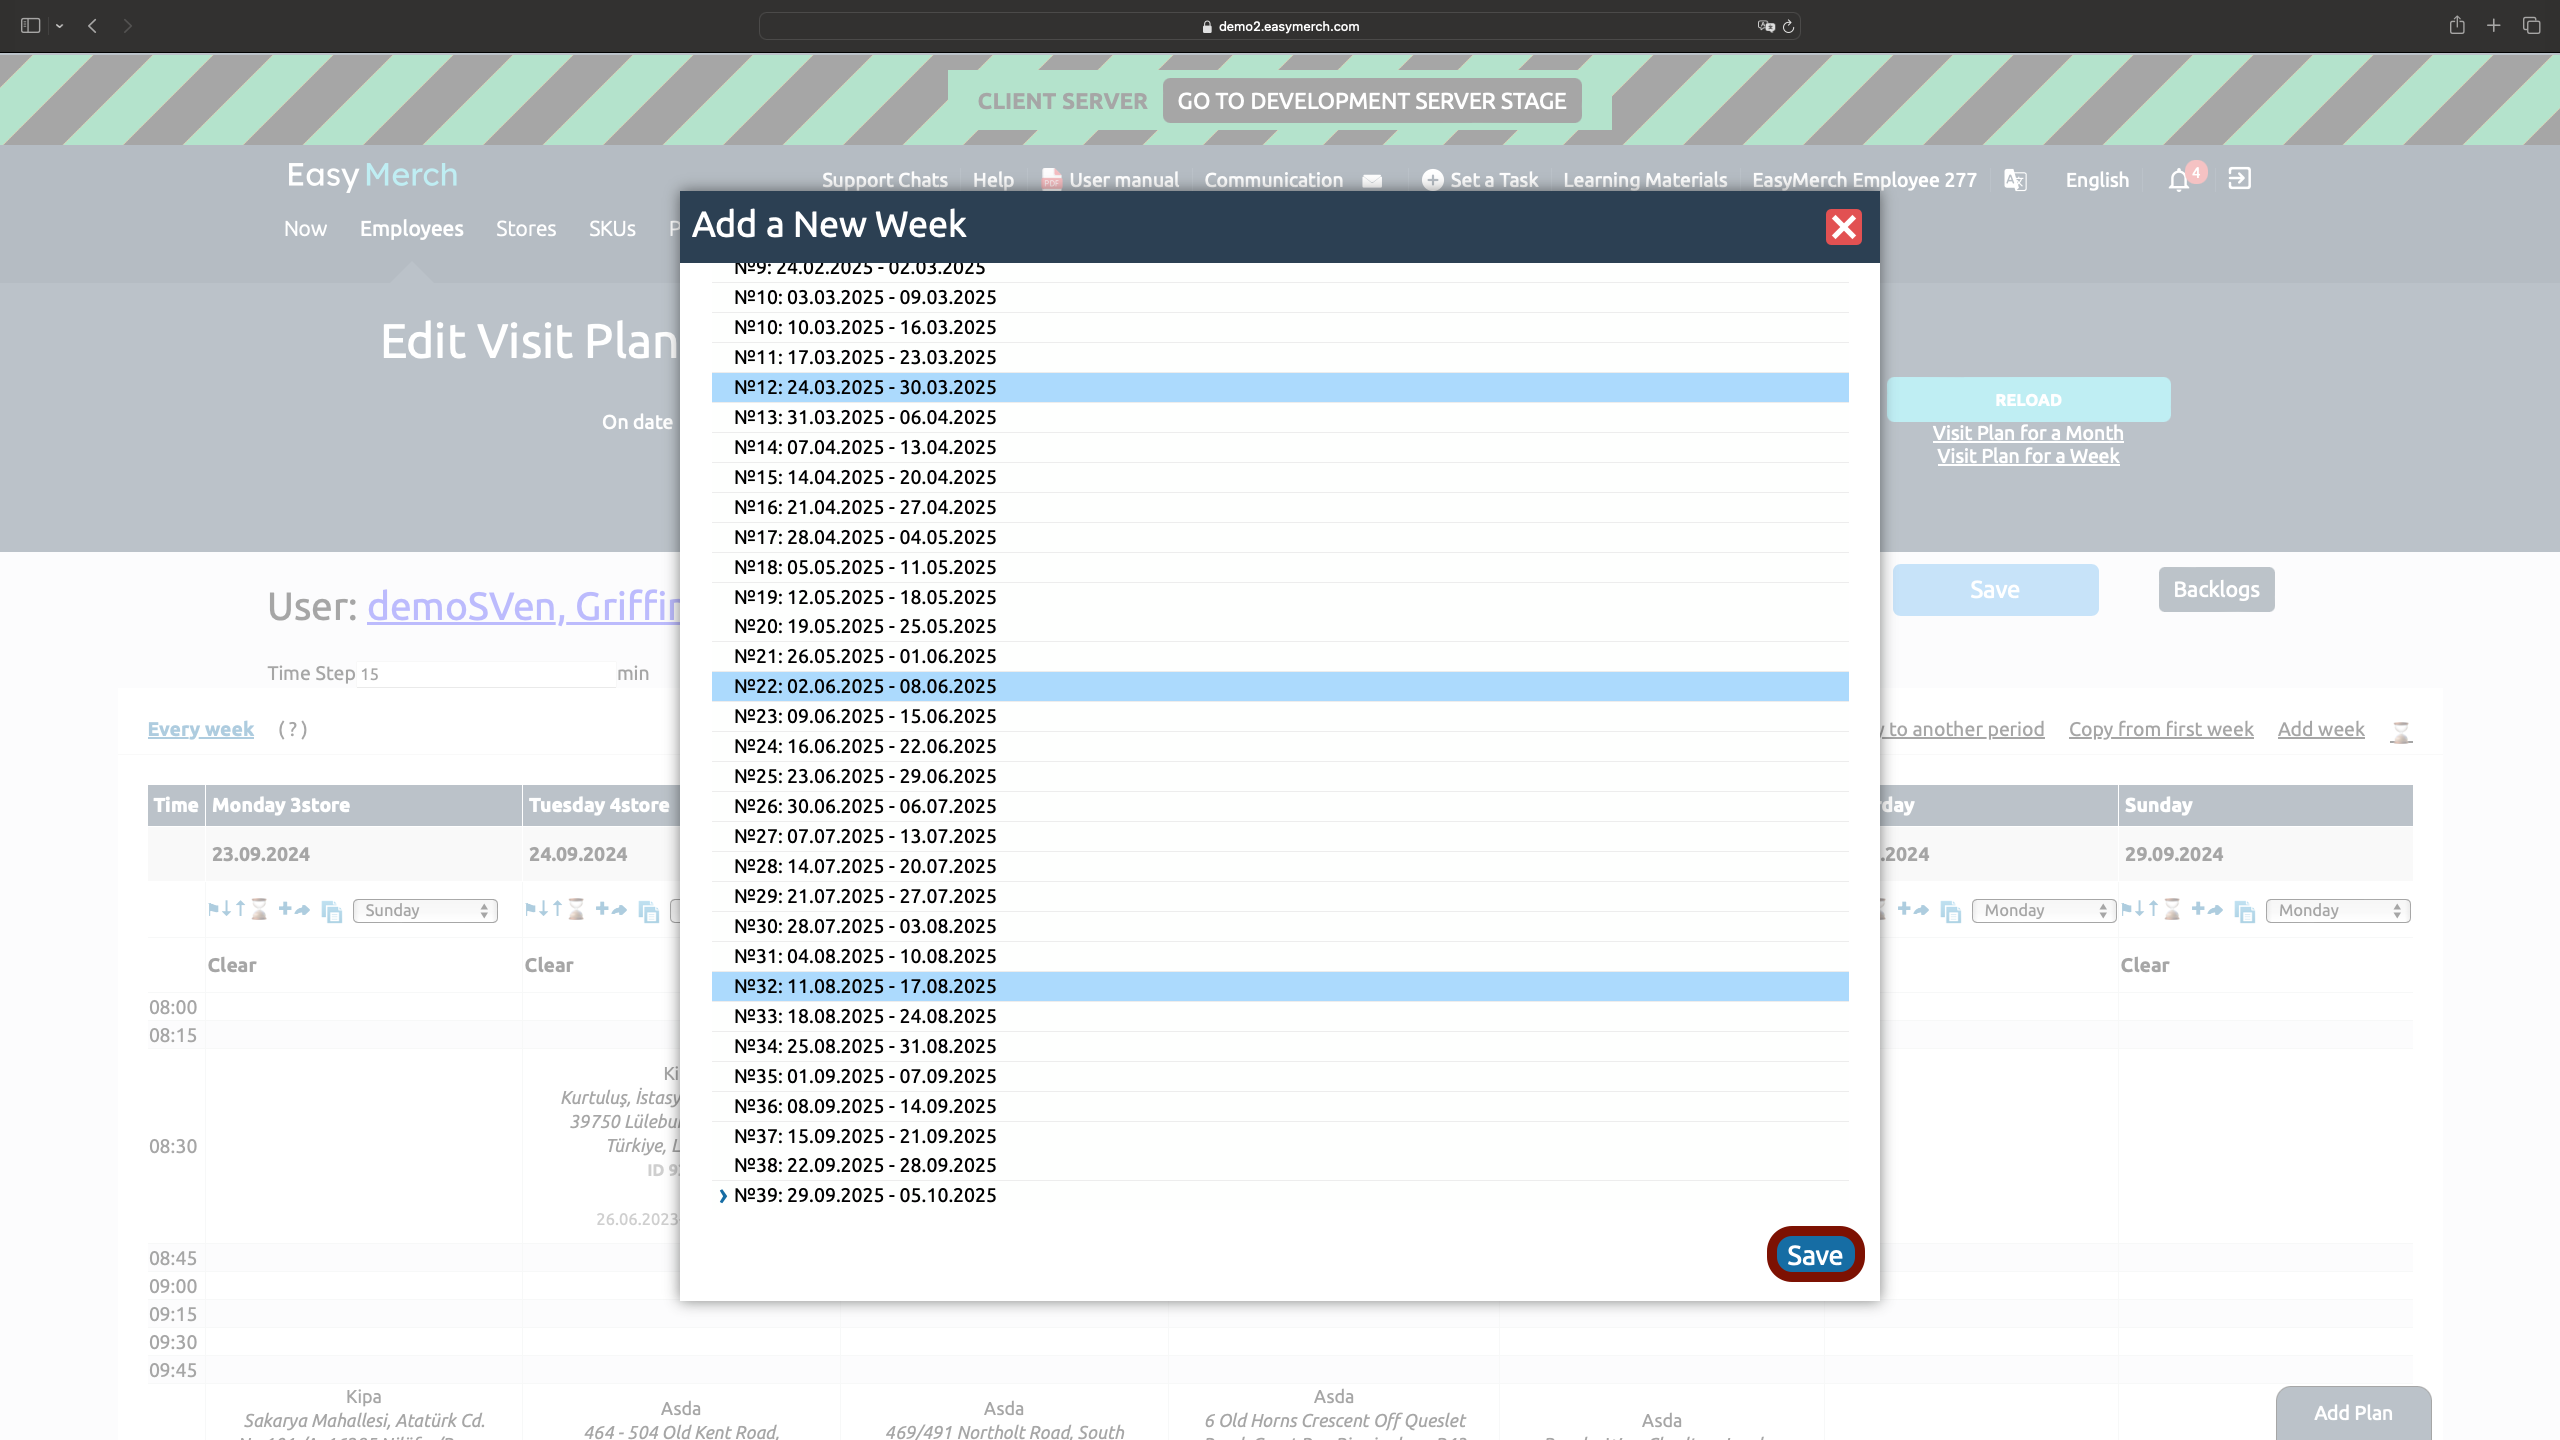
You can add a new week type via the «Add week» button
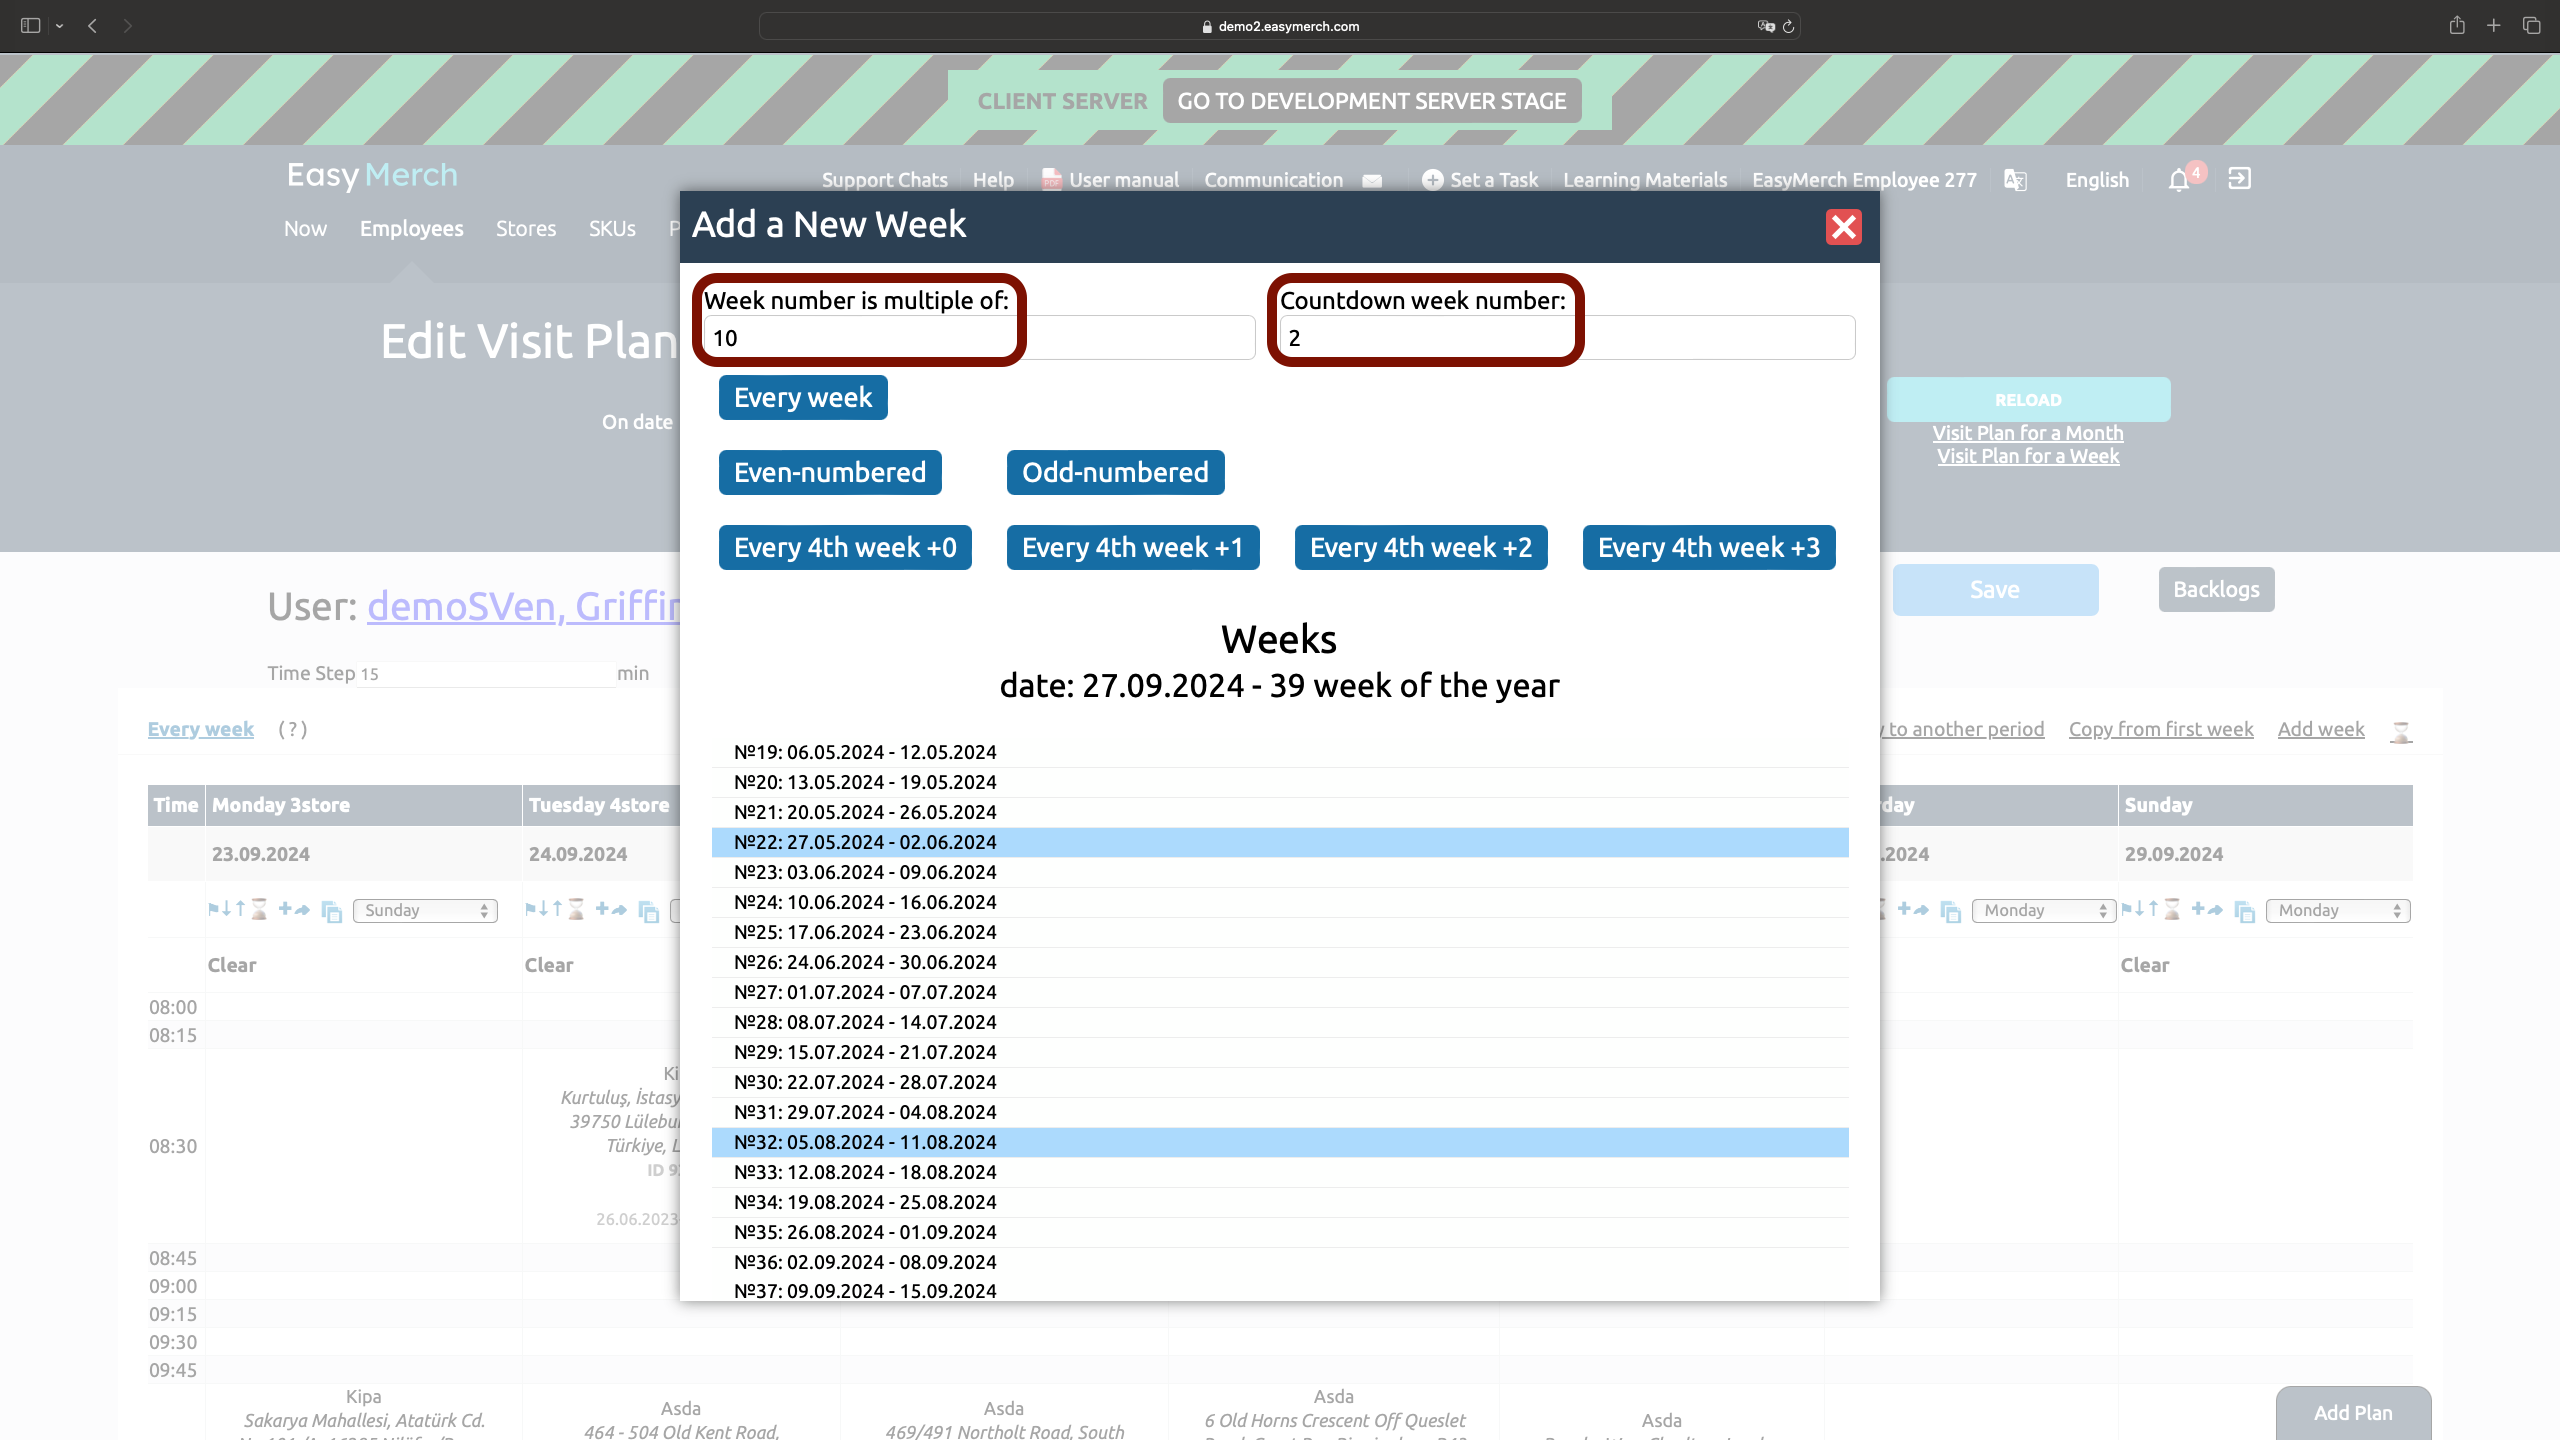
Select a week from the ready-made options, and weeks that match this filter will be automatically marked for you. You will also be able to see in the calendar which weeks fall under your selection
If none of the proposed options suits you, you can add your own option:
- In the «Week number is multiple of» field, enter what the week number should be a multiple of. For example, enter 10 and you will highlight all weeks divisible by 10 (10, 20, 30, 40, 50)
- In the «Countdown week number» field, enter the number of the week from which the countdown will begin. For example, enter 2, and then the report will start from the second week (12, 22, 32, 42, 52)
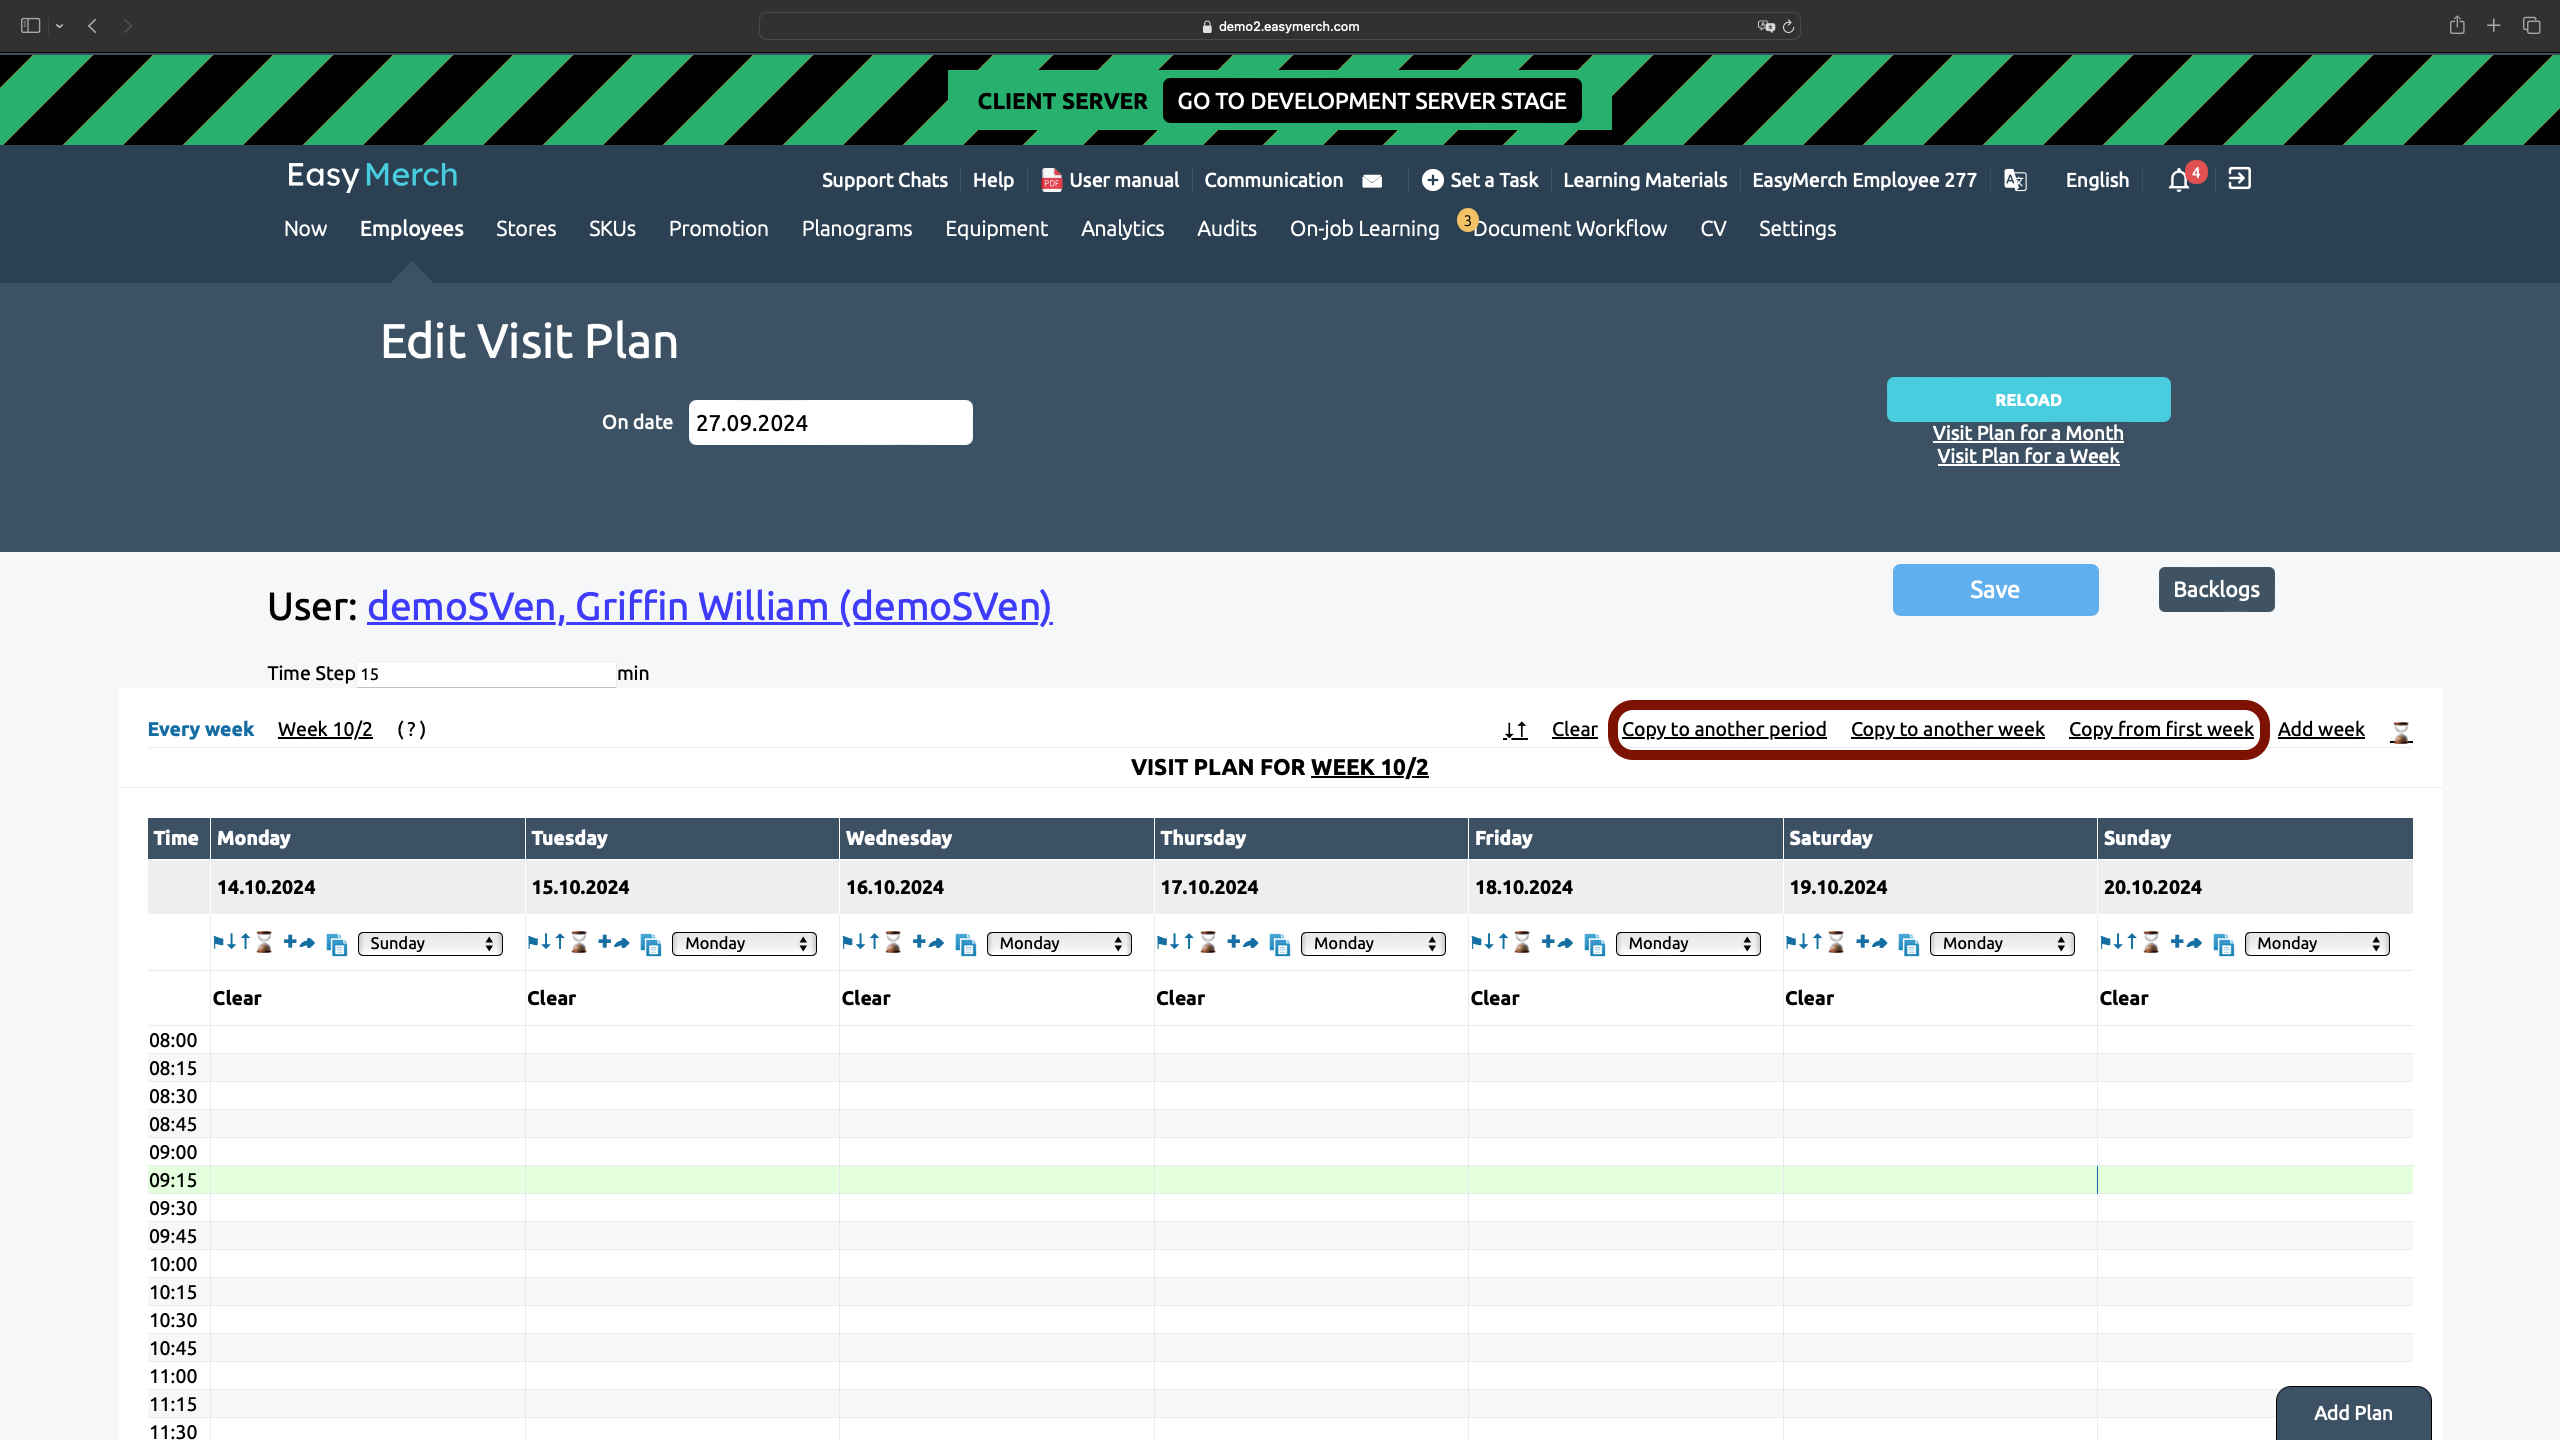
2. You can copy an already created plan to another period:
- Click «Copy to another period» to copy the selected week's plan to another period. Set the start date and end date of the period
- Click «Copy to another week» to copy the selected week's plan for every week, every even or odd week
- Click «Copy from first week» to copy the plan from each week to the selected week
3. Click the «Clear» button for any day of the week to immediately remove all points from the visit plan for that day
If you click the «Clear» button above the visit plan, all stores will be immediately removed from the visit plan for this week
Attention! If you clear Visit Plan for past dates and save the changes, you will not be able to view analytics for those dates
If you accidentally cleared Visit Plan, you can go back or close the browser tab without saving
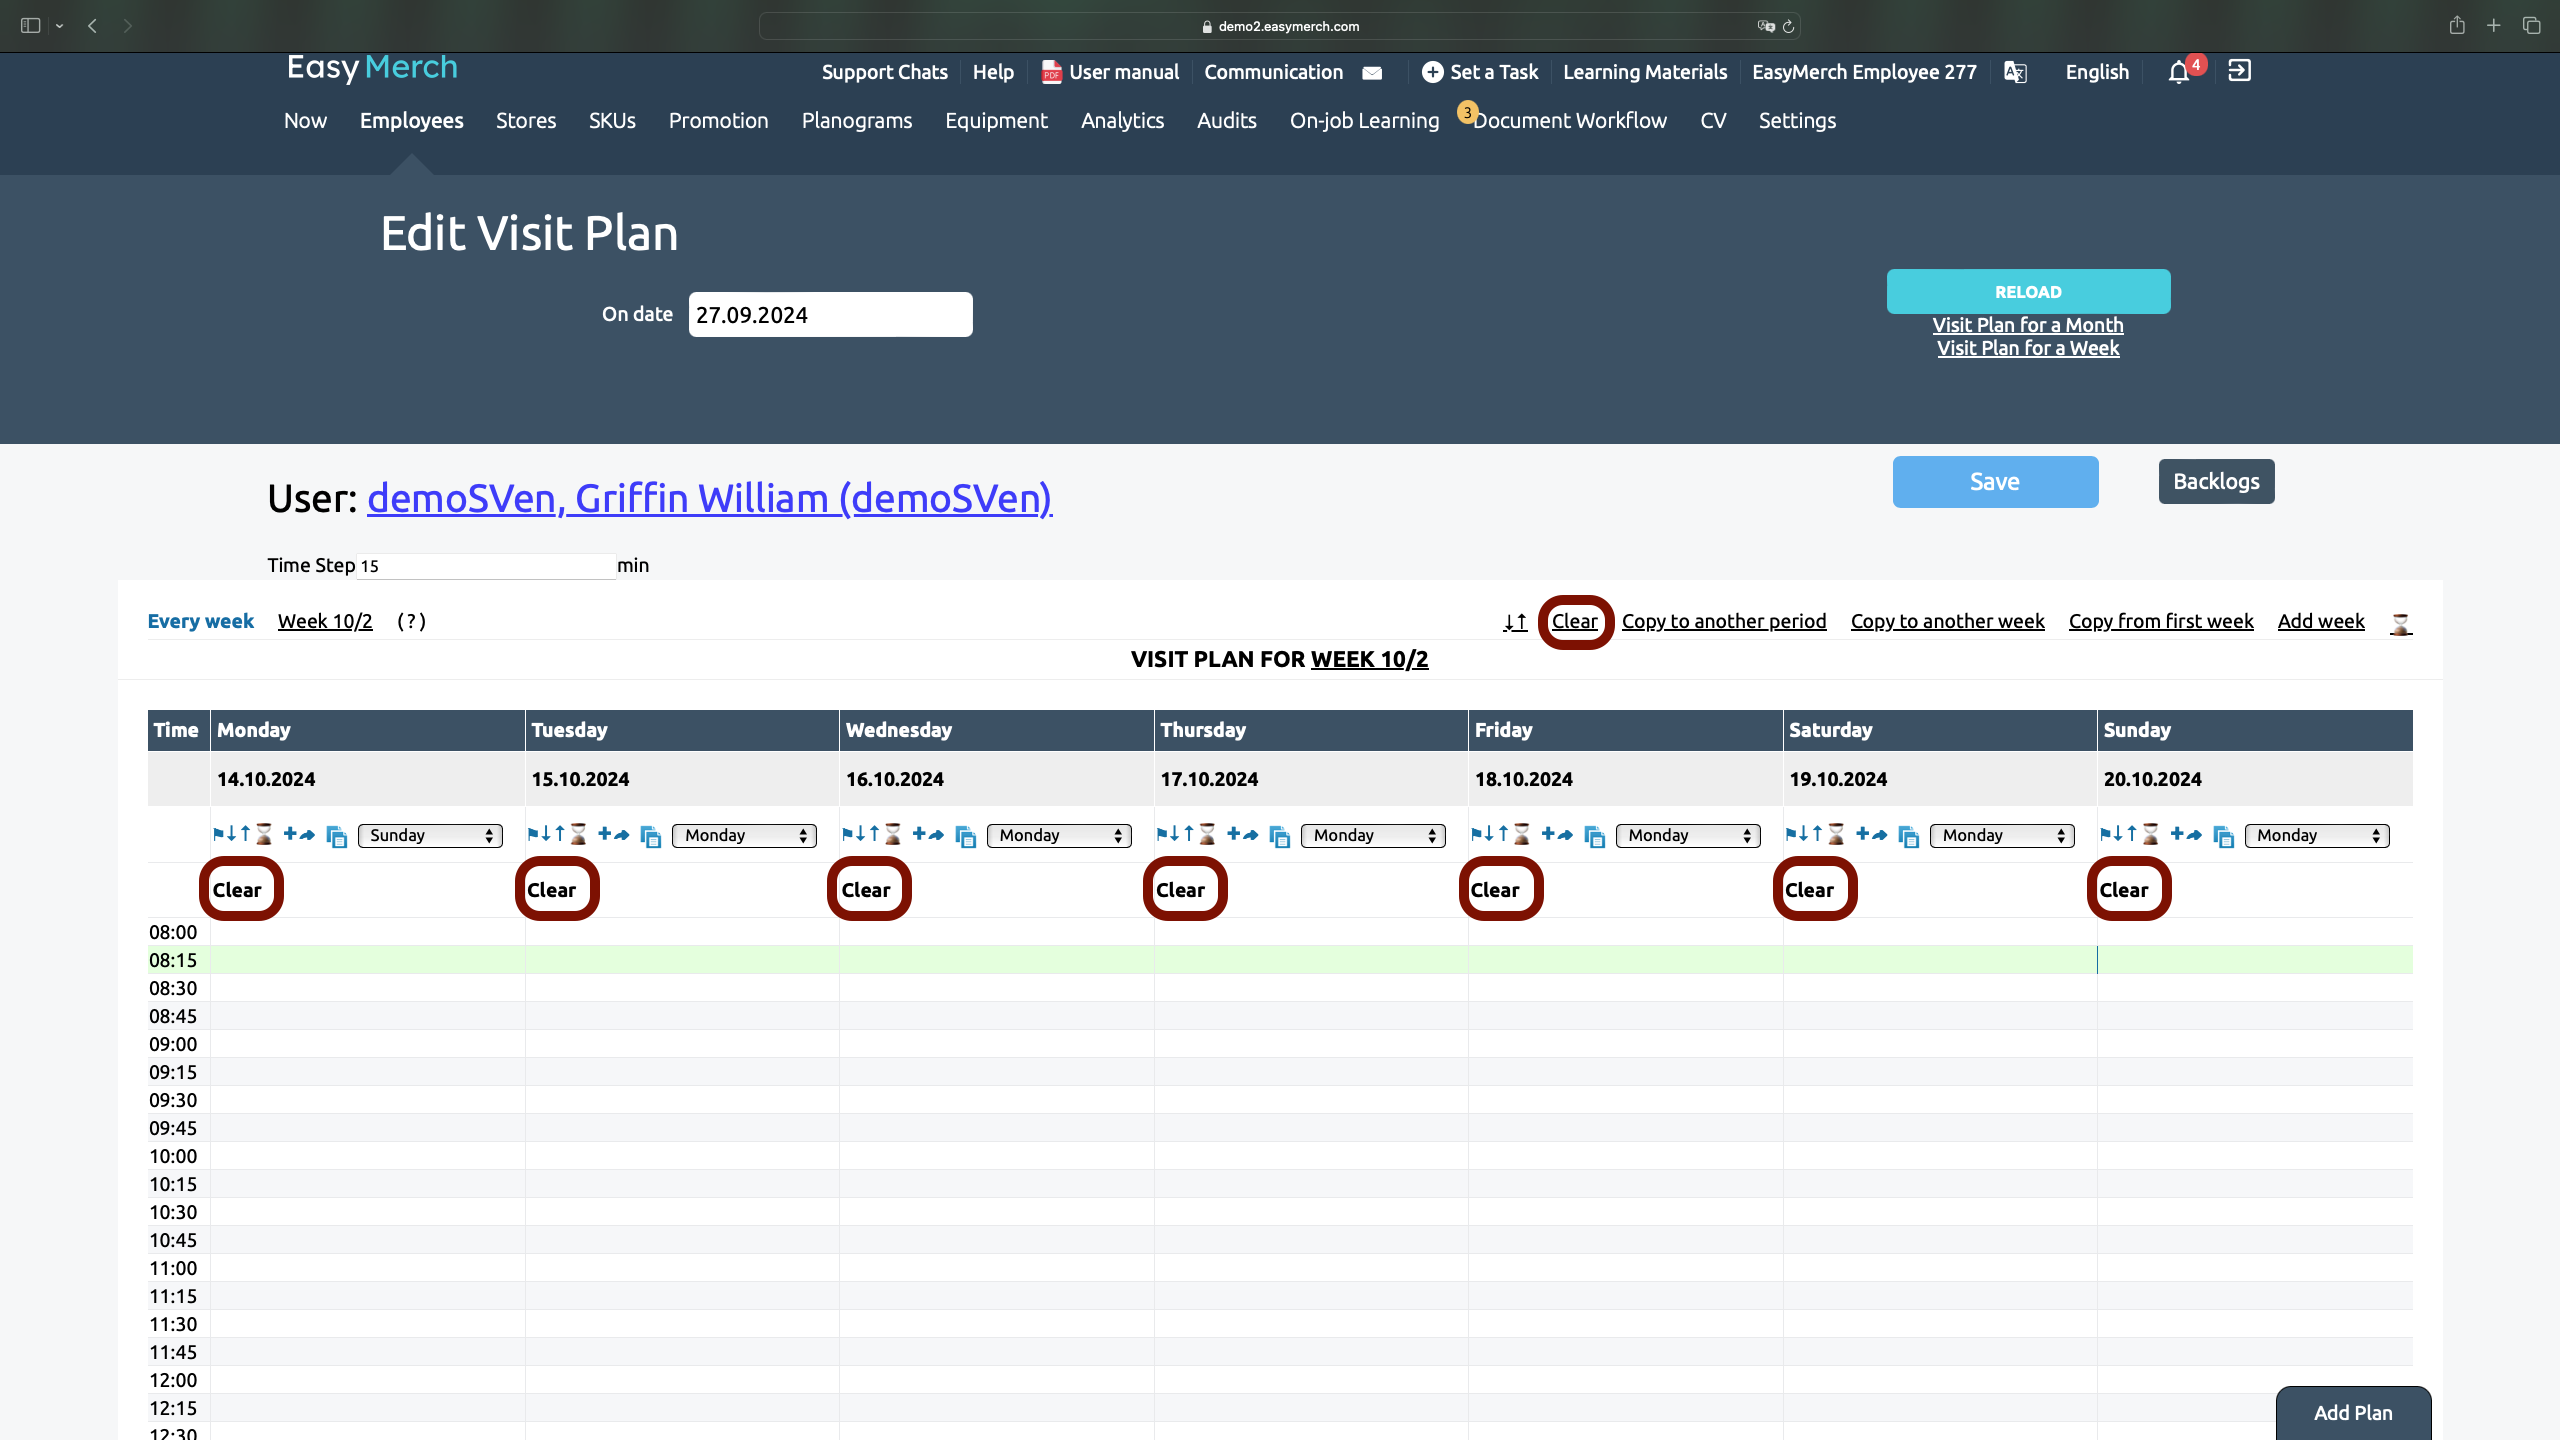
5. Click on ⌛ above the visit plan to change the time and dates of visits for the entire selected week
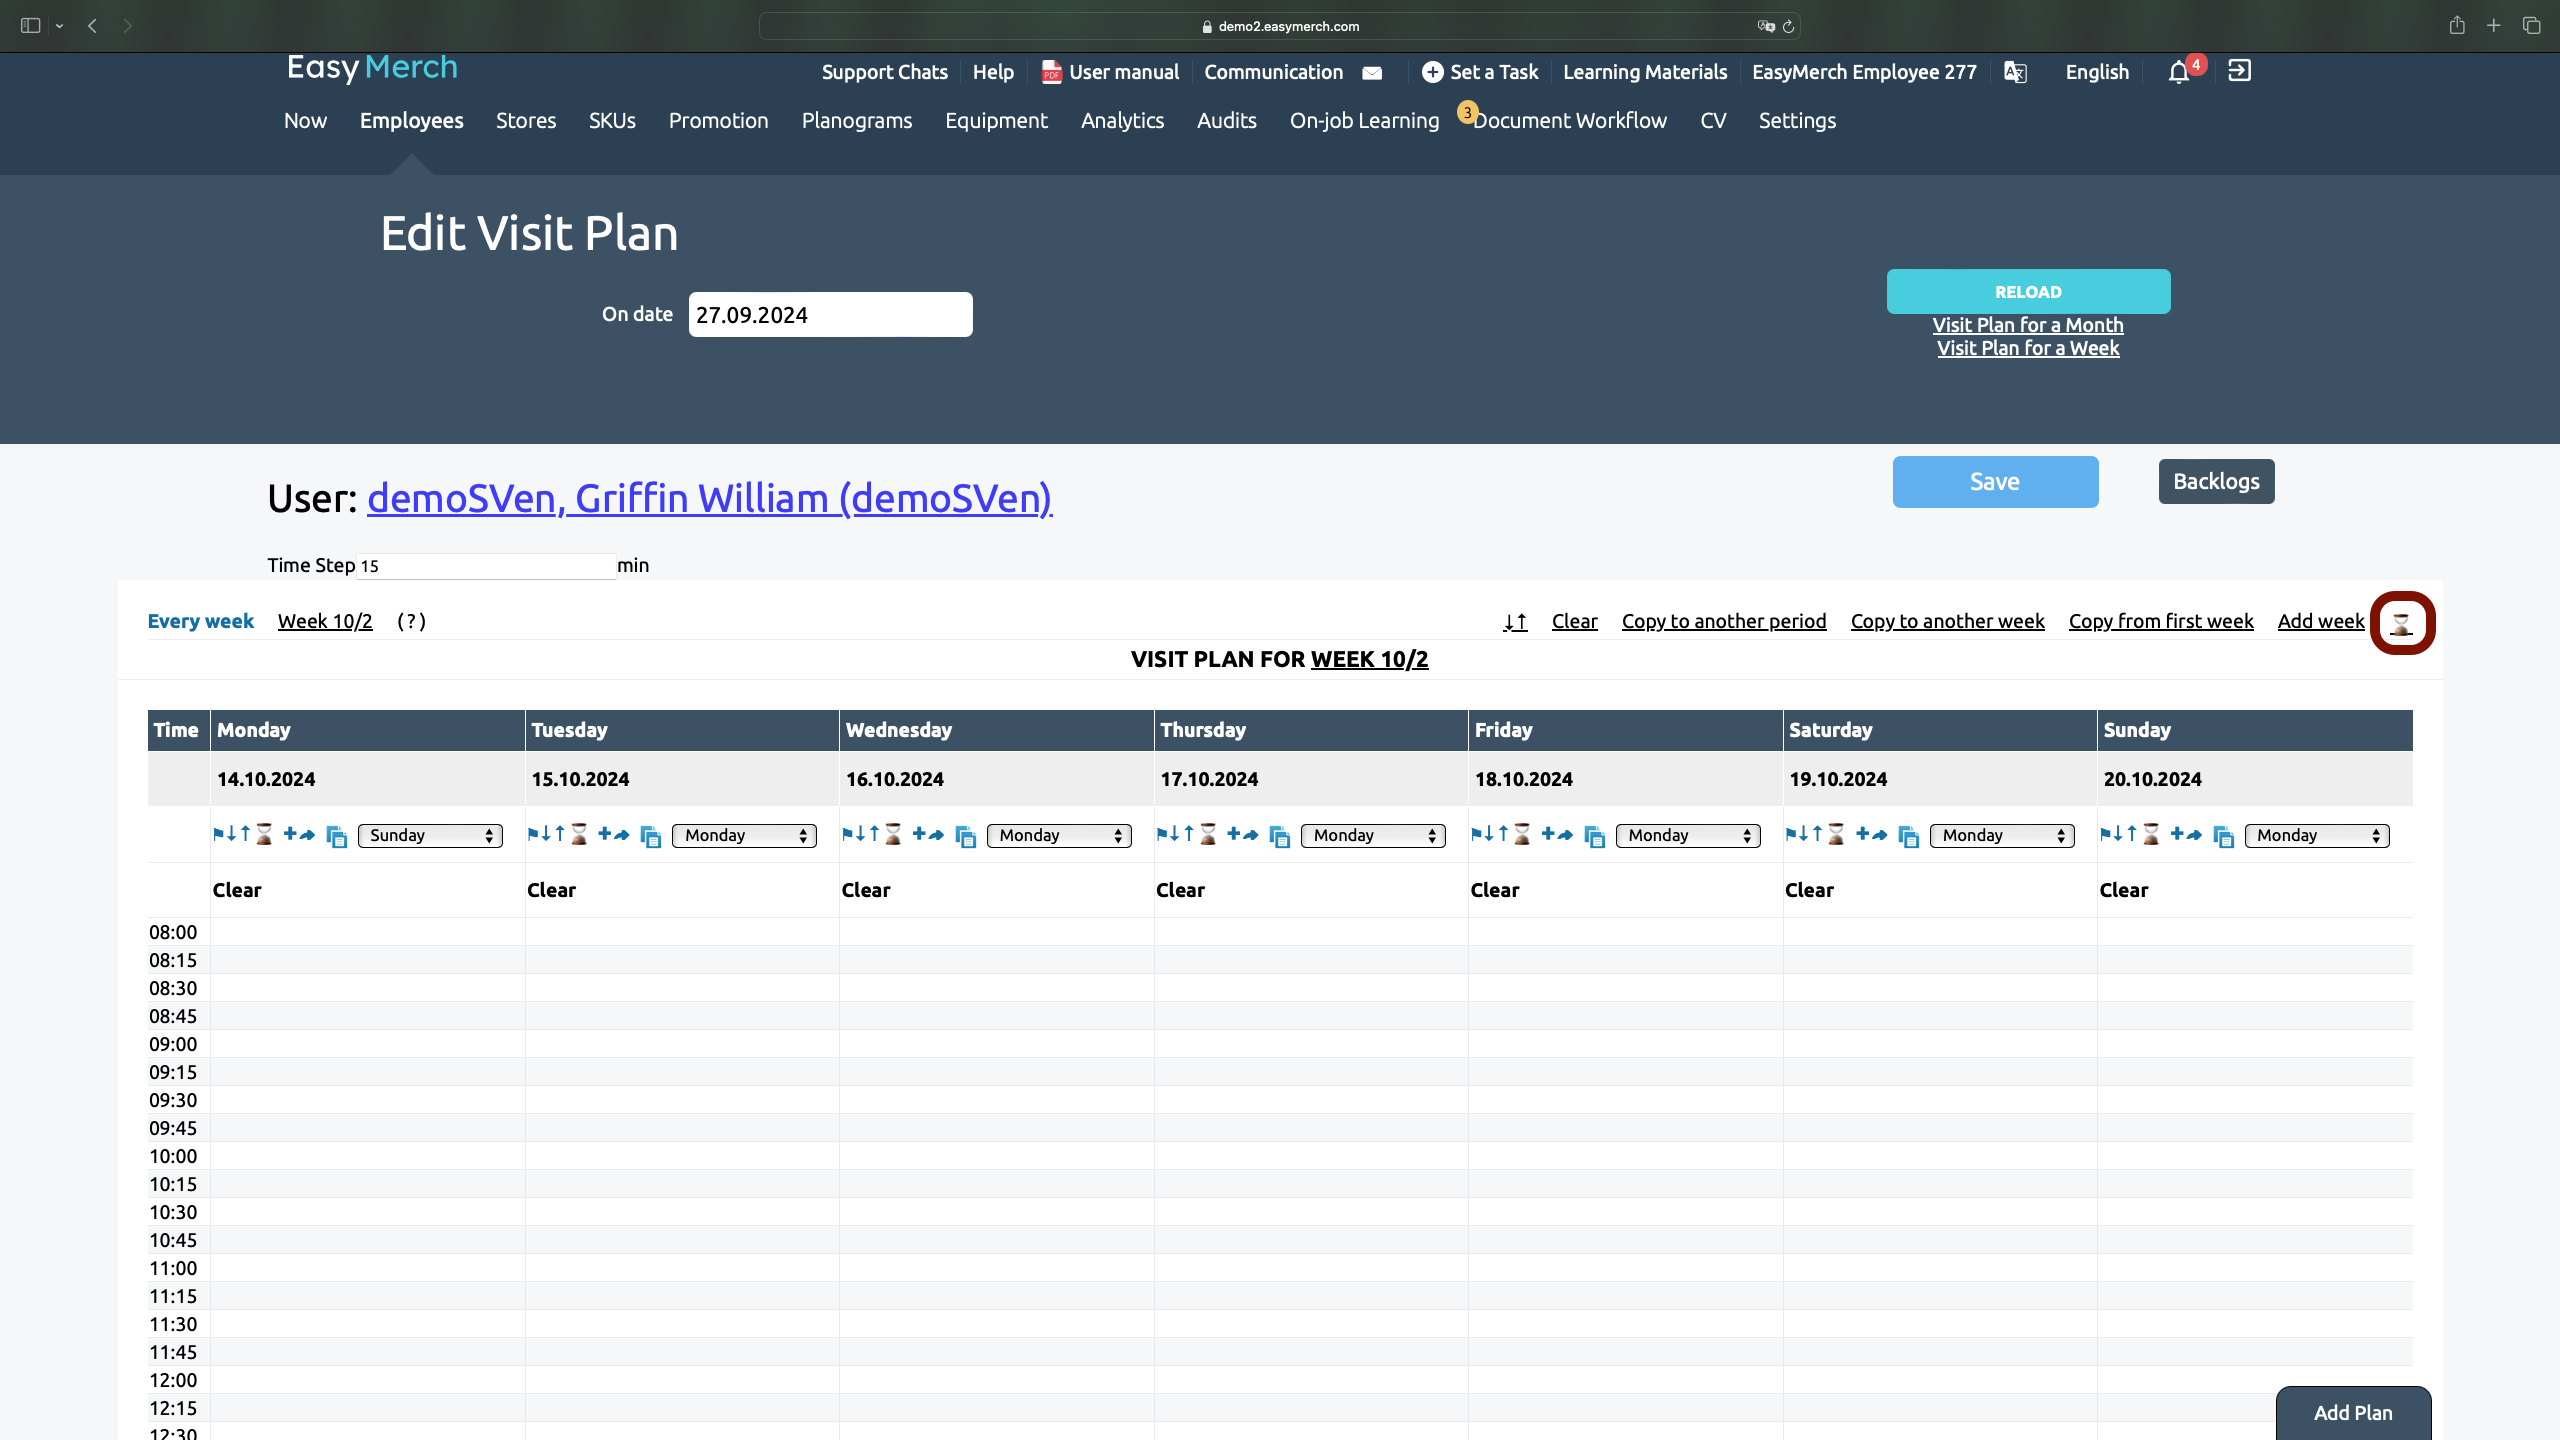
6. To copy Visit Plan from another day of the week, select the day (for example, we decided to copy the plan from Sunday to Monday) and click on ![]()
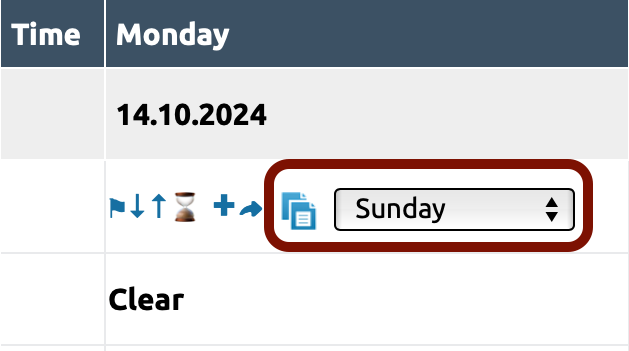
7. Click on ![]() to view Visit Plan on the map. Click «to plan» to close the map
to view Visit Plan on the map. Click «to plan» to close the map
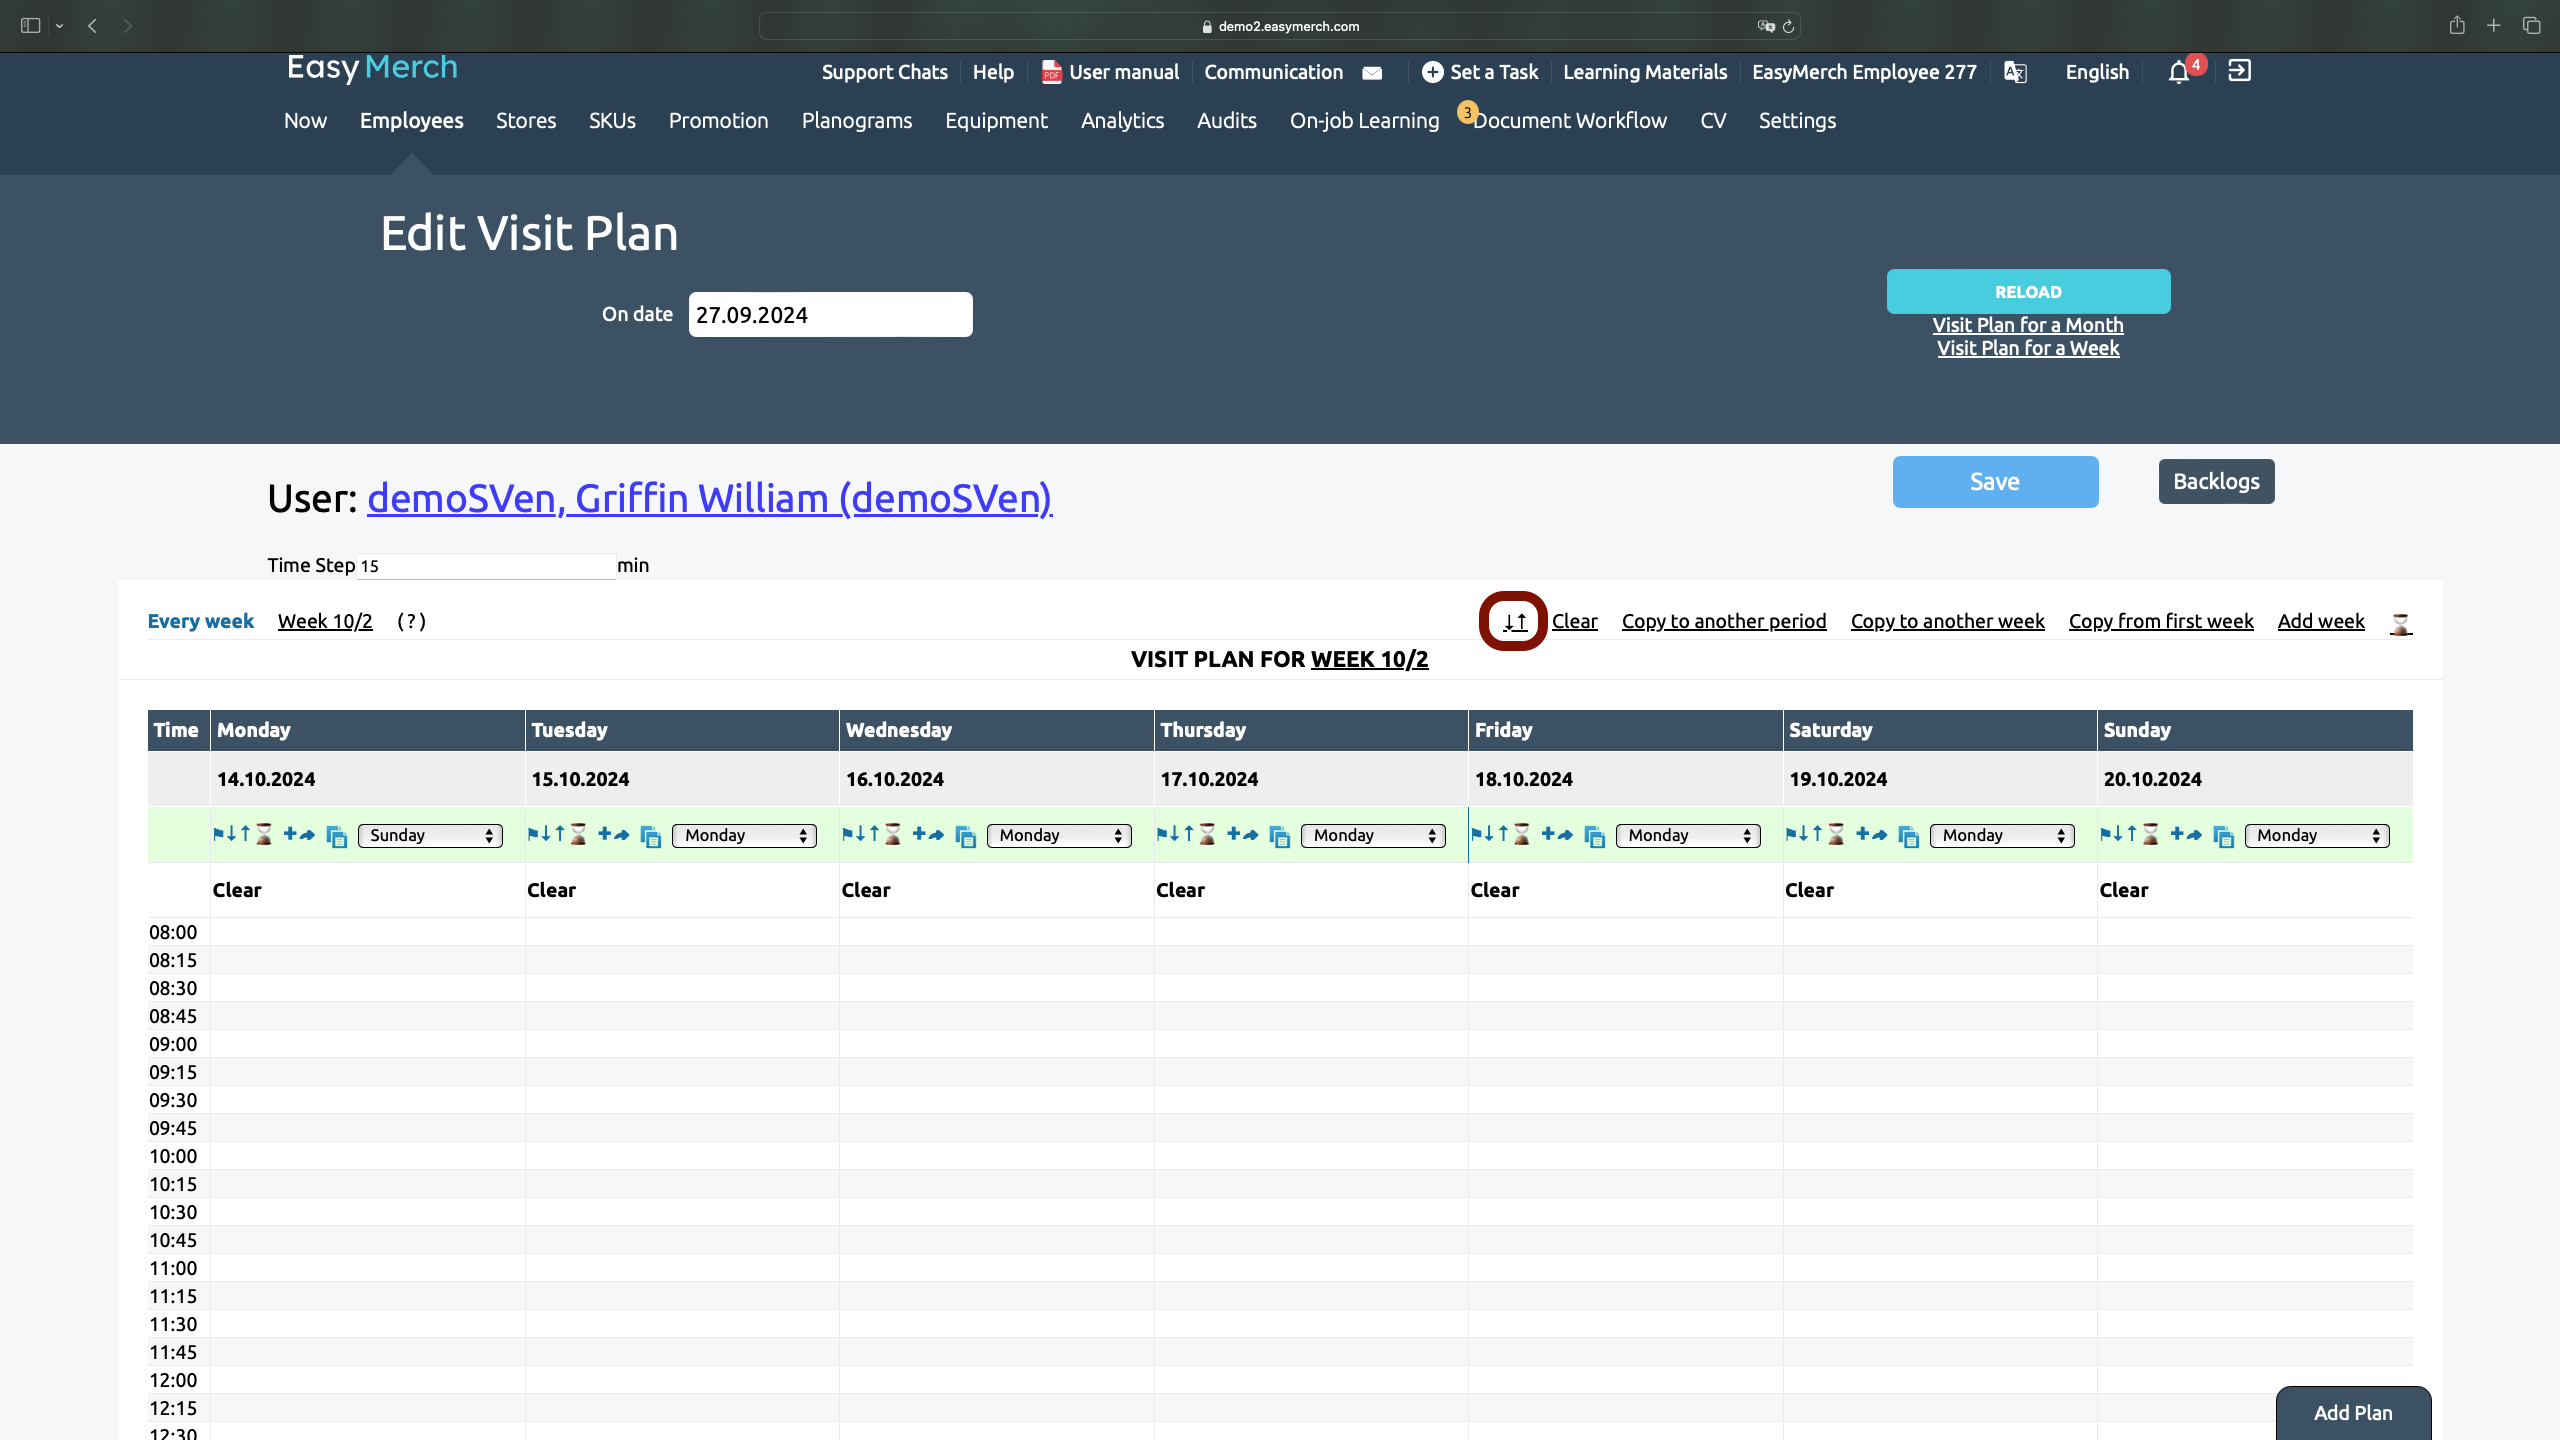
8. Click on ![]() or
or ![]() to move visits on the selected day one line down or up
to move visits on the selected day one line down or up
9. Click ⌛ to change the time and dates of visits for the selected day
10. Click ![]() to add a visit on the selected day of the week
to add a visit on the selected day of the week
11. Click ![]() to reschedule visits to another day of the week
to reschedule visits to another day of the week
Visits Off-Schedule
You can add unscheduled visits to your plan. Retail outlets that are visited outside of scheduled hours are always visible to employees, regardless of the day of the week.
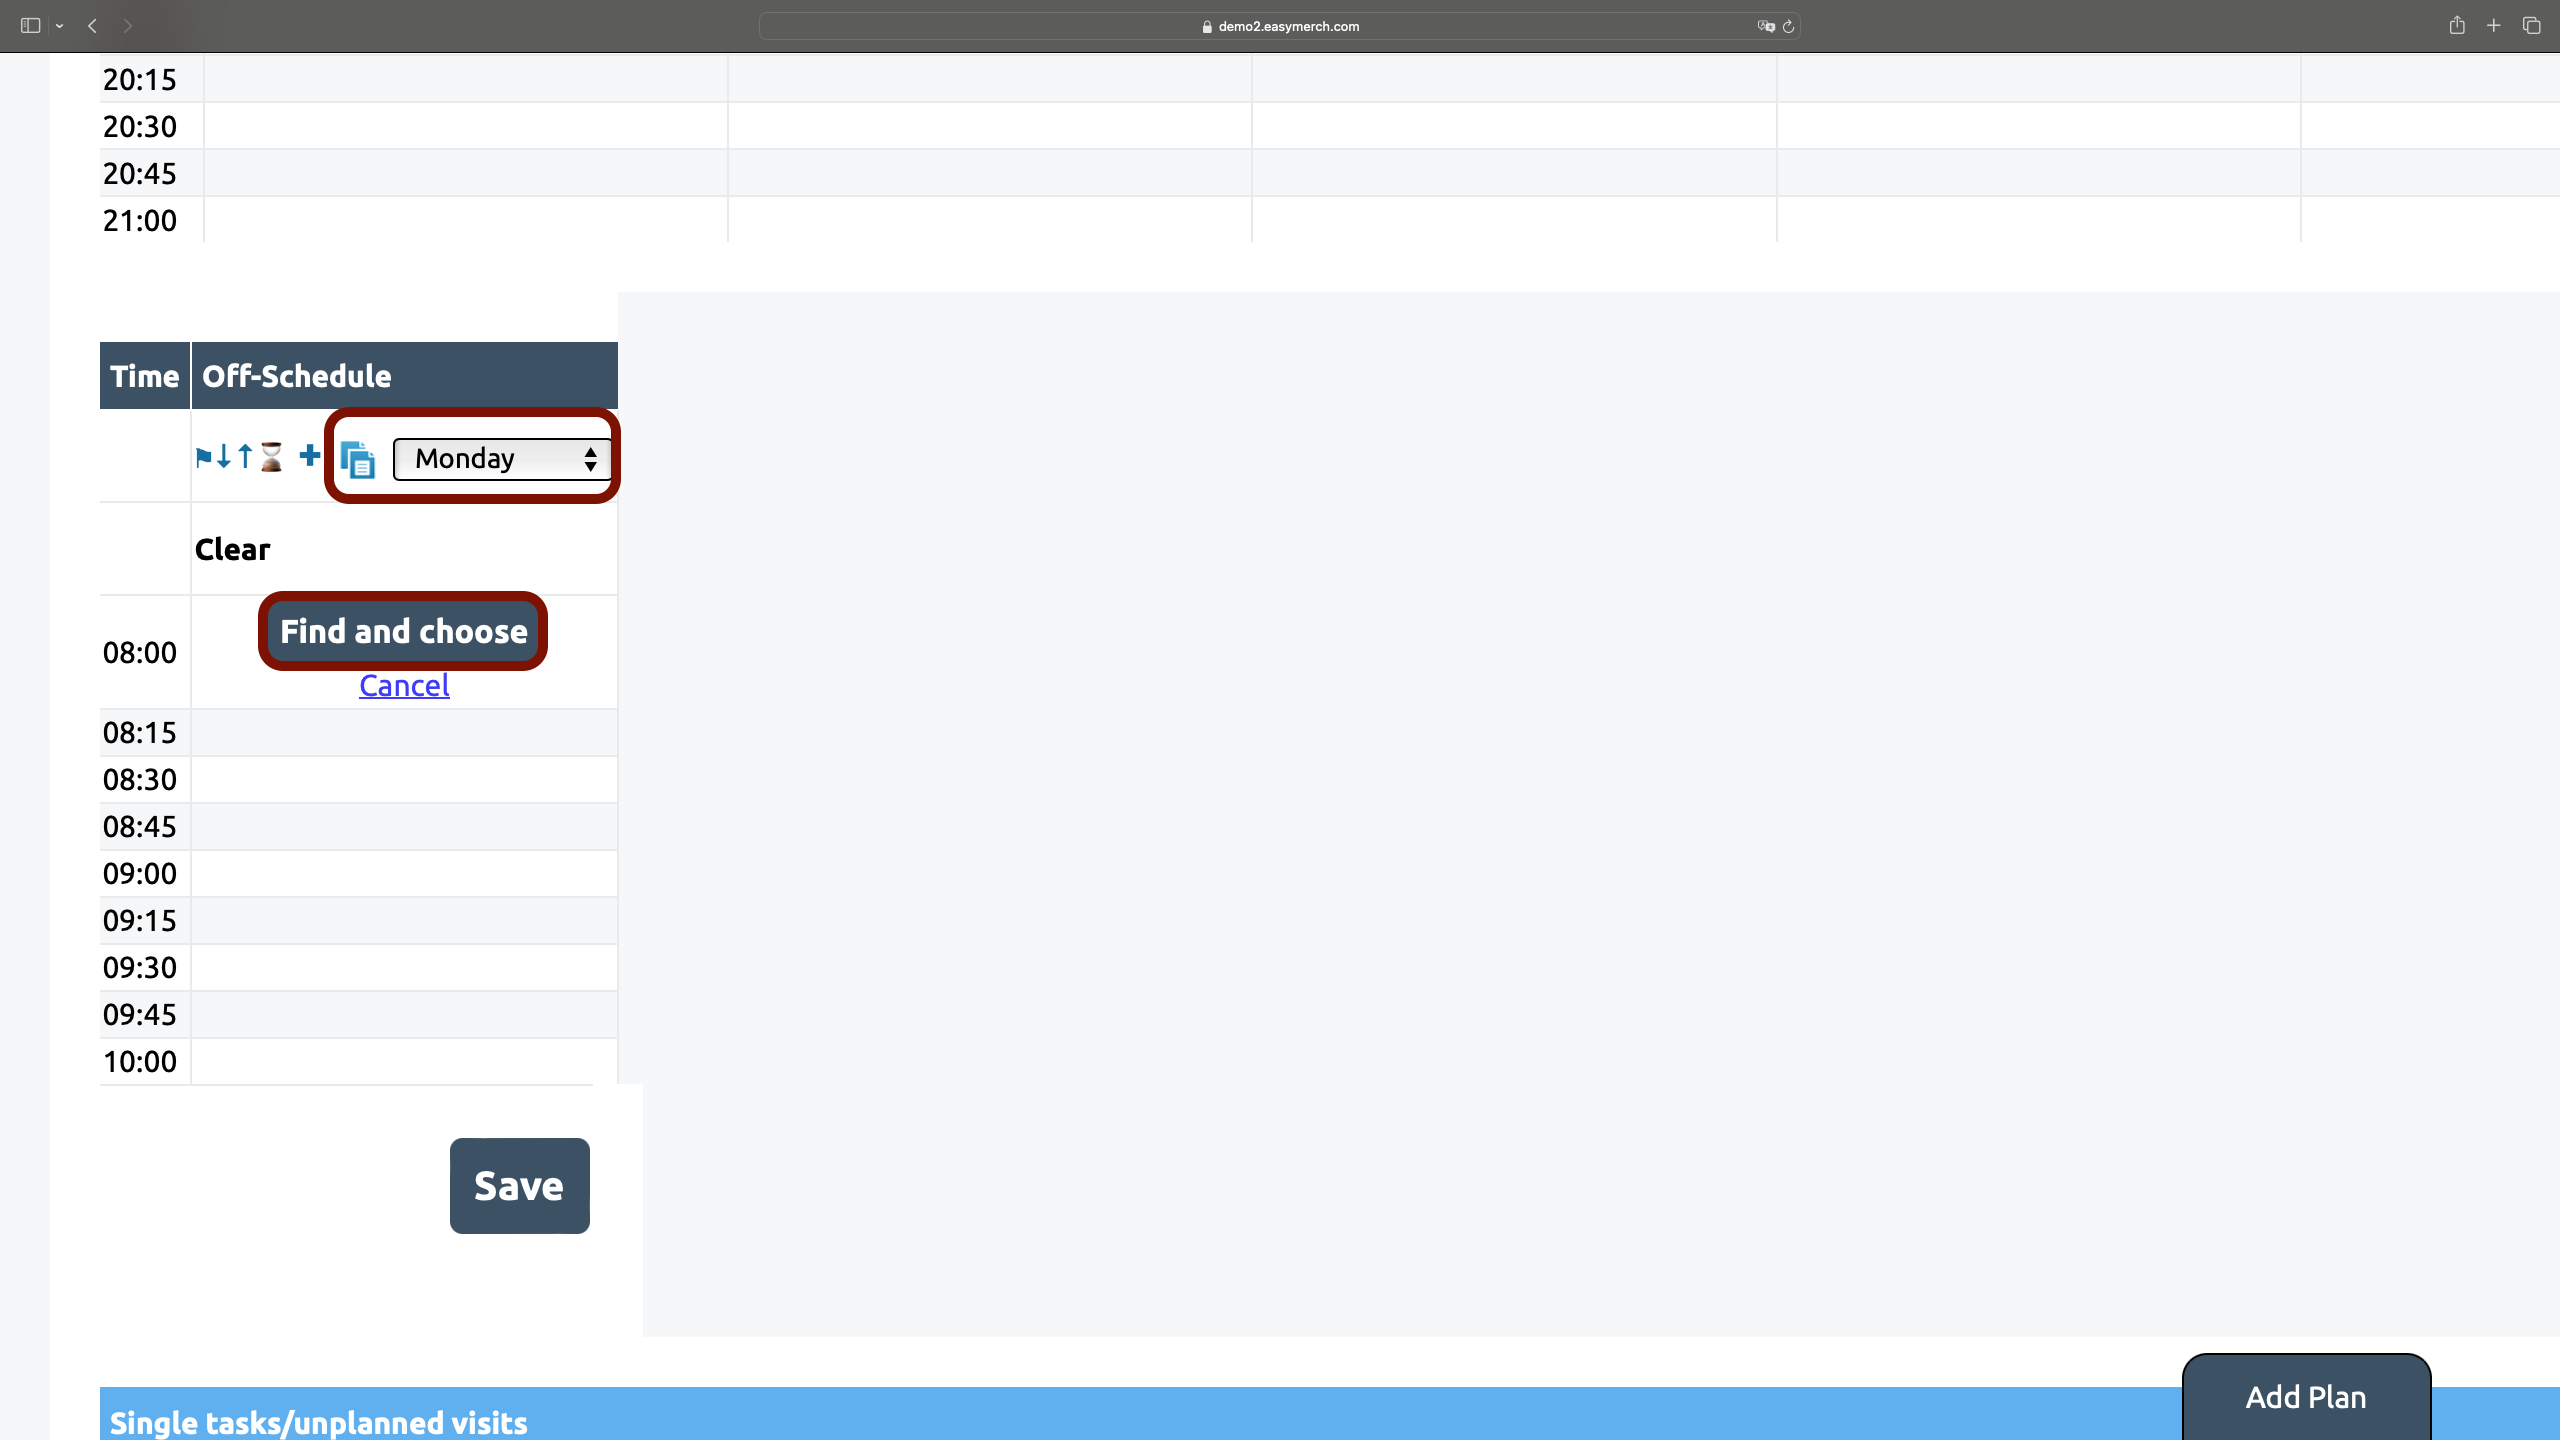
1. Open «Visit Plan»0 and scroll down the page to the “Off-Schedule” section
2. First, select the time of your visit and click on the empty field with it, and then on the “Find and choose” button that appears
3. A window will open as in editing a visit plan, you can fill it out in the same way
4. At the top of the «Off-Schedule» section you can edit all unscheduled visits. Its functionality is the same as editing scheduled visits:
- Click on ![]() to see Visit Plan on the map. Click «to plan» to close the map
to see Visit Plan on the map. Click «to plan» to close the map
- Click on ![]() or
or ![]() to move visits on the selected day one line down or up
to move visits on the selected day one line down or up
- Click ⌛ to calculate the planned time of visits
- Click ![]() to add a visit to «Off-Schedule»
to add a visit to «Off-Schedule»
- Click ![]() to reschedule visits to another day of the week
to reschedule visits to another day of the week
- Click ![]() to copy Visit Plan from any day of the week (we decided to copy from Monday)
to copy Visit Plan from any day of the week (we decided to copy from Monday)
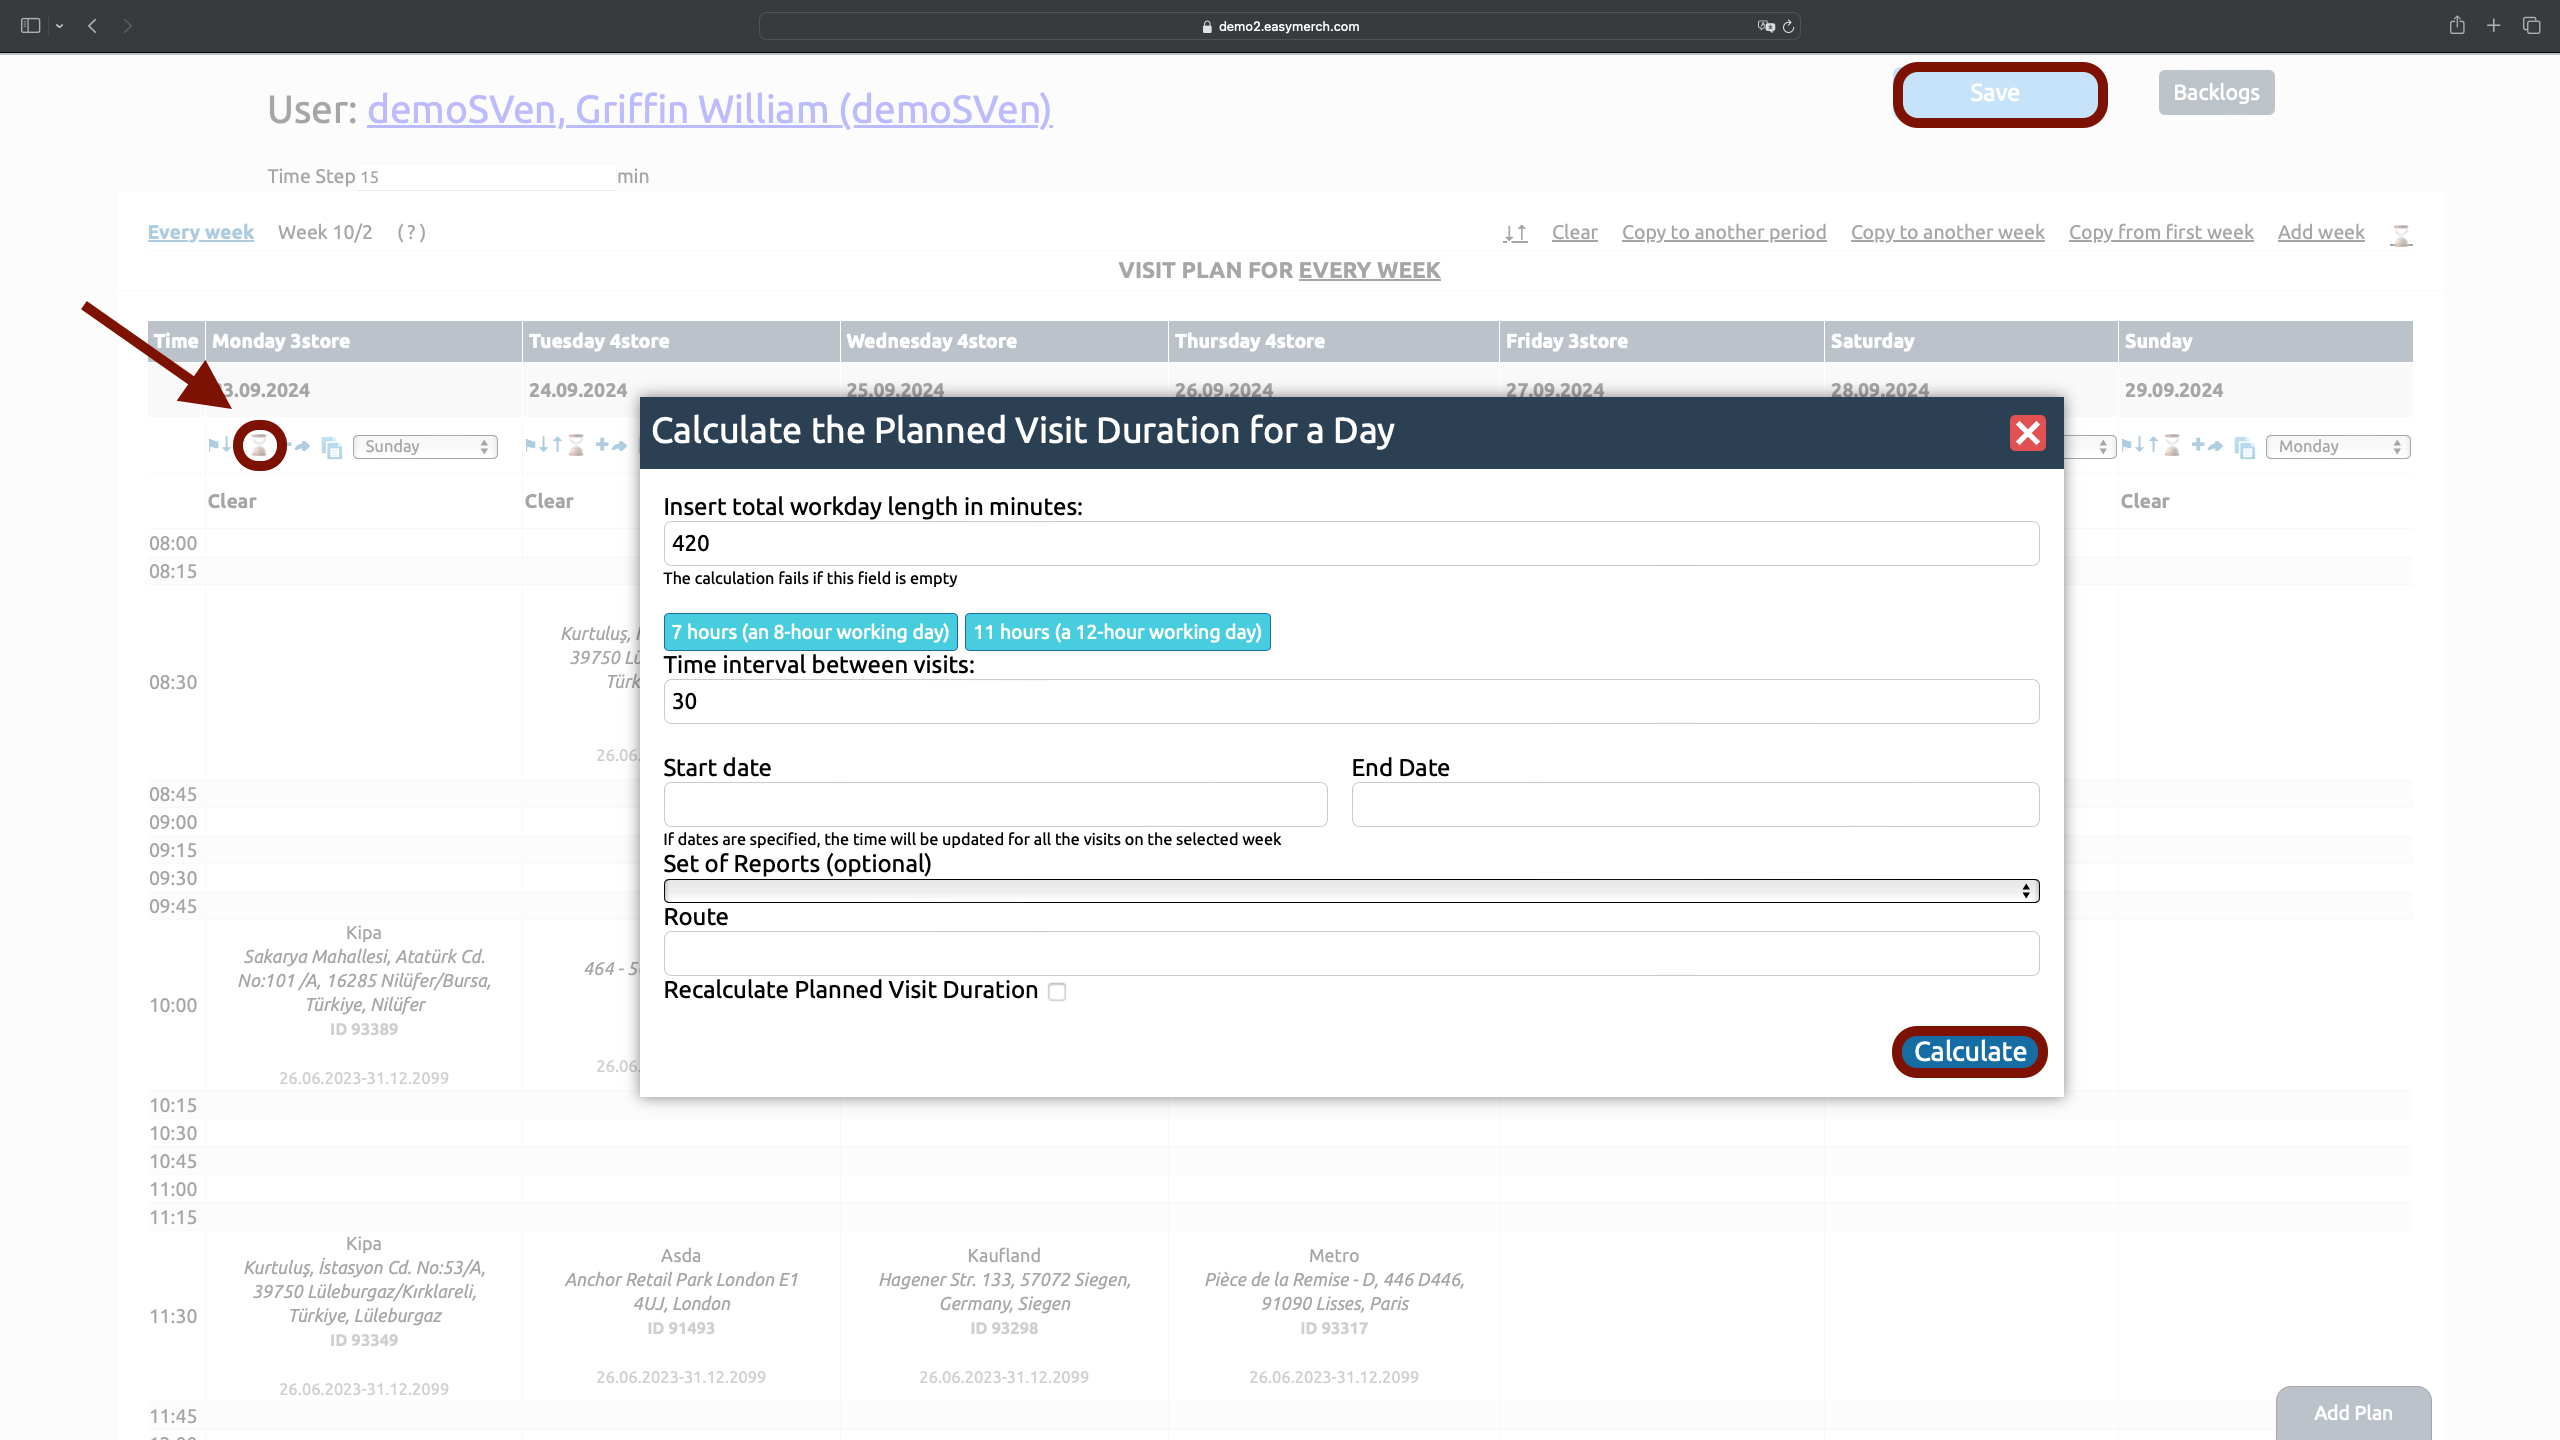
Changing visit times per day
1. Click on ⌛ under the desired day of the week
2. You can manually specify the total time for the day in minutes or select a ready-made option (7 hours or 11 hours), the hours will automatically convert to minutes
3. You can enter the interval between visits if necessary
4. Specify the start and end date if you want to immediately change the entire visit period for which the retail outlets will be available to the employee
5. You can select Set of reports if necessary
6. You can find a route that requires you to specify a planned visit time. Start typing a route name and select routes from the suggested routes
7. Check the Recalculate planned visit time checkbox to update data on visit times for the specified period
8. Click «Calculate»
9. Don’t forget to save your changes using the «Save» button
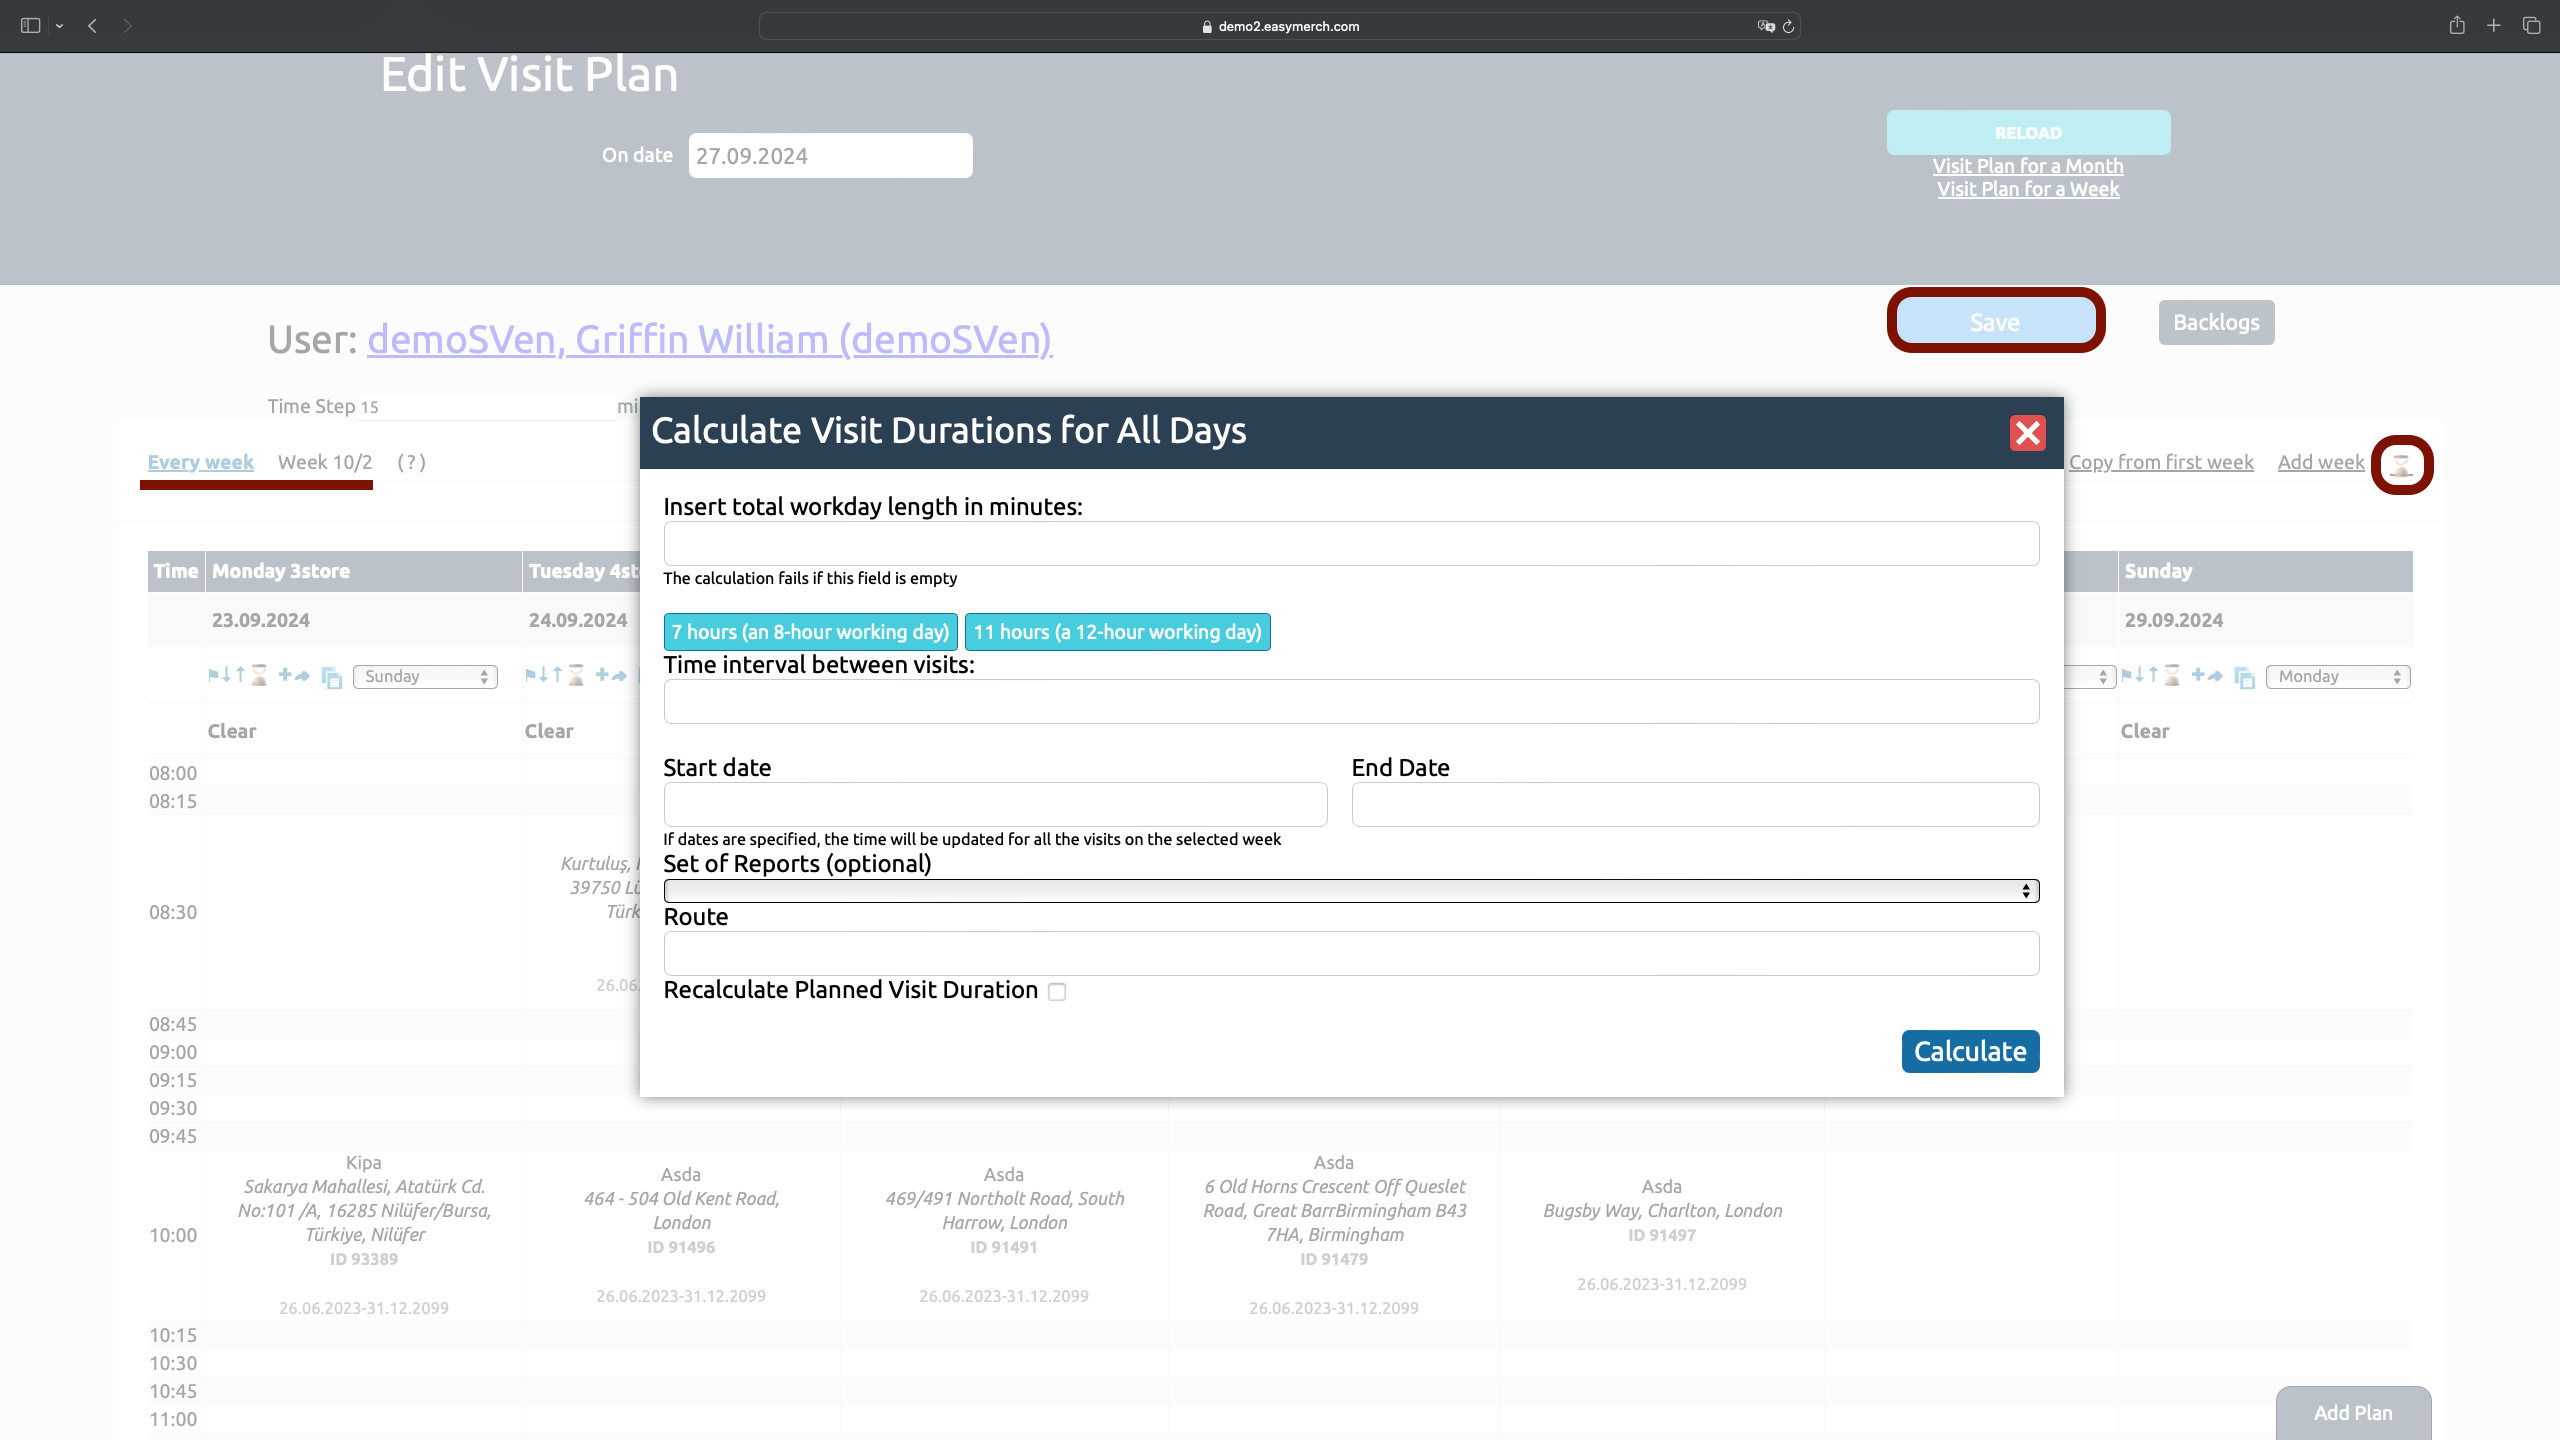
Changing visit times per week
1. Select the required week for which you want to change the time of visits (for example, «Every week»)
2. Click on ⌛ above the visit plan
3. You can manually specify the total time for the day in minutes or select a ready-made option (7 hours or 11 hours), the hours will automatically convert to minutes
4. You can enter the interval between visits if necessary
5. Specify the start and end date if you want to immediately change the visiting period for the entire week for which retail outlets will be available to the employee
6. You can select Set of reports if necessary
7. You can find a route that requires you to specify a planned visit time. Start typing a route name and select routes from the suggested routes
8. Check the Recalculate planned visit time checkbox to update data on visit times for the specified period
9. Click "Calculate"
10. Don’t forget to save your changes using the «Save» button
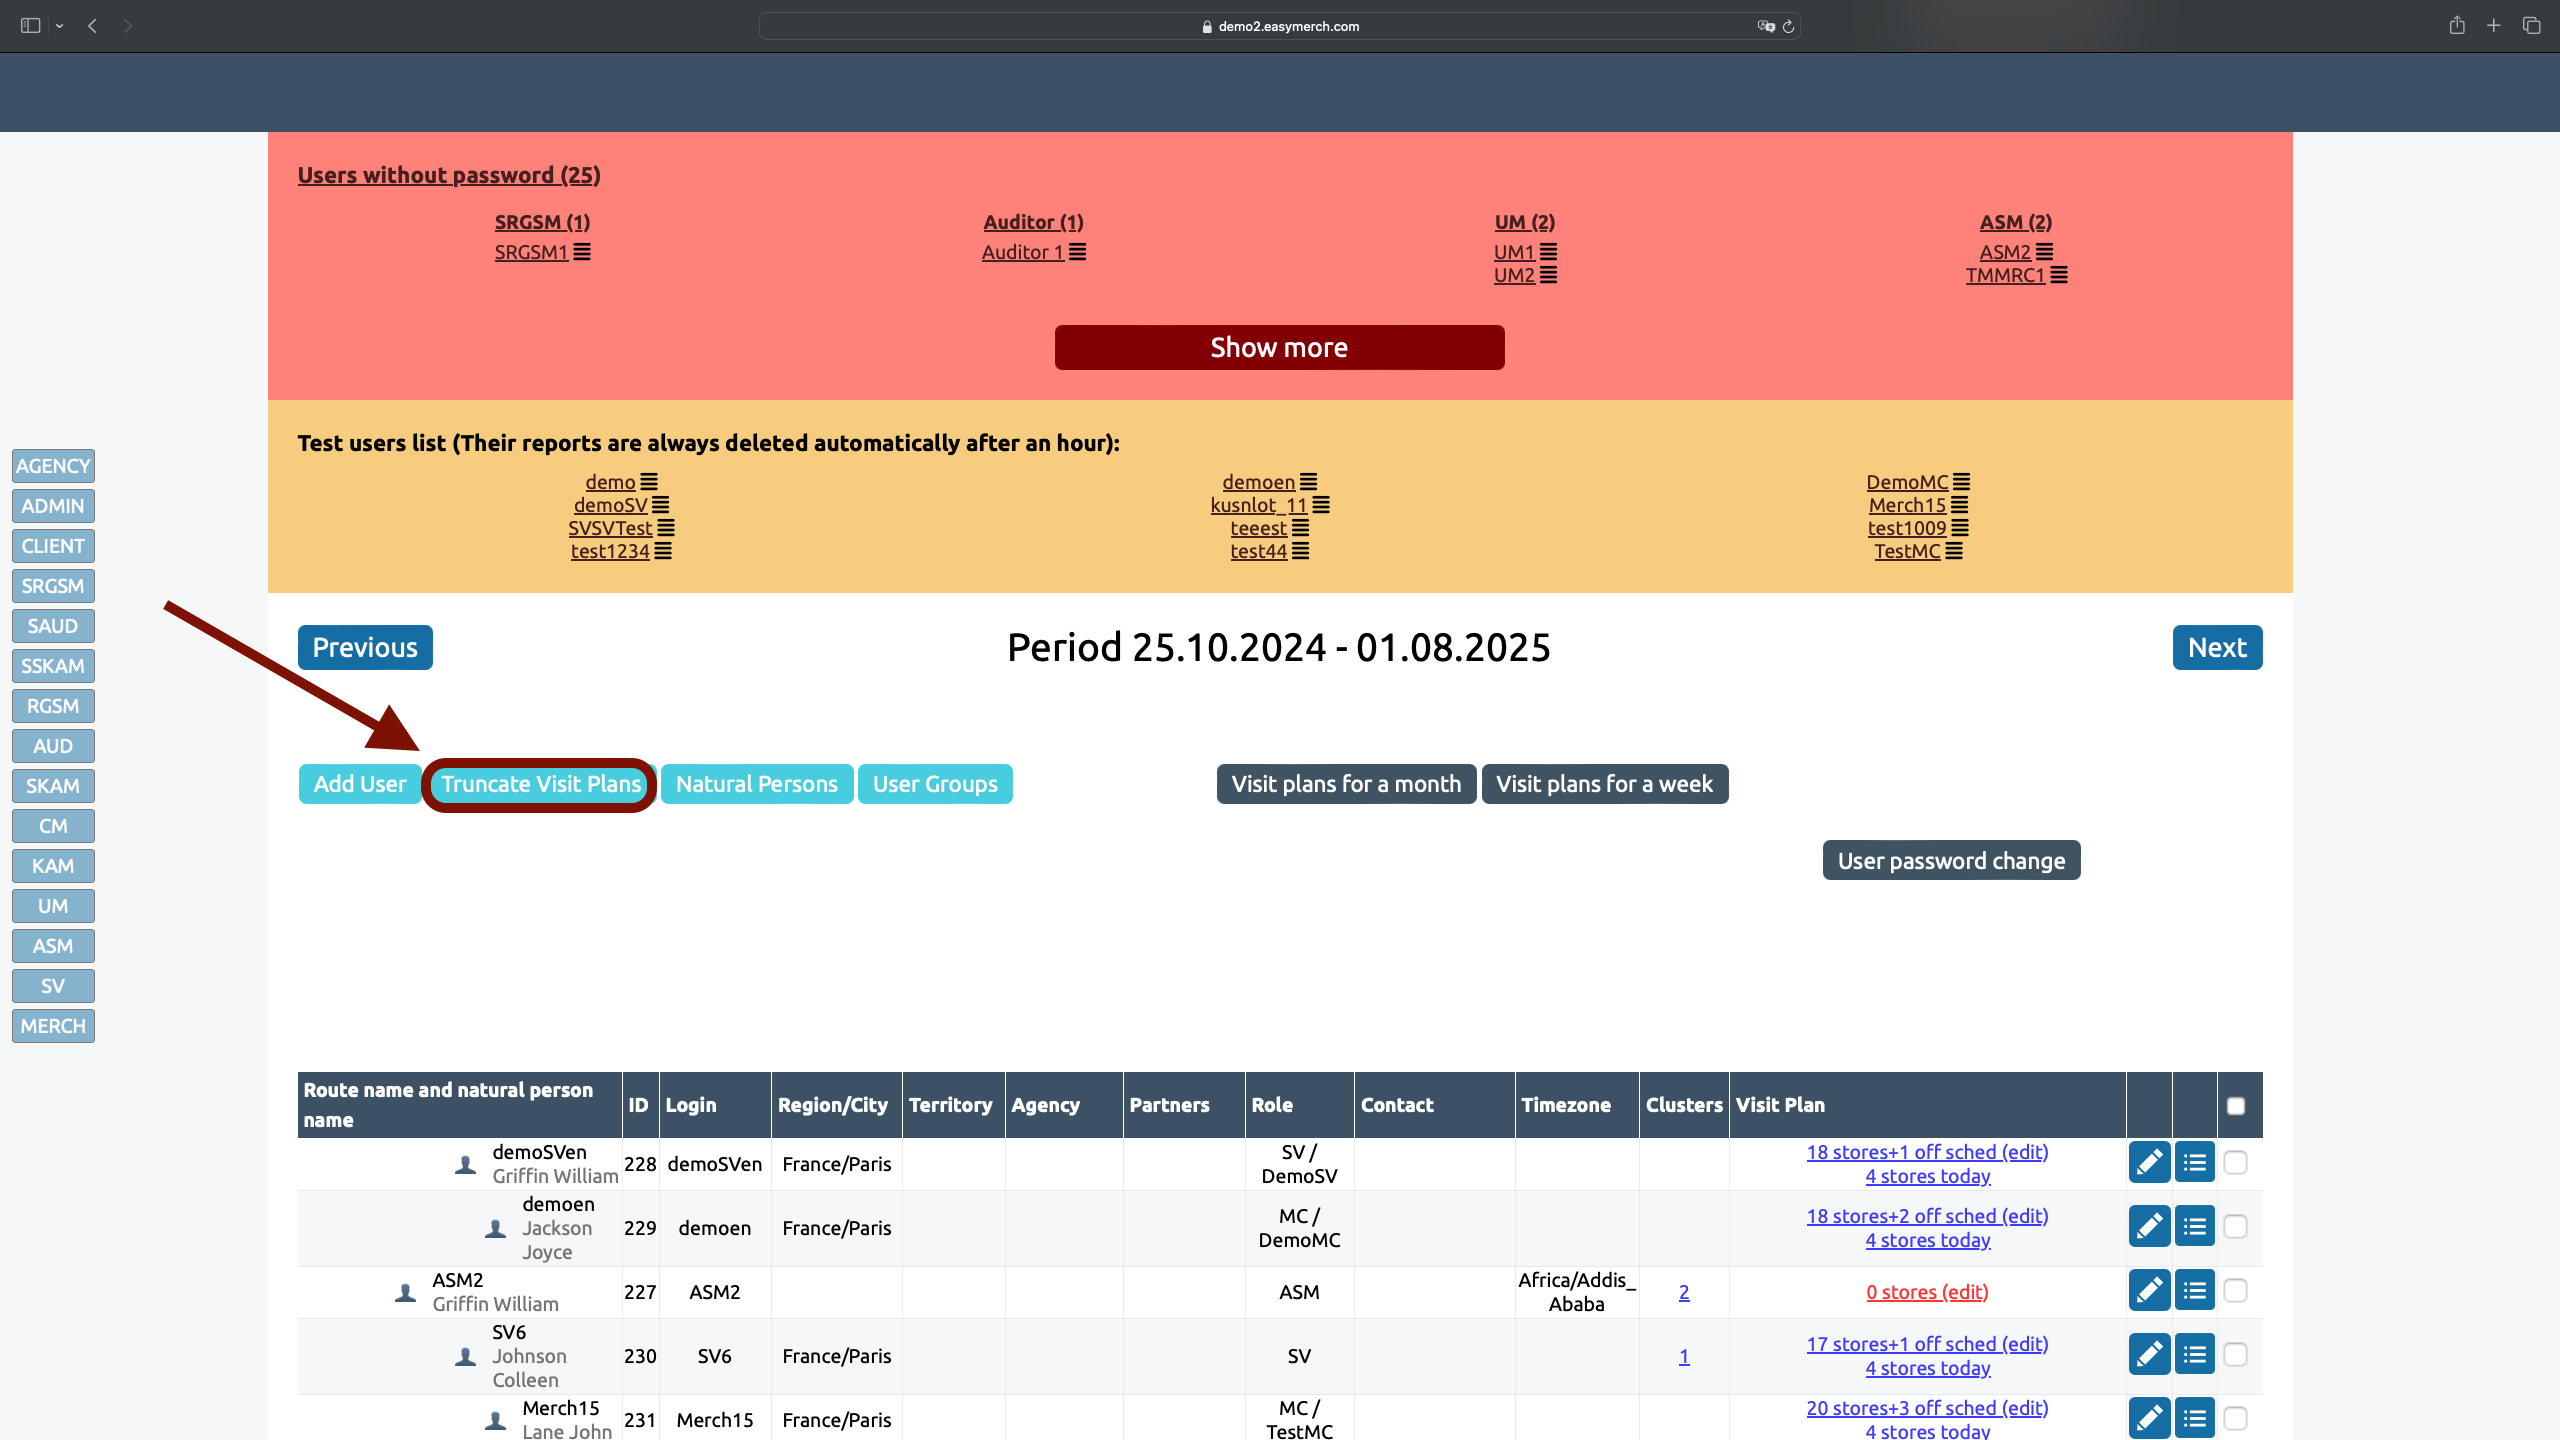
Truncation dates of visit plans
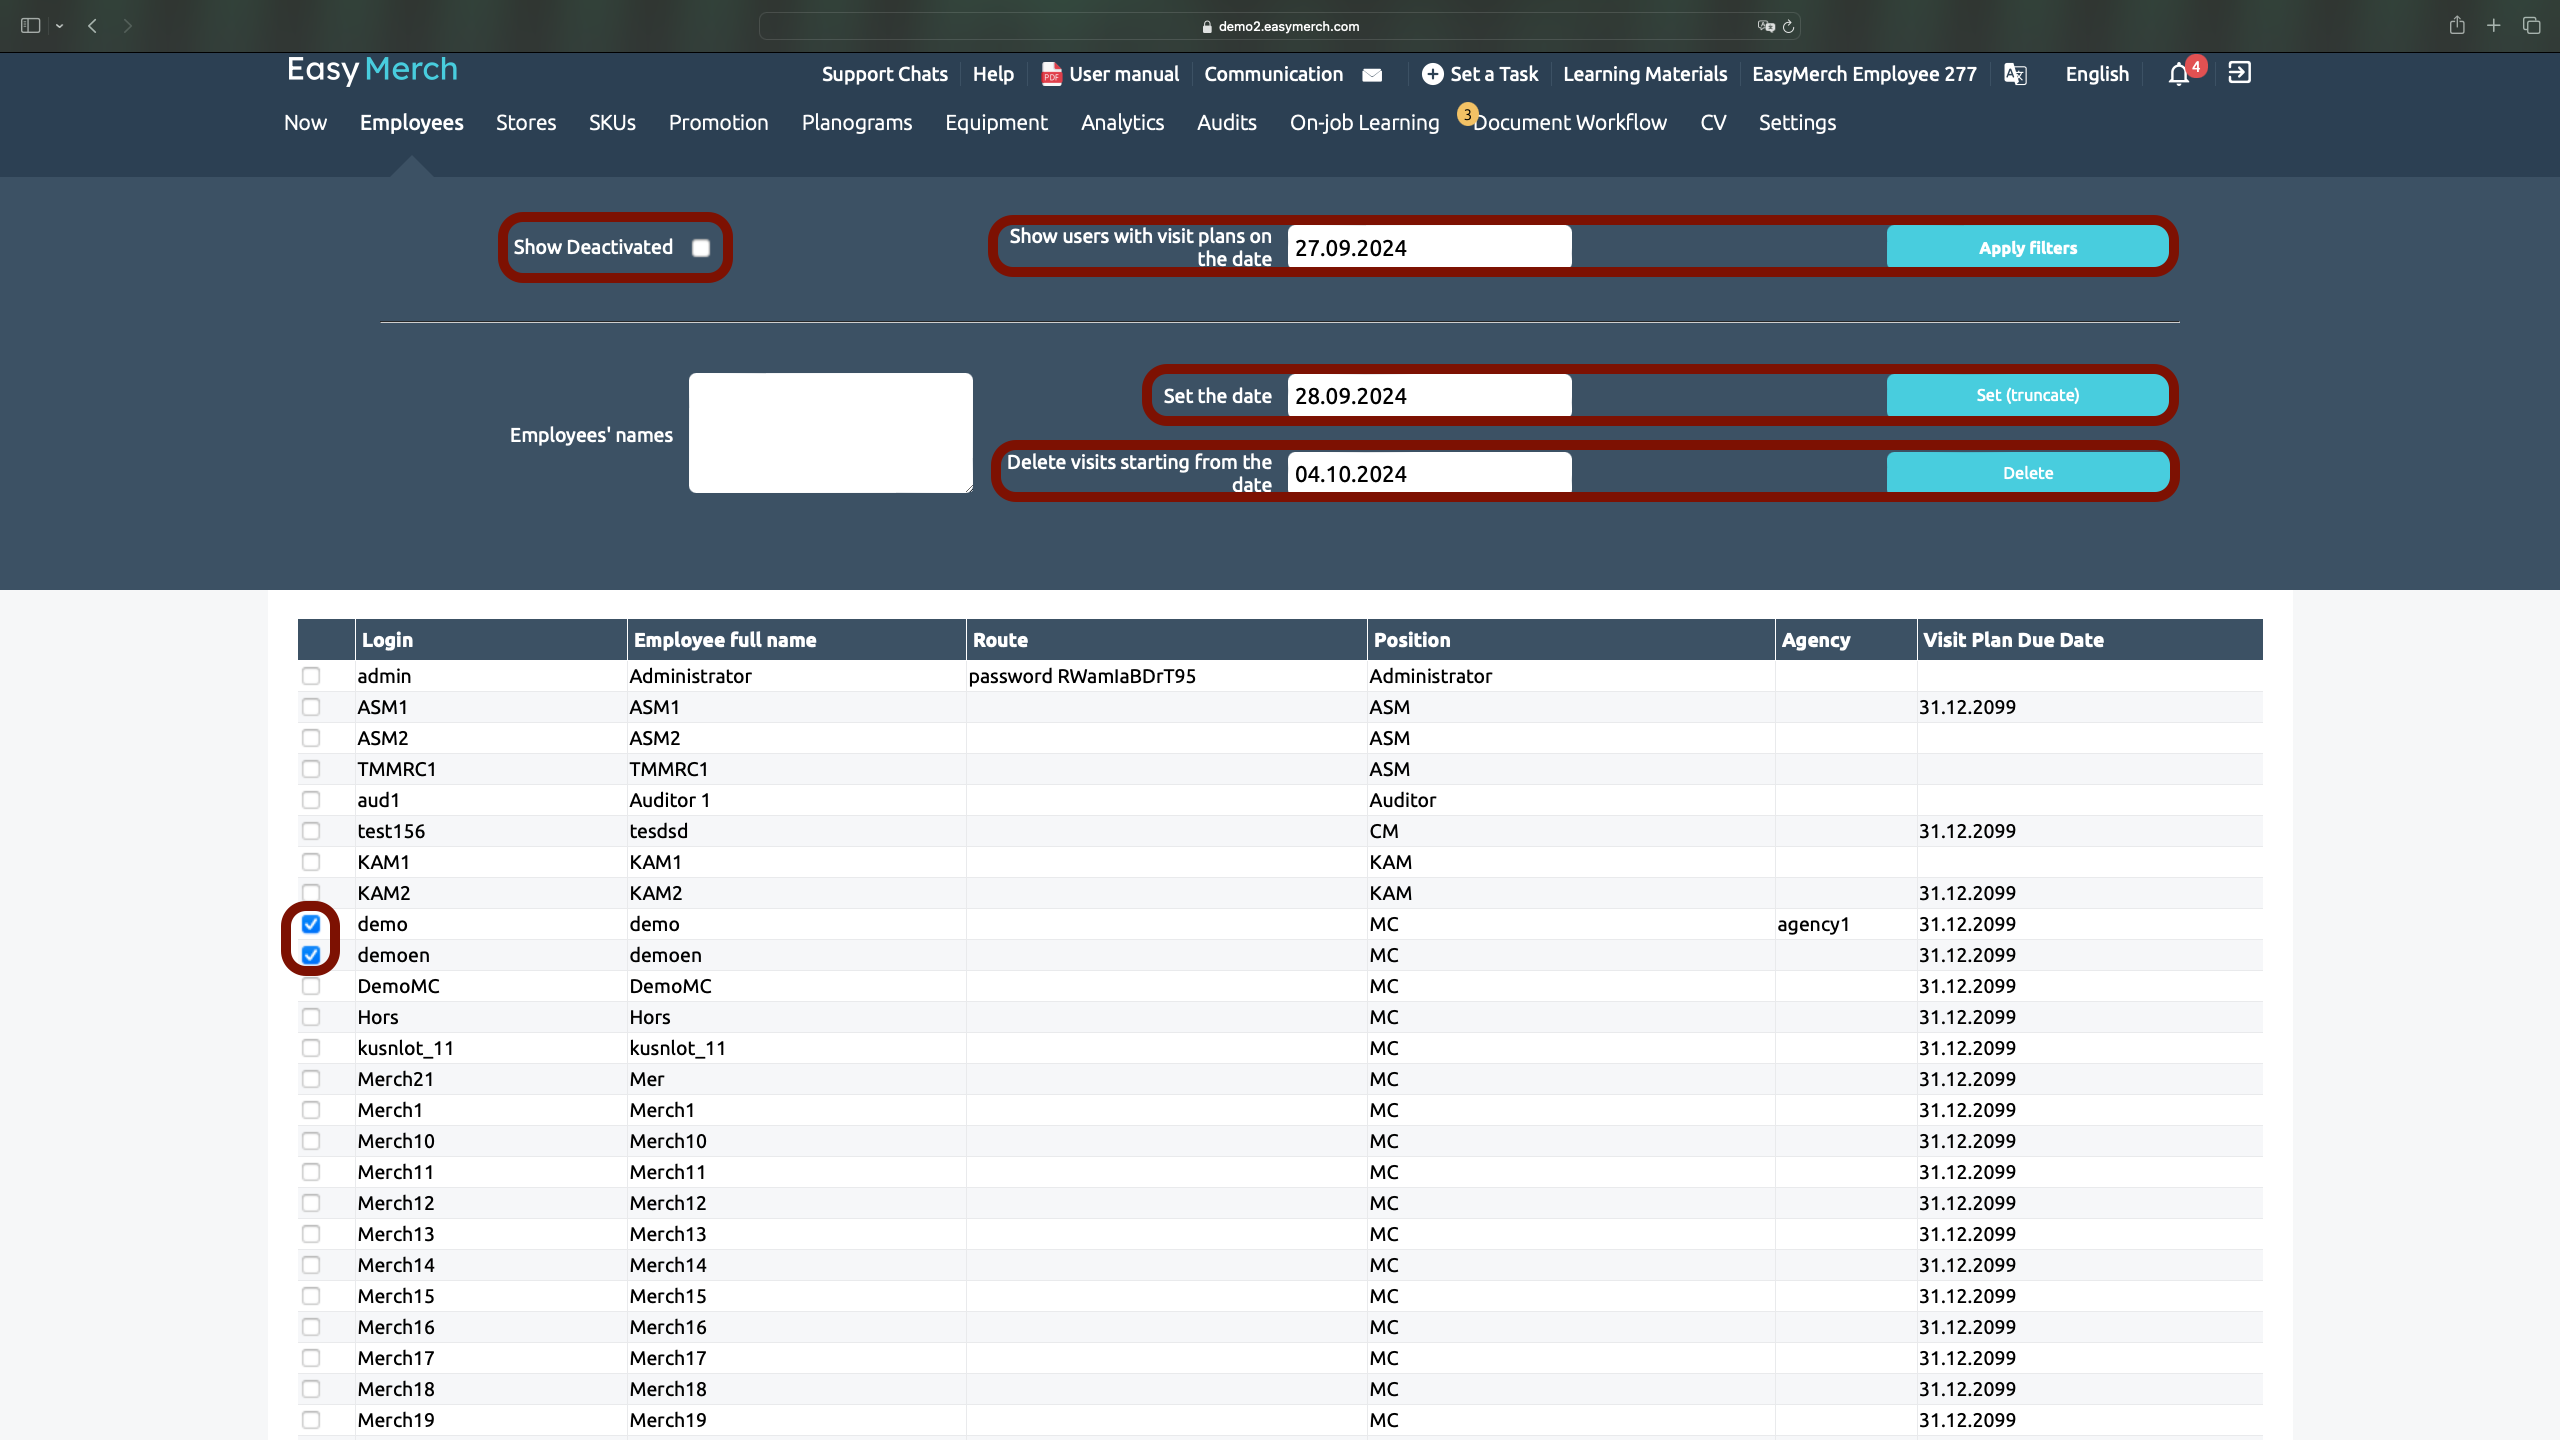
To truncate the date of visit plans for all employees at once, in the Сотрудники tab, click «Truncate Visit Plans»
1. To find the right employees, indicate the date for which they should have visit plans, and click «Apply filters»
2. If necessary, check the boxes for the required employees. You can also enter their names in the «Employees' names» field (you can have several in a column)
3. Set the date in the appropriate field and click «Set (truncate)», and then the visiting plans of the selected employees will be shortened to the set date. For example, if an employee had a Visit Plan until 12/31/2025, and you set the date to 09/28/2024, then the employee’s Visit Plan will be shortened to 09/28/2024 inclusive (the end date of the visit changes)
4. Set the date in the appropriate field and click «Delete», and then visit plans, starting from the next date after the set one, will be deleted from the selected employees. For example, if an employee had Visit Plan for the period until 12/31/2025, and you set the date to 10/04/2024, then visits starting from 10/05/2024 will be removed from the plan
The functionality for trimming visit plans is similar; each employee chooses how it is more convenient for him to do this
