Setting up rules in support chats
You are able to set up rules for each category in the chat support system. These rules would trigger under certain conditions
You are able to perform the following operations by using rules automatically:
- Reply to the client's message
- Transfer chat to another category
- Set priority level for chat
- Transfer chat to another operator
Bot checks all the existing rules to confirm that it can apply them. It means that multiple rules can be applied after a single message of a user
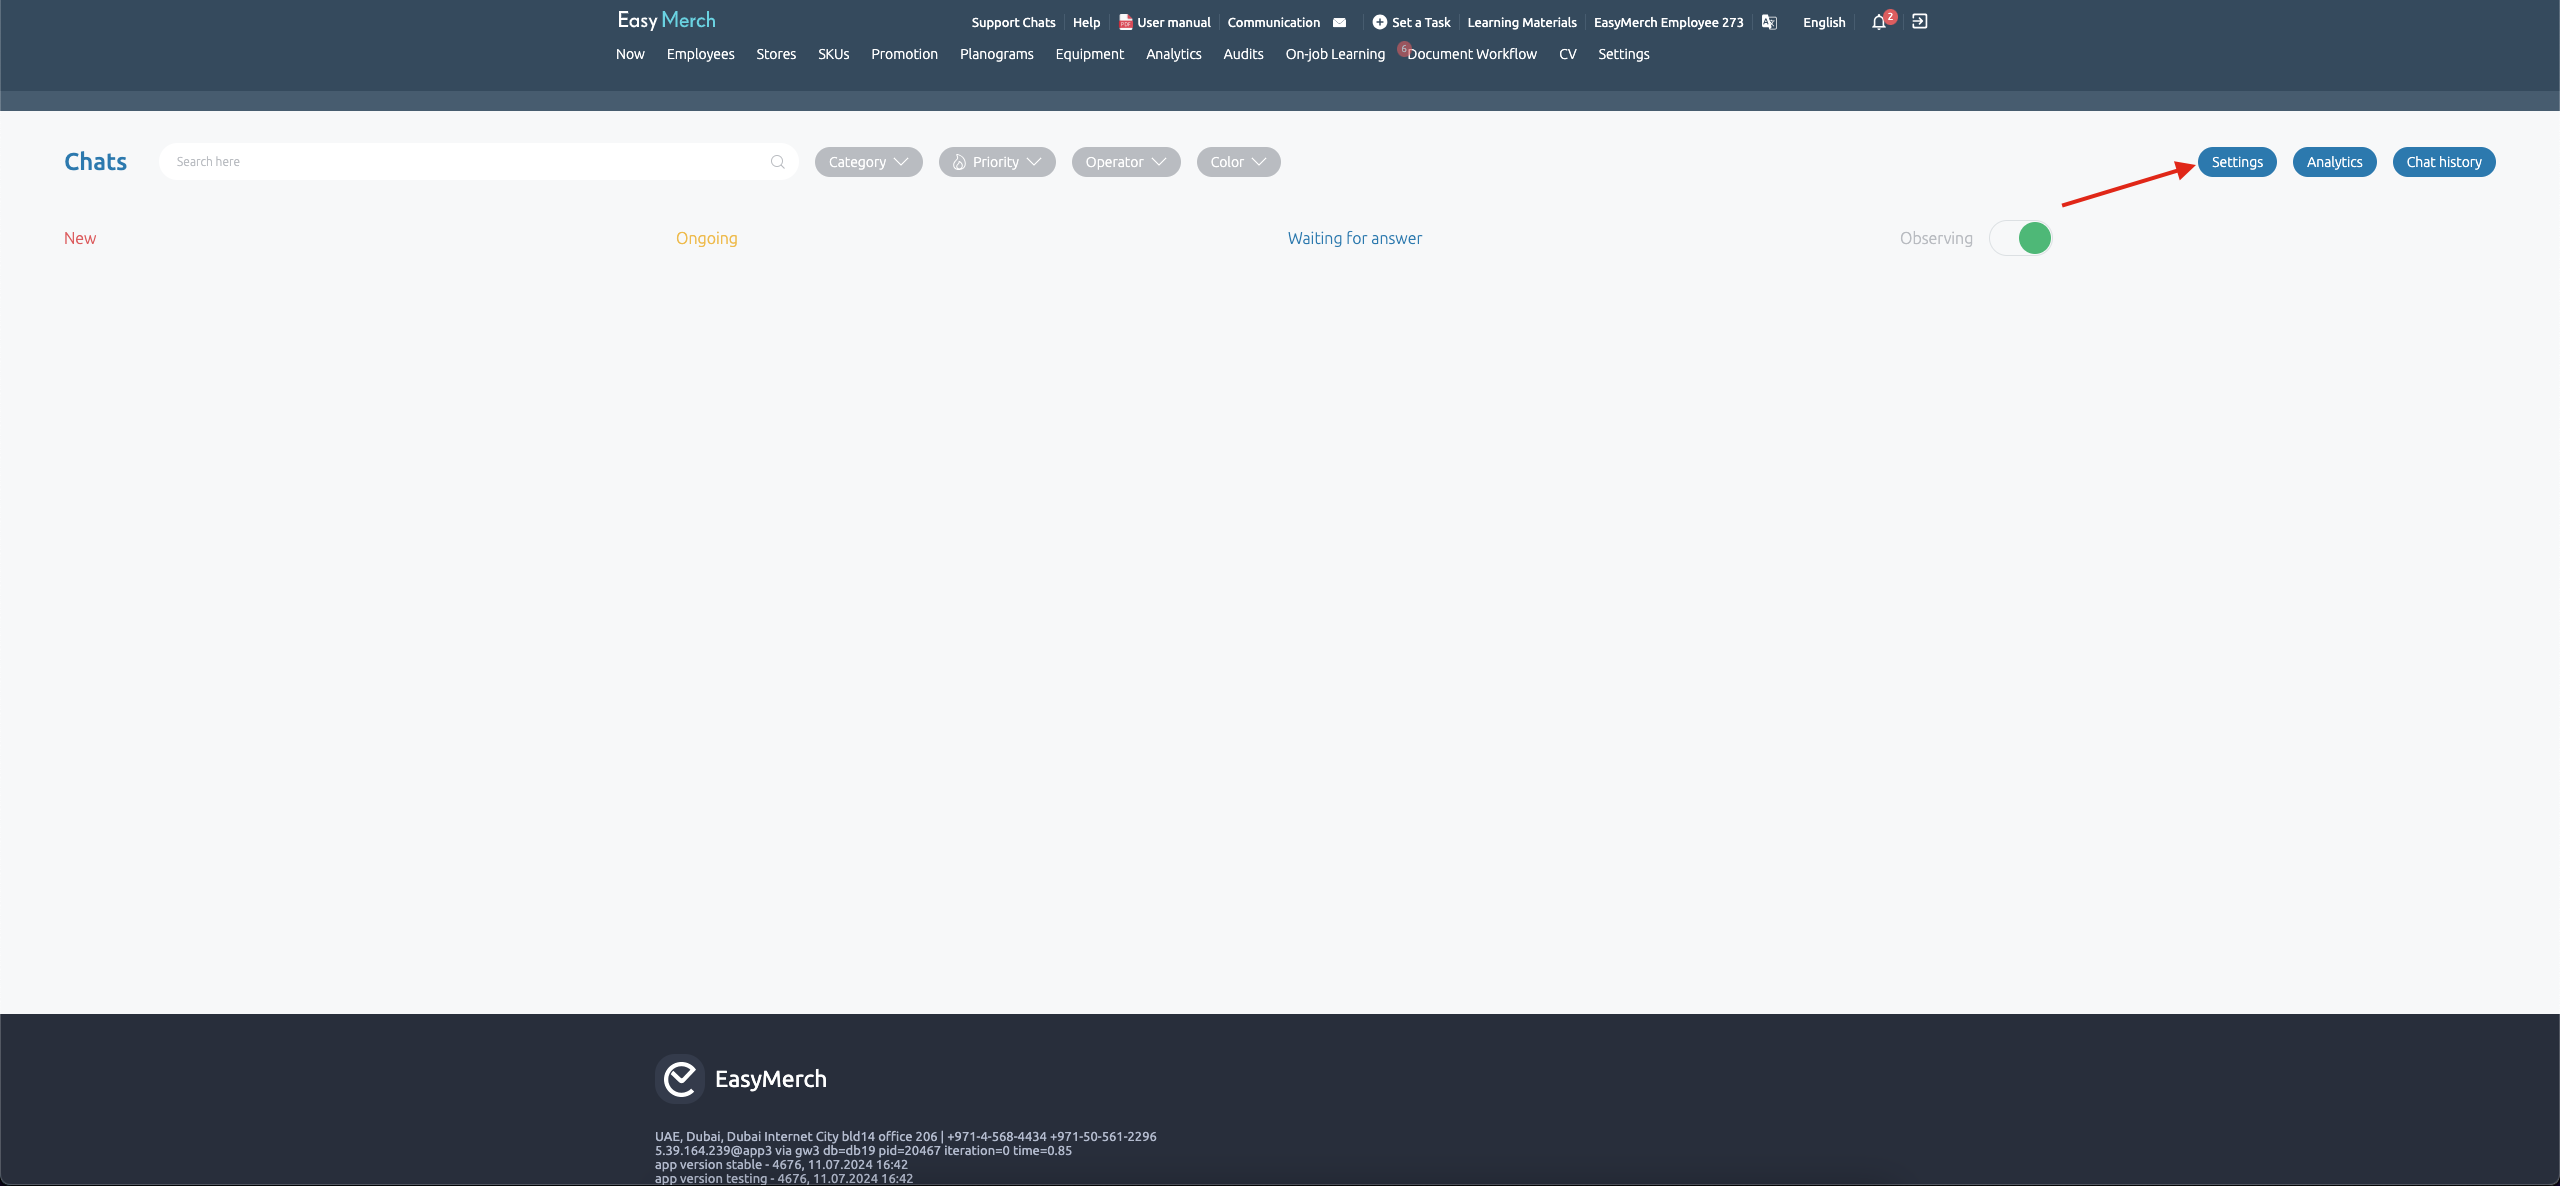
Click on "Support chats" in the site's heading to get to rules's settings or go to link
Click on "Settings" in the right part of your screen or go to link
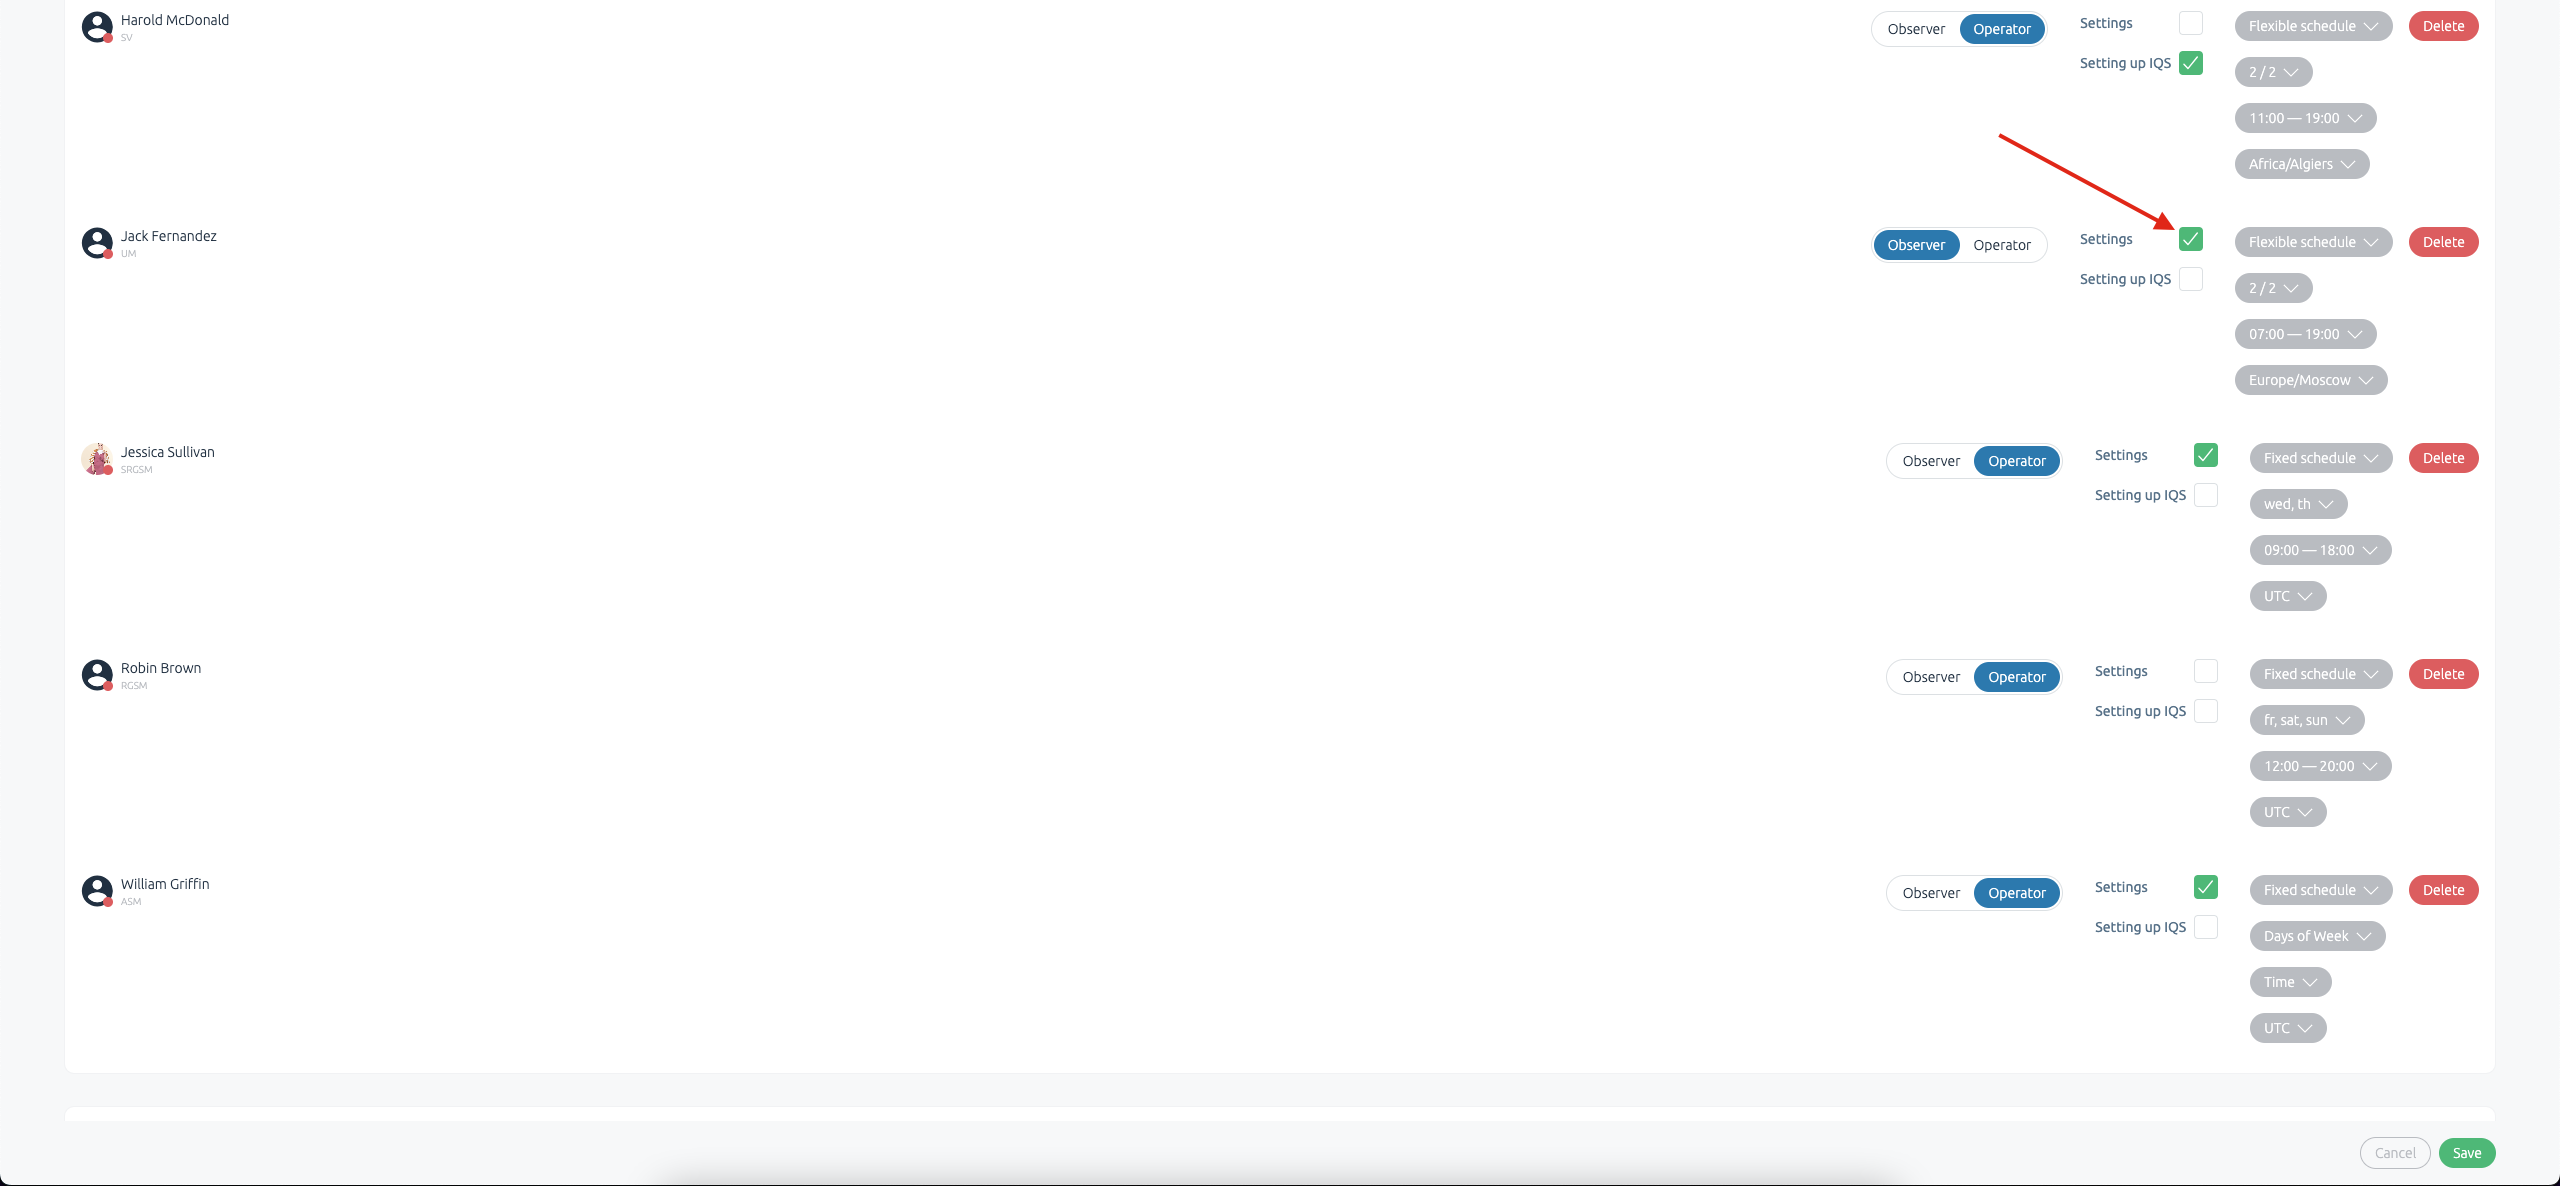
If you want an employee to have permission for creating rules or editing existing Rules, the "Settings" option opposite to employee's name must be turned on
If this option does not turned on for you, please ask one of your colleagues who has such permission to turn it on for you or ask him or her to create a rule by your request
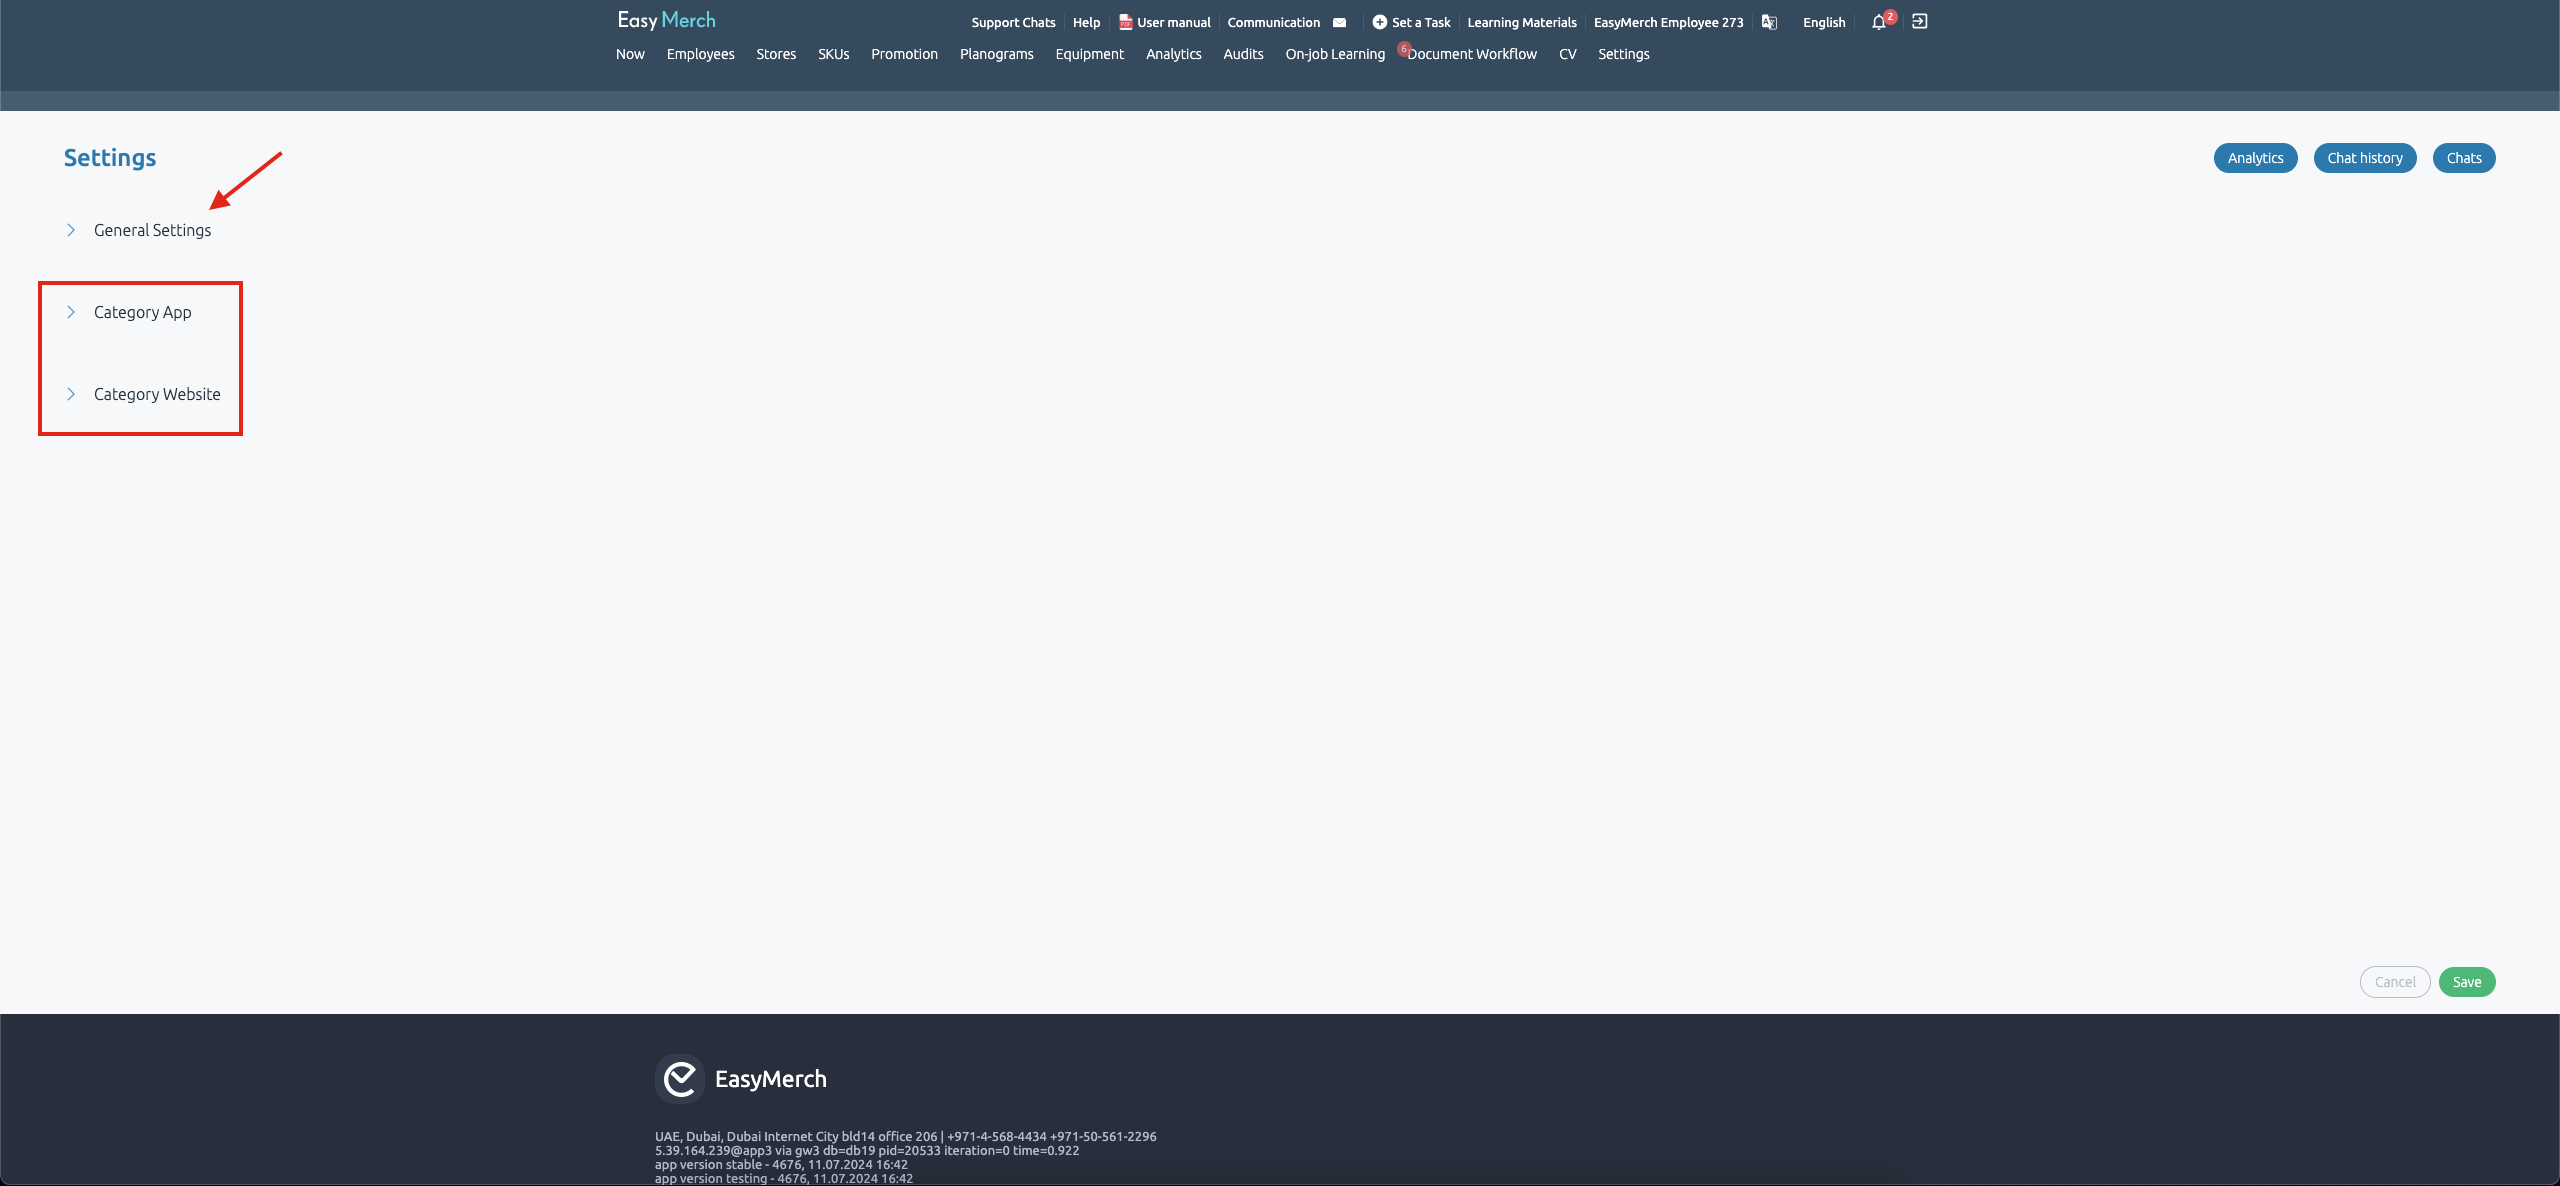
You can create a rule which would apply to all categories in the "Settings" block
Or you can open one of the categories and create a Rule inside of it so this rule would apply only if a chat belongs to this category
At the screenshot below you can see the following:
- Field for rule's name (obligatory)
- Condition under which the rule triggers (obligatory)
- Action which would be performed after the Condition completion (obligatory)
- Time periods during which the rule applies (optional)
- Rule's activity (on/off)
- Add/Delete rule button

Conditions
- New chat — triggers if an operator transfers chat to another operator OR if an operator changes category (chat receives New as a status). This does not work if transfer was performed by bot
- Any message — triggers on ANY message from user. Rule will be applied to user's every message unlimited amount of times within the single chat
- Any message contains — triggers if any user's message contains specified phrases. Rule will be applied to user's every message unlimited amount of times within the single chat
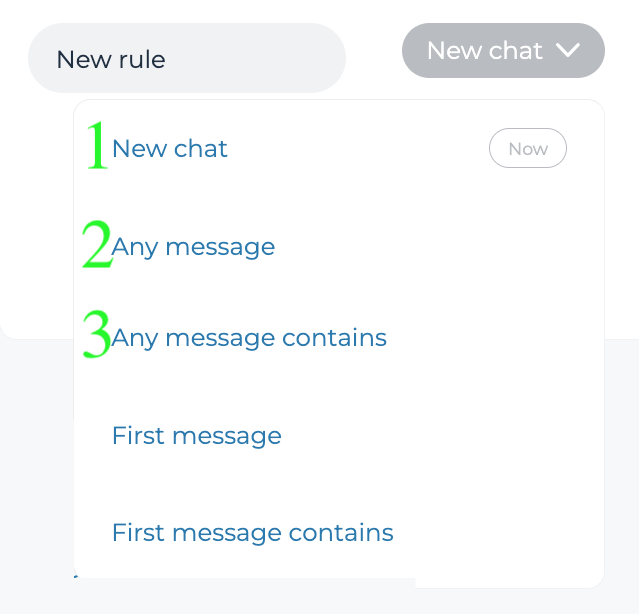
Condition "First message"
- First message — triggers when user sends his first message to the chat
- First message contains — is triggered by specified phrases in user's message
If EasyMerch is mentioned is Settings block as an initial category, the rules with these conditions would not trigger, because user's first message would come to EasyMerch

Condition "Message contains"
A text field appears under the "Message contains" condition after you choose it. Enter phrases that would trigger the rule without any gaps and separating them by semicolon
In this field you can enter Regular phrases. Find more about them here

Actions
- Change state — set specified State for chat
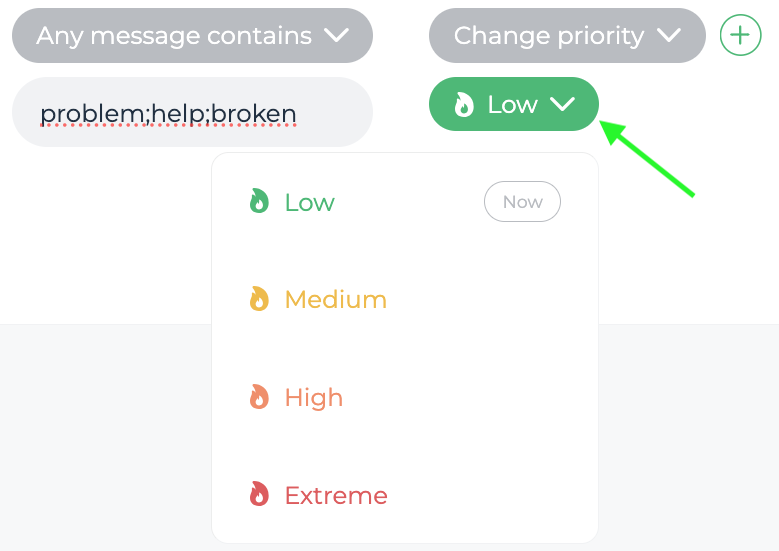
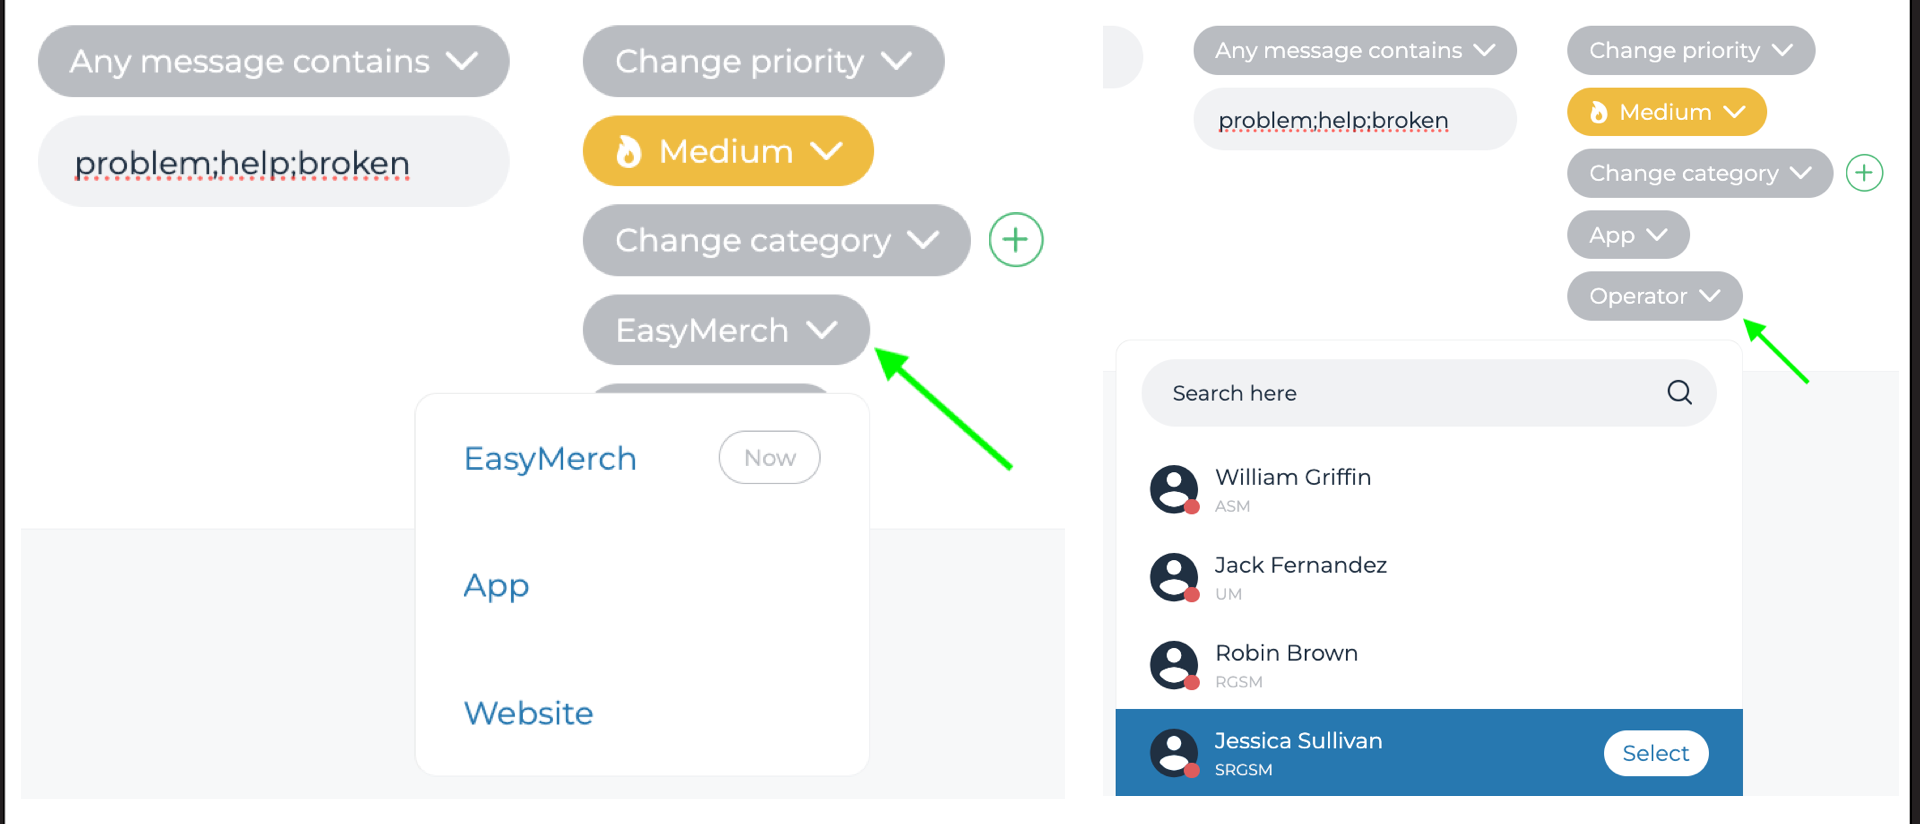
- Change priority — set specified Priority for chat
- Change category — transfer chat into specified Category. It's possible to select concrete operator
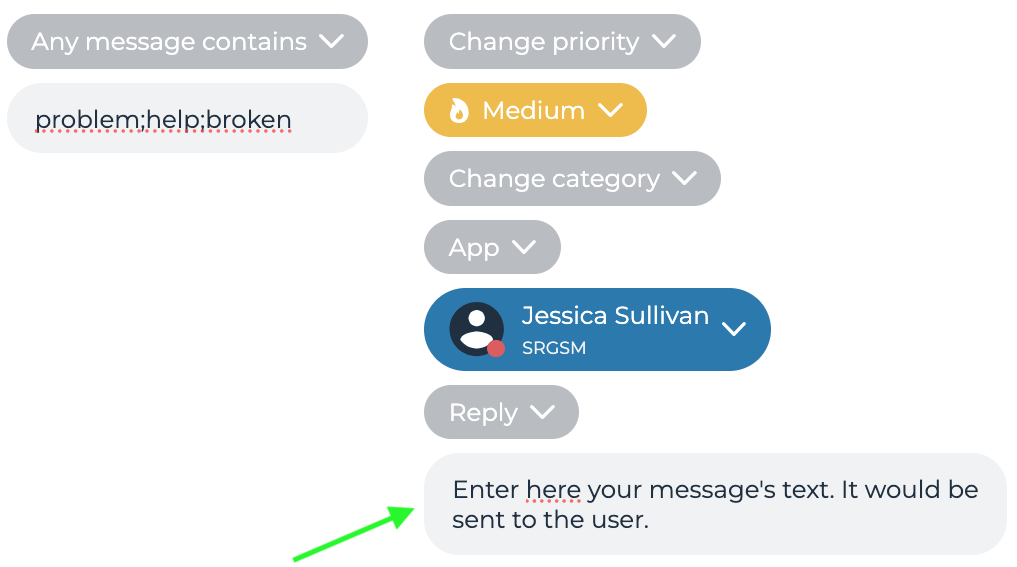
- Reply — send message with specified text
AI is able to perform up to three different actions at the same moment. You can not assign identical actions in one rule

After you click on "Change priority", a window appears where you have to choose which priority would be applied to this chat: low, medium, high or extreme
After you click on "Change category", a window appears where you have to choose to which category this chat should be transferred
In the second window you can choose an operator, who would receive this chat
After you click on Reply, a field appears where you have to enter your message's text. It would be sent to the user. In this field you can insert Variables. Variables are formulas which pull certain information from the system and insert it in your message's text
You can see all of the possible Variables are listed in Rule's Settings
When you write a text for your message, you can click with left mouse button on a Variable so it would instantly insert in your message's text
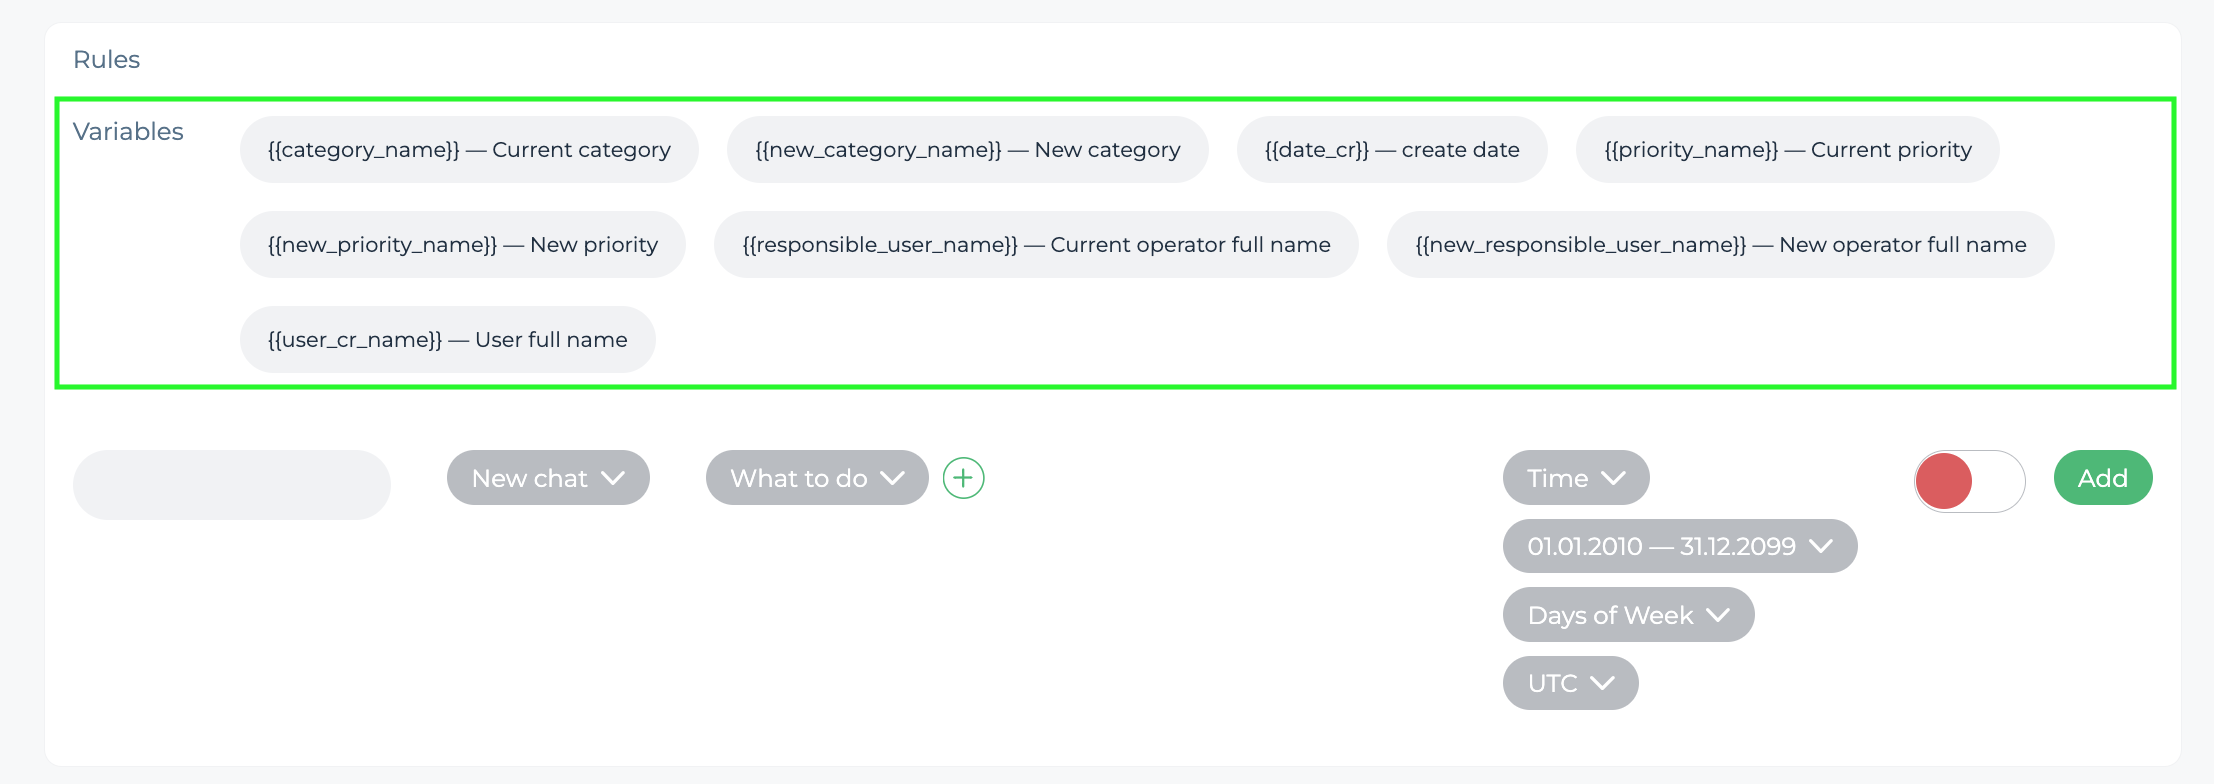
Variables and their meanings
- {{category_name}} — a category name to which a chat belongs is inserted in the message's text
- {{new_category_name}} — a category name where a chat will be transferred is inserted in the message's text
- {{priority_name}} : a current Priority of a chat is inserted in the message's text
- {{new_priority_name}} : a priority which would be applied to a chat is inserted in the message's text
- {{responsible_user_name}} : a current operator's name is inserted in the message's text
- {{new_responsible_user_name}} : an operator's name who would receive a chat is inserted in the message's text
- {{date_cr}} : the date and time of creation of a chat is inserted in the message's text
- {{user_cr_name}} : a name of a user who created a chat is inserted in the message's text


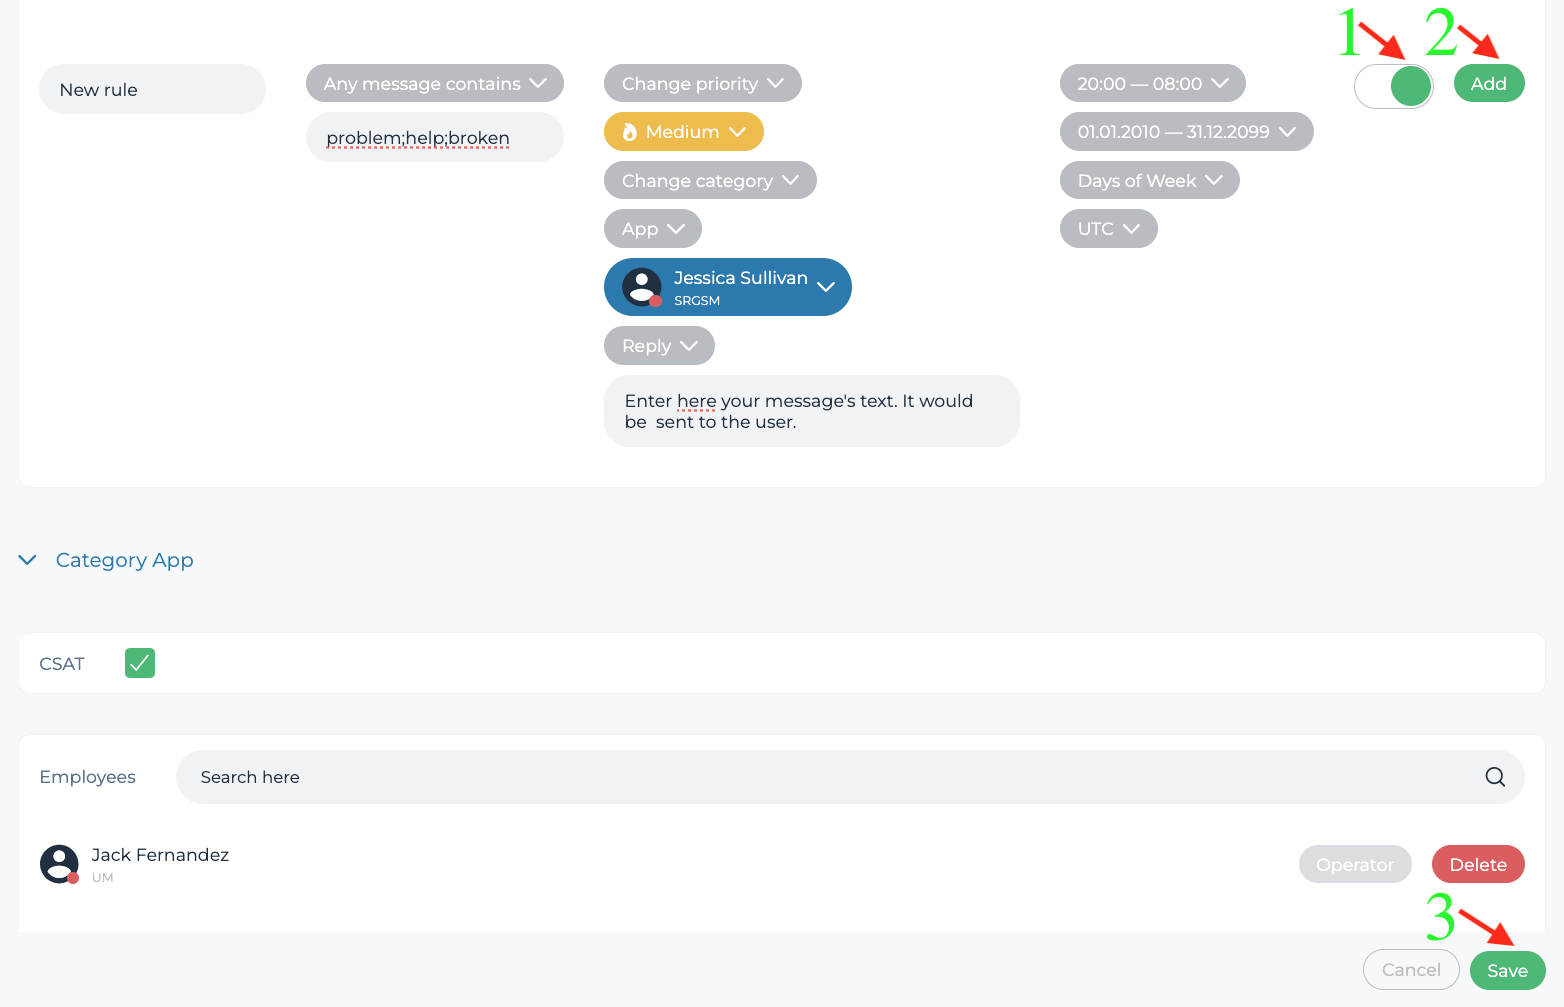
You can see the Rule itself on this screenshot
What happens: an EasyMerch operator transferred chat to App category to operator William Griffin. The chat receives the New status and the rule triggers. The chat in transferred to operator Robin Brown. The chat's priority is changed from Low to Medium

Finishing the rule creation
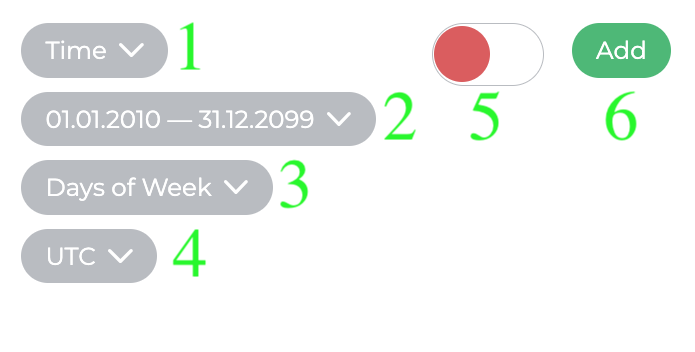
To complete the rule creation process, enable the rule and click Add. Customise the time the rule is active if you want it to run during certain hours or days
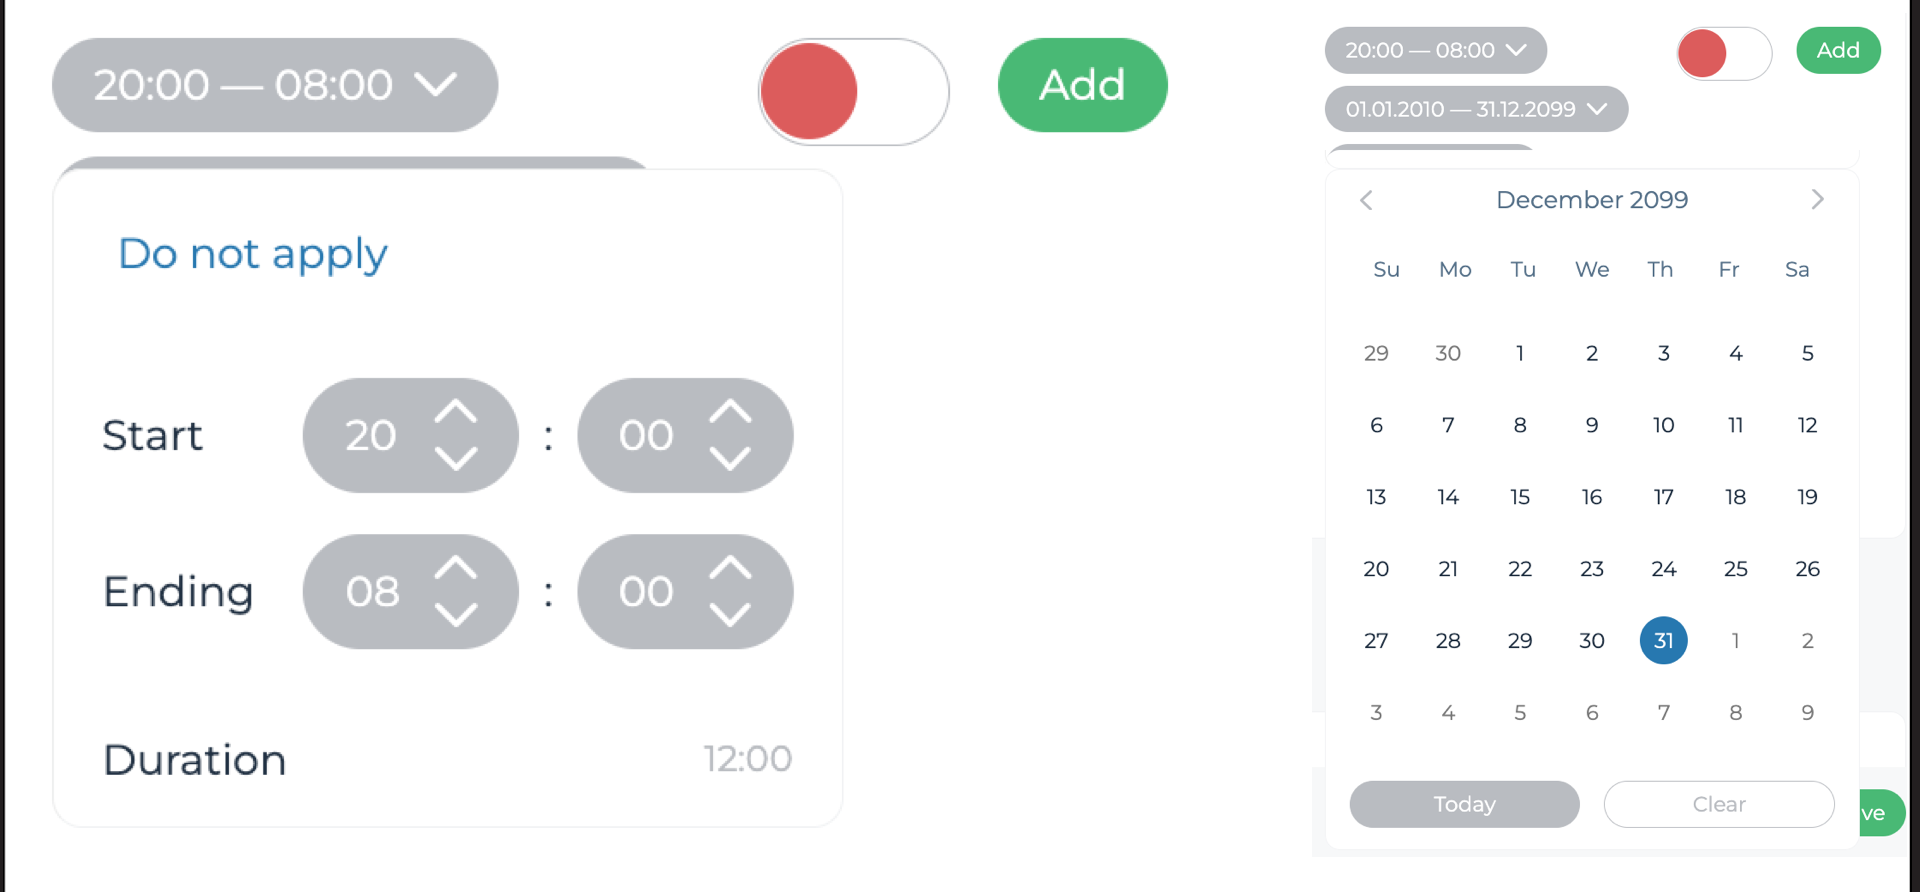
During the working Time setup you can specify:
- Working time of the rule
- Period (dates)
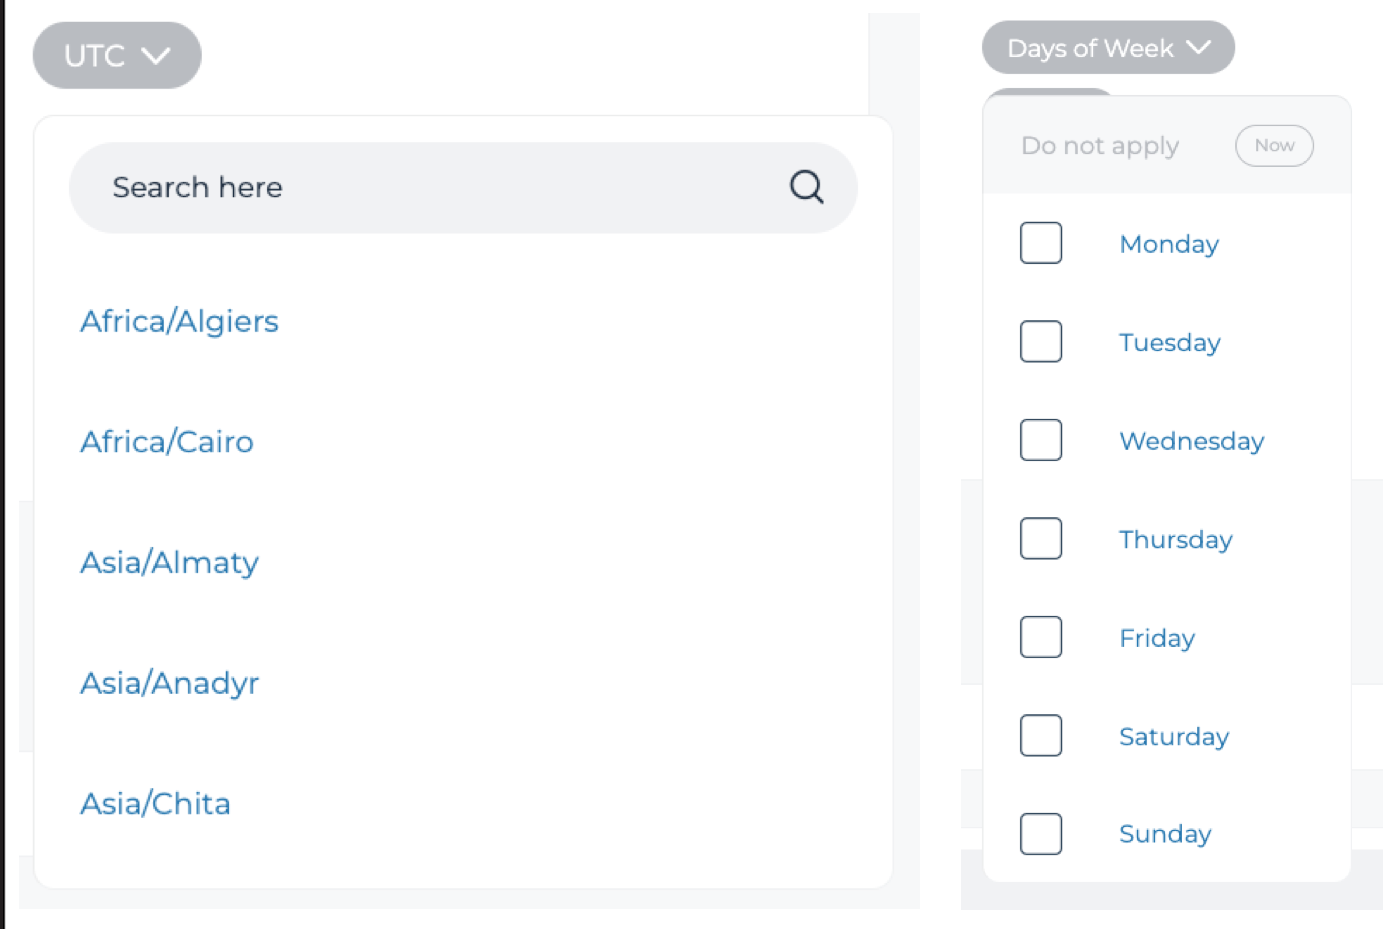
- Days of week
- Time zone
The rule's Switcher(on/off) and the button which adds the rule into rule's list are marked with 5 and 6 numbers at this image
When you select Time, a menu appears in which you must specify the start and end rule in 24-hour format. You can also specify a night time for the rule to work: for example, 20:00-8:00. Click "Do not apply" to make the rule work all the time
A calendar appears when you click on dates. When you choose a date for the first time it sets up like a Start date. When you choose a date for the second time it sets up as an Ending date. All the days between the chosen ones get into the sample.